When aligning walls for painting, it is necessary to take into account many features and nuances that can affect the result. Any errors in the application of putty are unacceptable, they can cause serious defects and the inability to continue further work.

Preparation process
Before applying putty it is necessary to clarify that various substrates are suitable for applying paint. Among them:
- processed putty;
- embossed materials for decoration;
- decorative plaster;
- other smooth surfaces, including wallpaper.
Each type of work has certain features and disadvantages. But the most popular way is to apply putty, it is the most simple and proven option that you can implement yourself.
There are times when perfectly flat walls are not needed: in a garage, shed, basement or other utility or storage room. In this case, you can do without puttying, but first you need prepare plaster for painting.
to contents ↑Instruments
When doing the work yourself, you will need the following tools:
- it is better to purchase several spatulas for work of different sizes, they will help in applying the composition;
- a marker is needed for initial preparation and marking;
- portable lamp, it will provide full lighting;
- small ax, hammer and chisel;
- abrasives: mesh, sandpaper, whetstones.

When processing, all tools should be in the direct access area so that you are comfortable using them.
to contents ↑Stages
The order of finishing includes several stages, among them:
- initial grinding before work;
- application of starting putty;
- treatment;
- execution of the finish layer;
- further alignment.
Doing the finishing yourself, you should inspect the base. If it is durable, there is no damage on the surface, then you can remove the old layer and conduct a slight alignment.
Standard technology involves the use of ordinary sandpaper and a sanding stone. If you have specialized equipment, then it is quite possible to use it.
After removing old layers and leveling it is necessary to conduct an additional inspection of the base. If serious damage, fungus is present on it, then they should be completely removed. The resulting holes are sealed with a solution and allowed to dry.
The walls will need to be treated with antiseptic compounds to destroy mold and fungi, after applying a primer. Such preparation does not take much time and is easy to perform.

In case of serious differences in height and damage to the plaster, it is necessary to choose another option for initial preparation. You will need to completely remove the old coating from the wall, replace it with a new solution. Alternatively, you can install drywall boards. The decision is made only for you, consider the possible difficulties in the performance of work and the cost of various materials.
to contents ↑Primary putty
After the initial preparation of the walls, you can proceed to the direct decoration and leveling. The plaster itself is unsuitable for coloring, it has a porous structure and absorbs a large amount of moisture. This can lead to a change in color, the appearance of roughness. Therefore, the entire surface of the wall must be opened with putty.
The technology of work involves the selection and application of starting putty. Its main difference is a large amount of fine sand, it allows you to lay the material in a sufficiently thick layer, the composition does not crack upon further drying.
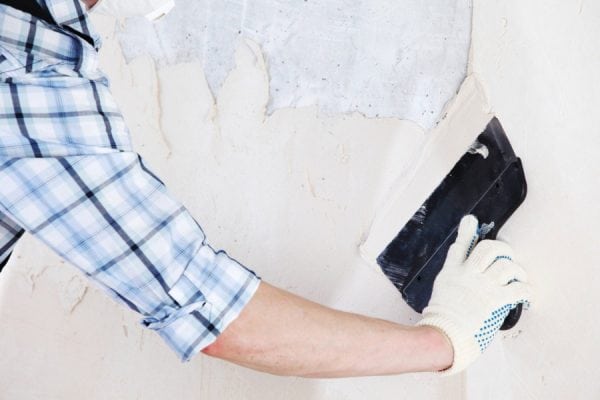
For work, you need a large spatula, a small one is used as an auxiliary tool for more accurate distribution. Usually the materials are delivered in the form of dry mixes, carefully read the instructions on the packaging, then dilute them for future use.
Doing it yourself, it is recommended to use additional reinforcement for the wall. It increases the strength of the material and increases its service life.
Initially, the putty is applied to the wall in one layer, after which the nylon mesh is brought in and pressed with the help of a spatula. From above it is covered with a composition, it remains inside the structure of the material.
When finishing, many try to immediately immediately maximize the composition on the wall. But this can be called a serious mistake. When applying putty, you should only level the surface a little and distribute the mass to other areas. It is not necessary to persistently achieve the ideal result at this stage.
The mass must be allowed to dry for 8 hours, after which you can begin grinding. Coarse abrasives are used for this, they will help align and get rid of small defects.
to contents ↑Finish leveling
For the top layer, finishing putty is used. Its main difference is the absence of extraneous impurities in the material and large grains, due to this, perfect surface alignment is ensured.
If the starting composition according to the technology is applied with a thick layer of up to 4 mm, then for the finish it should be half as much. Otherwise, material cracking and damage may occur.
Finishing is done with a large spatula, a small one is used to distribute the composition and smooth it. This material is much better on the wall, but do not try to eliminate all the existing tubercles.
We give the material to dry well for 6 hours. Then you need to take the abrasive mesh with the designation "60" and carefully treat the surface. It is important not to overdo it, otherwise you can remove all the applied composition from the surface.
If the result does not suit you, then you should perform another 1-2 additional layers. You can evaluate the quality of the finish using a lamp at an acute angle. Small shadows indicate tubercles, they must be removed with an abrasive.
to contents ↑Final stage
After drying, it is necessary to perform additional grinding, clean the surface from dust and dirt. According to the technology, a primer is applied, it will provide better adhesion of the paint and significantly extend the service life of the putty.

Now you know how to level the walls for painting, the nuances and subtleties of doing this process with your own hands.If decorative plaster is used as the base, then it should only be primed and then painted. Wallpaper is coated with adhesives to provide the best grip.
Correctly performed alignment will ensure the perfect result. Adhere to the described process, then you will prepare the wall for further painting.