The puttying process is simple even with little experience. This type of repair work is available to a beginner, but, nevertheless, you should know the most common mistakes.
- Puttying in unnecessary places
- Dirty tools
- Incorrect spatula selected
- Tool damaged or defective
- The putty solution is too thin or thick.
- Dry wall surface
- Putty is applied in a thin layer.
- Big break between primer and putty
- Start puttying from corners
- Angle formation in two planes at once
- Application of the second layer without stripping the first
- Putty incorrectly selected
Puttying in unnecessary places
It is very important to understand what putty is and what places putty solution is applied to. This is the final surface treatment for decorating the walls with wallpaper or painting. In no case do they putty on an unprepared surface or walls with large defects. Preliminary work with the walls includes the complete cleaning of surfaces from old wallpaper, plaster or paint. After that, you can proceed directly to the alignment of the walls. It is important to remember that putty is useless on walls with bumps greater than 2 mm. Large defects and curved walls will be leveled only by plaster. The putty is applied to the prepared rough and primed surface. If you plan to stick tiles on the walls or paneling, puttying is not required at all. In this case, there is no need for a completely flat surface, therefore, the application of the solution is pointless and will only lead to unnecessary cash costs.

Dirty tools
Any smallest contamination or a speck falling under the spatula will not allow you to cover the wall with an even layer, leaving scratches on the surface. Therefore, the bucket and tools must be perfectly clean. For puttying, it is necessary to have a separate container and not use it for other types of work. Particularly undesirable is the presence of sand particles in the bucket. After the process, the bucket is thoroughly washed. Tools also need to be washed after each use. And the mixer - immediately after mixing.
to contents ↑Incorrect spatula selected
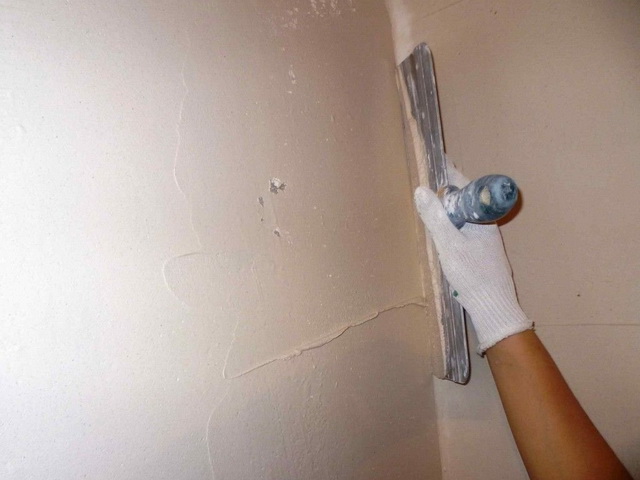
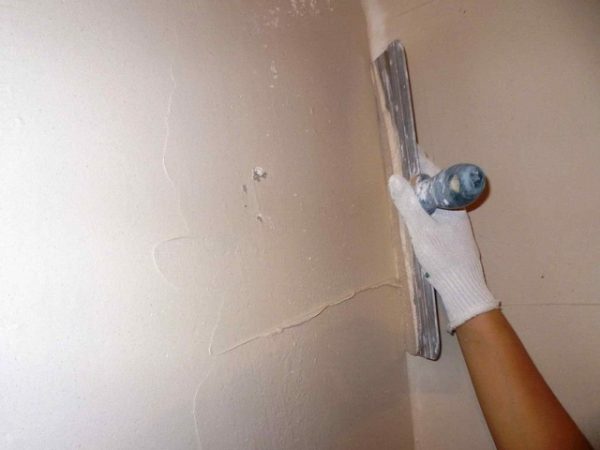
Choosing this tool can greatly facilitate or complicate the putty process. It is not necessary to choose the most expensive tool. A flexible and wide spatula is suitable for newcomers to repair, because hard trowel leaves too many grooves in the solution when pressed too hard. A wide spatula is also good because with its help there are much fewer stains on the treated surface. It is best to use two flexible tools in work - 40 and 12 cm. Narrow is used in hard-to-reach places. With it, a solution is also taken from the container.

Tool damaged or defective
Typical defects: bent corners or uneven, curved canvas. Such spatulas leave many marks on the walls. The canvas can be checked by attaching the tool to the wall: there should be no gaps between it and the surface.Smooth spatula - a prerequisite for successful work.
The putty solution is too thin or thick.
It is very important to knead a solution of the correct density. Too thick or liquid will give a lot of cracks and subsidence. The correct consistency of the putty is of medium density, like sour cream, so that it does not drip from the spatula, and the tool immersed in it does not fall. But you need to distinguish between start and finish layers - the second is made thinner than the first. Otherwise, the solution will not lie on the surface and crumble. The ideal solution in this case is to prime the surface before applying the finish. And in no case can you dilute the solution with linseed oil, turpentine and the like.

Dry wall surface
Too dry walls dehydrate the solution, and it becomes lumpy, applied unevenly, clinging to the tool. If the wall material is porous and absorbs water, its surface is intensely sprayed from the spray gun and primed a few minutes before the start of finishing work.
Putty is applied in a thin layer.
People who first started puttying often strongly press the spatula and apply too thin a layer of mortar. The ideal thickness should be at least a millimeter. It is better to carry out work in several stages. Each layer is applied, waiting for the previous to dry. It is advisable to use a reinforcing tape. Finishing is allowed to carry out a thicker layer. But if you overdo it, bubbles may form in it. The maximum thickness of the solution is usually indicated in the instructions on the package. You should not ignore these recommendations.

Big break between primer and putty
A typical mistake is to leave the primer to dry for a day and only then putty. Such a break will cause the wall to dry. And on a dry wall it is impossible to evenly apply the solution, as it will draw all the moisture out of it. Therefore, it is correct to prime immediately before puttying - in 3-4 hours.
Start puttying from corners
Putty should equal surface defects, namely the corners are most curved. Therefore, the start of processing the walls from them will only aggravate the bumps. Work should begin by stepping back from the corner by at least 5, and preferably 15 cm. The corners are processed at the end, after the very first solution has completely dried. Starting from the leveled area and focusing on it, slowly bring the angle to the same level. If the corners of the room are rounded, this is removed by a punch. Otherwise, an even angle will not work.
to contents ↑
Angle formation in two planes at once
Beginners often make a mistake - getting to the corners, they putty both sides of them at the same time. This increases the likelihood of touching part of the mixture that has not had time to dry on one of the sides of the corner and damage its integrity. First, the solution is applied on one side, and after it has completely dried, they are transferred to the other plane.
Application of the second layer without stripping the first
Before applying the second layer of the mixture, it is necessary to carefully clean the first layer to maximize the fixation of the final solution. You can walk on it with a clean wide spatula - the tool will remove all the bumps and remove the bubbles that inevitably appeared during the operation on the walls. In addition to a spatula, you can use a grater to wall the walls. By the final stage, the surface is cleaned with pumice or sandpaper. At the same time, it is strongly not recommended to use a rag. The resulting dust is carefully swept away with a brush, otherwise the final layer will not hold.

Putty incorrectly selected
Be sure to pay attention to the quality and shelf life of the putty. Almost any type is suitable for wallpaper. Finishing is necessary for painting, but it is applied to a primed surface.
Types of putty:
- Gypsum It is considered the starting form.Suitable for wallpapers and other decorative finishes. Evens deep cracks and does not settle when dried.
- With polymers. It is sold in liquid form with the desired consistency. The structure is fine-grained, this type can be used for paint. This coating is very flexible and not afraid of dampness.
- Cement. Coarse-grained, not suitable for wall decoration before painting, as it will appear through the dye layer and emphasize all the flaws.

To avoid lumps in the solution, it is necessary to knead it using a special tool - a mixer or whisk.
Following all the rules, you can level the walls to perfect condition and make a quality repair at home yourself.


Himself at least once putty? you don’t even know how the word putty is spelled correctly) go and turn red your purchased diploma back)
Sanya, why so categorically, or do you have something to object to in the text?
In the Big Explanatory Dictionary, we see the word putty, Dahl's dictionary notes the three-fold variation of the word, without giving particular preference to any of them - the dwelling (t, k) is left, the Academic Dictionary of 1847 fixes only one option: putty.
It is not necessary to wait until the first coat has dried, there is a putty Acrylic Putz 2in1, where you can apply it on wet immediately, it saves a lot of time