Facing tiles are not the cheapest finishing material. Unlike paint or wallpaper, tiles are usually chosen as an interior solution for a much longer period - such a coating can last for ten or more years. Naturally, the facing tile must hold firmly to the surface.
However, how to achieve this and is it possible to put tiles on putty? Of course, it is possible, since it is the putty that provides reliable adhesion of materials. In addition, the putty surface absorbs much less glue, which saves money. We will talk about the correct selection of putty and the nuances of the putty process below.

Selection of putty
The choice of putty for a tile is dictated by the following circumstances:
- The putty should maintain integrity even under the influence of moisture, especially when it comes to kitchens, corridors, bathrooms and toilets. After all, it is in such rooms that tile is most often laid. Thus, gypsum mixtures are not suitable for puttying before laying tiles, since they swell and collapse under the influence of moisture. In addition, gypsum, due to the tendency of this material to draw fluid, will dehydrate the glue, and this will lead to the loss of its performance and peeling of the tile layer.
- One of the most important indicators of the quality of the cladding is good adhesion. This property characterizes the reliability of adhesion between different materials. The putty should adhere well to the wall as well as adhere to the tiles with high quality.
- Ideally, the putty should combine well with the base material. For example, silicate, silicone and cement mortars are excellent for walls made of foam concrete and gas silicate blocks.
- The final choice is affected by the climatic conditions in which the coating will be operated. If the outer walls are tiled, then the material is subject to increased requirements for frost resistance and the ability to withstand temperature extremes.
- As a rule, the surface is putty not in one but in several layers: the first is the starting layer, which equalizes large defects, the second is the finishing layer, designed to bring the coating to perfect smoothness. Often there is a need for the third and fourth layers, if the first time it is not possible to level the base.

Note! The putty is not intended to conceal too large surface flaws (overhangs or depressions of more than two centimeters). Such defects must be covered with plaster.
Even if the wall is already lined with drywall, puttying is still needed. It is necessary to close the seams between the sheets - this will strengthen the drywall base.
The thickness of the future putty layer can be determined using a plumb line or building level. For this, it is necessary to find the most protruding surface area and take measurements with respect to this area. If plumb bows are used, they must be hung out at the corners of the wall, as well as along the line of the largest protrusion. Accuracy is established using a diagonally stretched thread.
to contents ↑Putty Technology
Before applying putty, carefully prepare the surface. Preparations include removing dirt, dust, traces of oil and other types of contaminants from the surface.

If there are large cracks or potholes, they are covered with a plaster mixture. Also, for sealing cracks, mounting foam is suitable.
Next, the surface is primed. The primer strengthens the base and improves the adhesive properties of the material. In addition, an antiseptic is added to the primers, which resists the development of fungus and mold, which is especially true for surfaces operated in high humidity.
When the primer dries, you can begin to putty. The thickness of the starting putty should not exceed 5 millimeters, otherwise the material will fall off along with the tile. It should be noted that some types of putties, for example, acrylic, have limitations on the thickness of the layer (3 mm), so several layers may be needed, especially if there are noticeable irregularities.
Note! Each layer of putty coating must be primed with a deep penetration composition.
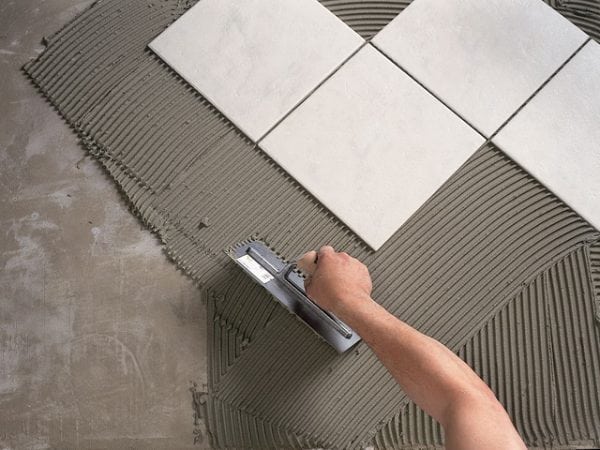
A feature of the described process is the fact that it is possible to glue tiles on the putty without grinding and finishing puttying the surface. The fact is that minor defects are easily corrected with glue during the laying of the tiles. Moreover, for better adhesion it is even recommended to make small incisions in the surface.
Note! Do not lay tiles on a surface that has not yet dried. First you need to wait for the primer to dry completely.
Another point to which you should pay attention: before gluing the tiles, you need to make sure that there are no voids under the putty. To check, you need a rubber mallet, with which you can tap the coating. The voids give a characteristic sound, so identifying them is not difficult.
Puttying the surface before laying the tiles will make repairs more high-quality and durable. If you perform the work in compliance with all the described technological procedures, the facing tile will last for many years.