Plasterboard putty for painting - one of the most common technologies during repairs. After puttying, when the surface has become smooth, protected, capable of uniformly absorbing the paintwork, you can start painting the drywall.
- The need for putty
- Materials and Tools
- Putties
- Reinforcement Materials
- Primers
- Putty Tools
- Preparatory work
- Start of finishing work
- Initial primer
- Sealing joints, screws
- Basic putty
- Finish stage
- Putty Consumption
- Putty consumption chart for 1 m2 for a layer of 1 mm
- Recommendations of specialists
The need for putty
Drywall must be putty for the following reasons:
- It is extremely rare that the finishing work can be done with one sheet of drywall. And if so, then unaesthetic joints can not be avoided.
- Seams must be not only putty, but also reinforced, otherwise cracks will appear along the line of contact of the sheets.
- When installing drywall structures, metal fasteners are used. Hats of self-tapping screws are recessed into the material, thereby forming holes. To achieve a flat surface, you can not do without puttying of these artificially created defects. In addition, if metal products are not hidden under a protective layer, they will rust.

- When carrying out construction work, most often the key parameter is the cost. As a result, consumers give preference to the price factor when buying drywall, and such products do not always differ in perfect evenness. Moreover, defects are not always noticeable by the eye, although even a slight curvature will then not allow for a high-quality painting of the product.
- Even if the best quality drywall is purchased, the material can still be scratched, deformed during transportation or installation. If defects are not repaired, you cannot count on high-quality painting.
- Drywall is most often painted with water-soluble paints. At the same time, cardboard absorbs moisture well, and gypsum is prone to swelling. A deformed surface is not suitable for painting. Therefore, drywall first needs to be made moisture resistant.
- Unpleasant for the builder property of drywall is the uneven absorption and drying of the paint. Priming and puttying allows you to create an intermediate surface, the presence of which will save the coating from this drawback.
- Drywall, although uneven, absorbs fluids very well. Unprepared material absorbs much more paint compared to a putty.
Conclusions:
- If the main criterion for repair work is quality, drywall pretreatment cannot be refused. If there is any doubt as a drywall, it must be putty. If you want to save expensive paint, pre-applied putty is a wise decision.
- If the quality of the drywall sheets is not in doubt, and during transportation there is no harm done to the material, you can do without puttying the entire surface. But in this case, you will need to close up the seams and fasteners.
Materials and Tools
Putties
Putties are usually classified according to the base material:
- Cement putties. They are characterized by high moisture resistance, but are prone to significant shrinkage and dry for a long time.
- Plaster putties. They are used most often. They are distinguished by excellent adhesion with drywall, quickly set, easily processed. The disadvantage is that they do not tolerate high humidity.
- Polymer putties. There are no significant shortcomings, but they are expensive.

According to the purpose of putty, they are divided into 3 groups:
- Starting (leveling). Since drywall is a practically flat surface, in relation to this material, starting formulations are mainly used for sealing screws and joints.
- Finishing (front). They are characterized by a finely divided structure. Thanks to this quality, the finish gives a smooth surface.
- Universal. They have the advantages of starting and finishing putties, but the cost of such compositions is higher.
According to the degree of readiness of putty, they are divided into 2 types:
- Dry mixes for dilution with water. Such compositions are prepared at the place of work, bringing them to the desired consistency. The preparation of the solution requires some experience, so beginners are not recommended to use such putties. If you cook too much putty, there is a risk of it drying out, since such mixtures quickly set.
- Ready pasty putties. Sold in sealed packaging. Easy to use, as they are immediately in the right consistency and stored in a closed bucket for quite some time. The cost of finished formulations is higher compared to dry mixes.
Reinforcement Materials
Not so long ago, fiberglass sickle was the main reinforcing element when sealing joints. However, today the situation has changed, as more reliable options have appeared. The geometry of the serpyanka tends to change during the course of work: the tape stretches, unravels, which interferes with the quality of work. Experts recommend using strips of paper to reinforce. Such paper sheets are produced by the drywall manufacturers themselves. Of course, this is not about plain paper, but a specialized high-quality product with a dense internal structure.

The same goes for internal and external corners. Instead of plastic, reinforced paper strips are now used.
to contents ↑Primers
On sale there is a huge variety of primers. However, there are several brands of primers, the performance characteristics of which are recognized by most professionals:
- Tiefengrund from Knauf
- «Ceresit ST-17»;
- primer of the universal Unis type;
- Primer from Litokol.
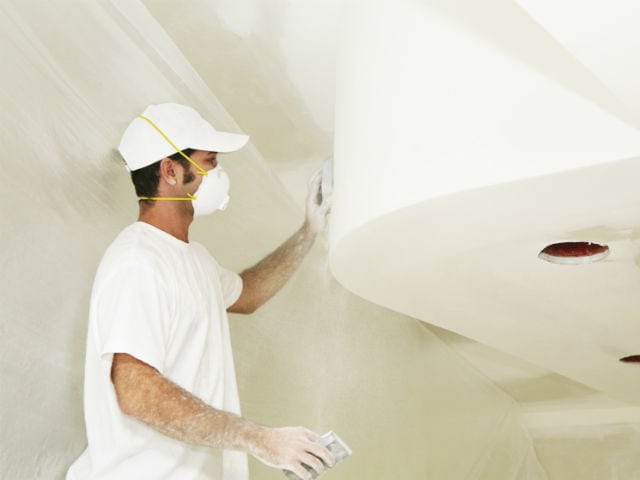
Putty Tools
For puttying you will need the following tools:
- Set of spatulas. Tools should differ among themselves on the width of the working plane. For the primary repair of defects and work in the corners, a spatula with a width of 50-60 millimeters is suitable. For basic puttying and reinforcing joints, it is recommended to choose a spatula with a width of 120-150 millimeters. To finish puttying large surfaces or working with the ceiling, a spatula with a width of 250-400 millimeters is needed. Some experts use even wider wide tools, the working plane of which reaches 500-600 millimeters. Spatulas should be absolutely even and clean (pieces of mortar adhered to the tool are not allowed).

- Spatula with a small tooth along the edge. Such a tool can be made of both metal and plastic. A spatula of this type is used when reinforcing corner parts, since it is very convenient for them to lay out putty.
- Grater. It is used for mashing and grinding putty-treated surfaces.
- Sandpaper or abrasive brush. They are used for sanding coatings.
- Paint bath, roller, brush. Used when priming surfaces in hard to reach areas. Some rollers are equipped with an extension telescopic handle.
- Construction knife equipped with interchangeable blades. Edges and ribbons are cut with this tool.If we are talking about a reinforced tape, then instead of a knife it is better to use scissors for metal.
- Putty containers. The best option is a narrow oblong bath with sloping edges and a rounded bottom. From such containers it is convenient to pick up the solution with a spatula. In addition, specialized containers are designed so that they do not leave a solution in the corners. As a result, not only is putty saved, but the process of caring for the tank is also facilitated.


- Portable light sources. To create a flat surface, it is desirable to use accented lighting, which will allow you to see the smallest defects.
- Goats or stepladder.
- Safety glasses, respirator.
Preparatory work
Preparation for puttying is performed in the following sequence:
- Preparation of the premises where the work will be carried out. Free access to all work surfaces is provided, dirt and dust are removed.
- Creating a putty mortar for sealing joints. If ready-made putty is being prepared, then it must be thoroughly mixed and filled with a paint bath. It is important not to leave such a container open so that the solution retains its working qualities for as long as possible. If the dry mixture is diluted, work must be done directly in the bath, from which the putty will then be removed with a spatula.
to contents ↑Note! Excess solution from the surface can not be returned to the bath, as such actions will provoke an acceleration of its setting.
Start of finishing work
Many beginning masters make a gross mistake - they ignore the initial priming of the surface. This is an important stage, without which, as a result, high-quality coverage will not work. Also, at the first stage, you need to close up the seams, joints and fasteners.
Initial primer
Priming the surface helps to improve the adhesion of drywall (adhesion is the adhesion between different materials). In addition, the primed surface absorbs less fluid, which further reduces paint consumption.
Work execution order:
- We remove dust and dirt from the surface.
- Apply a primer to drywall. The primer must be very evenly distributed over the entire surface. For processing hard-to-reach areas and corners we use a small brush.
- We wait until the surface dries.
As a result, a barely noticeable film resistant to moisture will appear on the surface.
to contents ↑Note! Before using the primer mixture, you should carefully read the instructions from the manufacturer. When applying a primer, make sure that the layer thickness is not more than 0.03 mm.
Sealing joints, screws
This step includes terminating all joints, including joints and fasteners. Self-tapping screws should not be too deep in drywall (maximum depth - 5 millimeters). If the fastener is too immersed, it must be unscrewed and replaced with another.
To putty the screws we use a narrow spatula. The mixture is applied crosswise: along and across. This scheme of applying the solution allows you to better fill the recesses for screws.
Then we begin to process joints and corners. If the butt parts do not have a factory edge, we cut them manually at an angle of 45 degrees. It is this angle that is optimal for high-quality reinforcement of the seam.

We glue the corners and joints with adhesive tape (serpyanka). At the same time, we strive to stick the tape as evenly as possible so that it covers both sides of the joint, and the seam is located strictly in its middle.
To putty the joints, we also use a narrow spatula. We dilute the composition according to the instructions on the packaging and begin to apply it along the seam in small portions.After that, we stretch the solution with a wide spatula. First, putty one side of the corner, and when the composition is dry - the other.
To check the work for quality performance, we take a wide spatula and place it perpendicular to the sheet. If the putty is done correctly, there will be no clearance.
After puttying we take a break for a day. That is how much the surface will dry.
to contents ↑Basic putty
If the room has external corners or you have to mount a suspended ceiling, you need to install metal corners. Such corners are fixed with a stapler or putty compound.
The main putty is as follows:
- Using a wide spatula, spread the main putty on the surface.
- We distribute the composition on drywall as evenly as possible. The first layer is rough. Its function is to fill in all the bumps.
- When the first layer dries, proceed to applying the next. We level it right away, without leaving any defects on the coating.
to contents ↑
Finish stage
The task of the last stage of work is to obtain a perfectly even coating. At this stage, you can not do without fine-grained sandpaper. With this device, any defects, even the smallest ones, should be removed. If any flaws are found, they need to be eliminated with a thin plaster layer.
Note! Before working with sandpaper, you need to wear a respirator, as there will be a lot of dust.
When the surface is brought to a level state, it remains to apply a thin layer of the primer mixture. After the primer dries, the preparation of the drywall surface for painting is considered complete.
to contents ↑Putty Consumption
When calculating the expendable material, certain factors must be taken into account:
- surface defects;
- the presence of a layer of primer mixture;
- putty composition.
If the drywall surface is perfectly smooth, primed, then the consumption will be:
- for cement putty - 1100 grams per square meter;
- for gypsum putty - 1000 grams per square meter;
- for polymer putty - 500 grams per square meter.
Putty consumption chart for 1 m2 for a layer of 1 mm
| Putty name | View | Consumption per 1 m2, kg | Application |
|---|---|---|---|
| Universal putty | Starting (primary) | 0,8-1,0 | Finishing surfaces in dry rooms. |
| Universal putty | Finishing (primary) | 0,4-0,5 | Finishing surfaces in dry rooms. |
| Plaster putty | Start | 0,9-1,0 | Alignment of walls and ceilings, repair of drywall joints in dry rooms. |
| Plaster putty | Finish line | 0,5-0,6 | Final alignment of walls and ceilings in dry rooms. Easy to sand. |
| Cement putty "Ceresit CT29" | Start | 1,8 | Cement-lime mixture reinforced with microfibres. For leveling concrete, masonry, previously plastered surfaces. Resistant to cracking. For exterior and interior use. |
| Putty "Ceresit CT126" | Finish line | 1,0-1,1 | Finishing in dry rooms of concrete, brick, plastered surfaces. It is applied in a single application with a layer of not more than 3 mm. |
| Putty “Knauf-finish” | Finish line | 1,1 | Thin-layer alignment of concrete, plasterboard, plastered surfaces inside buildings and premises. |
| Putty "Knauf-multi-finish" | Start and finish | 1,0 | Alignment of the bases of concrete, plasterboard, plastered surfaces, sealing joints between plates. |
| Putty "Knauf-Uniflot" | Start | 0,25-0,3 | Sealing joints between drywall sheets. It does not shrink, withstands a large load in the working layer up to 20 mm. |
| Putty "Knauf-Fugenfüller" | Start | 0,3-0,5 | Sealing joints of drywall with the use of a sickle, repair of cracks and various defects. |
| Putty "Shitrok" | Finish line | Up to 0,5 | The finished mixture dries quickly, does not form cracks and shrinkages. |
| Putty "Vetonit" | Finish line | 1,2 | Interior puttying in dry rooms. |
The presence of drywall defects leads to an increase in the consumption of putty mixture.
to contents ↑Advice! Regardless of preliminary calculations, it is necessary to buy putty with a margin.
Recommendations of specialists
There are situations when the amount of work can be reduced without treating the entire surface of the drywall. Instead, you can only focus on sealing joints, corners and indentations from screws.
Saving materials and time is possible in the following cases:
- Drywall is characterized by very high quality, it is perfectly smooth.
- The gypsum plasterboard should turn out a light shade, and dark spots will be visible through the paint layer.
- Planned use of thick or textured paints.
Without preparation before painting drywall in most cases can not do. Despite the rather lengthy instructions, it is not so difficult to carry out such work, since all actions are scheduled and divided into stages. If you adhere to the sequence in the preparatory measures, clearly follow the recommendations of specialists, drywall coatings will turn out smooth, and it will not be difficult to paint them.


