Uneven angles are visible to the naked eye. They look unaesthetic and interfere with the normal arrangement of furniture, household appliances, and decor. Alignment is carried out using a technology such as plastering corners, this is one of the most difficult stages of the work of the finisher. To ensure that the quality of corner processing is at a high level, you need to choose the right materials and follow the advice of professionals.
- Plastering Rules
- Markup
- Foundation preparation
- Necessary materials and tools
- Exterior corners
- Finish without perforated corner
- Work with the corner
- Plastering the inner corners
- Work with beacons
- Plastering with profiled corner
- Reinforced finish
- Angle Processing Errors
- Rounded corners plaster
Plastering Rules
Often, plastering work in the premises is done by yourself. For this purpose, you can independently make a solution of the individual components or purchase a packaged building mixture. The most commonly used mineral plasters are cement and sand, gypsum, lime and clay. If we are talking about the decoration of facades or rooms with high humidity, it is worth using cement mortars. Where air is dry and there is no direct contact between walls and water, plaster plasters are allowed.
To properly plaster corners and get an excellent result, you should adhere to such rules and recommendations:
- in the absence of experience in plastering, use plastic compositions of factory production, sold in a diluted form;
- Before applying the plaster, do not forget about priming to improve the adhesion of materials (this applies to all types of surfaces);
- in addition to the primer, use antiseptic solutions to prevent the growth of mold under the finish;
- Do not exceed the maximum permissible thickness of the plaster layer (on the walls 50 mm, on the ceilings 30 mm);
- when diluting a dry construction mixture, use only clean cold water, and pour the powder into the liquid, and not vice versa;
- prepare a solution that resembles thick sour cream in consistency - it is most conveniently applied to the surface;
- Do not knead large portions of plaster, as it tends to harden quickly and become unusable;
- after applying the solution, straighten it immediately without waiting, especially when it comes to gypsum mixture;
- give each layer a good hold on the base;
- Do not work at temperatures below +5 degrees and above +35 degrees;
- after plastering, start painting or gluing wallpapers only after 2 weeks, so that the composition gains strength.
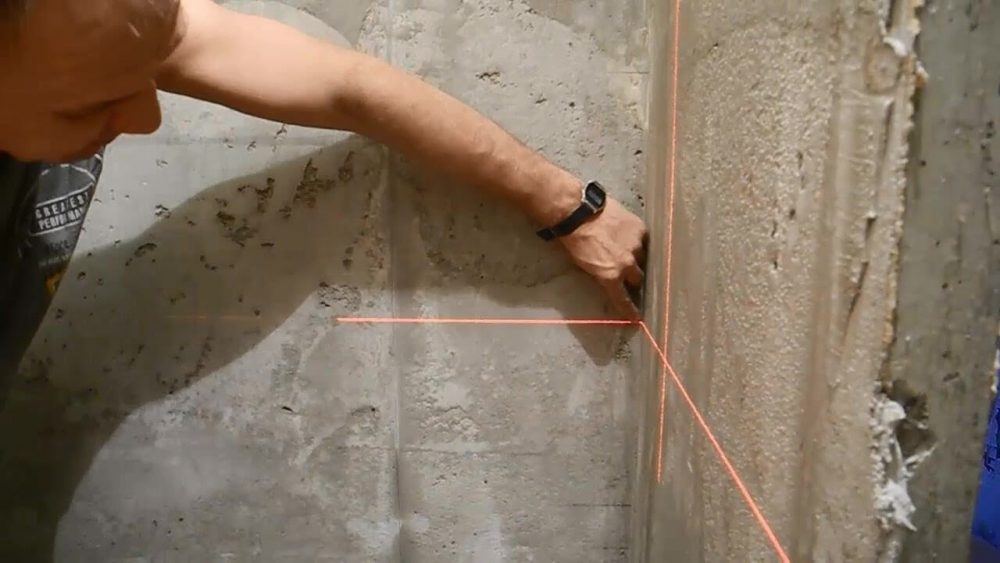
Markup
To draw corners evenly, you need to mark the walls in advance. To get joints at 90 degrees, tools are prepared (usually a plumb line, square, level) and act in this way:
- Using a plumb line or a rule with a level, measure the angle for verticality, and adjacent walls for blocking.
- Identify all the defects and features of the position of the walls, draw the joint lines along the angle, extending them using the rule (marking is performed on the ceiling or on the floor, depending on whether the angle is straightened up or down).
- Using a plumb line, transfer the lines and the top of the drawn figure to the opposite end (to the floor or to the ceiling, respectively).
- On the lower and upper marks put beacons.
- If possible, do all the work with the laser level (level), which forms clear lines with perfectly calibrated angles.
to contents ↑Most often, the joints of adjacent walls are plastered last, after drying the rough mix. In this situation, it is possible not to mark on the internal corners, it is enough to plaster one side, and then the second, resting the rule in the first direction.
Foundation preparation
How to plaster walls and corners is not an easy question. Start work with preparatory activities. Here is a list of them:
- Old cover. Remove loose pieces of plaster and putty right down to concrete or other base material. All protruding areas are tapped, picked out with a chisel. Durable protrusions are cut off with a grinder or grinder.
- Cracks. The size of existing cracks is increased to seal them with putty. A reinforcing mesh is applied to the layer of deposited material, and from above it is recessed into an unhardened mass.
- Deepenings and defects. All such areas are filled with gypsum or cement mortar, carefully leveled.
- Metal elements. Fasteners, hats and old corners are treated with an anticorrosive agent and coated with a thin layer of solution. If possible, the excess elements are dismantled.
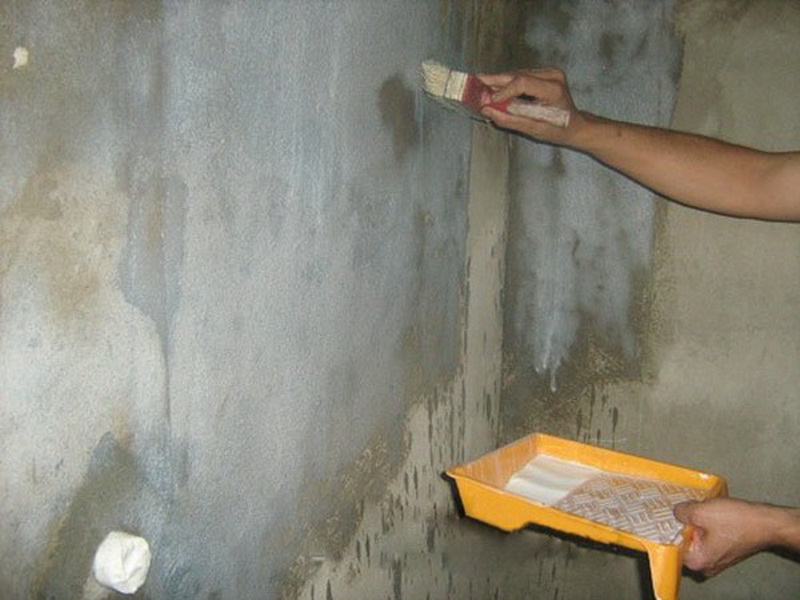
At the end of the preparatory work, priming is performed with a high-quality primer in 1-2 layers so that the plaster composition has increased adhesion to the base.
to contents ↑Necessary materials and tools
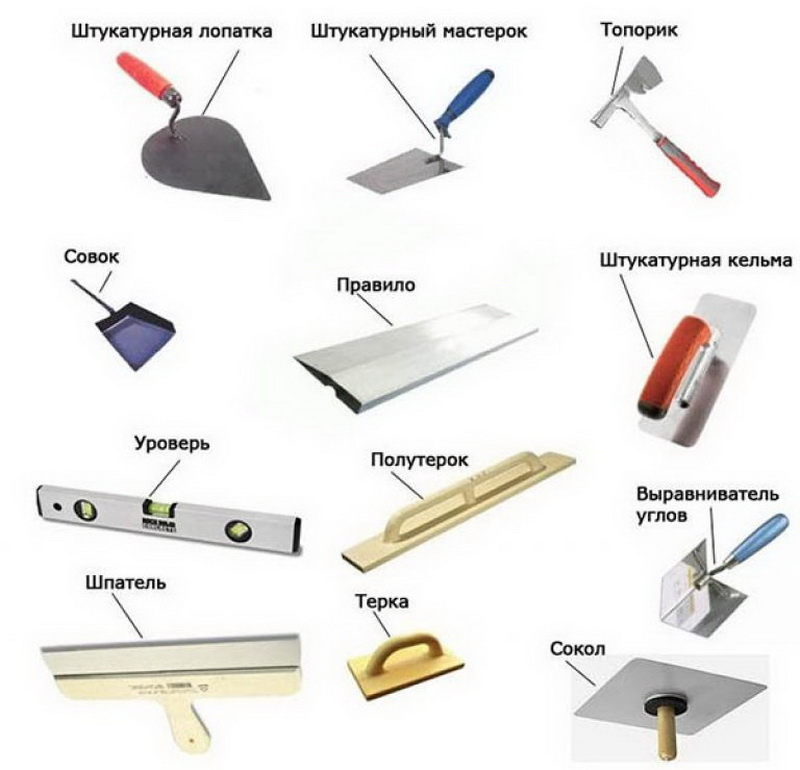
To align the corners, you need to prepare the same tools: level, rule, corner, as well as:
- spatulas - straight and angled;
- trowel, grater and grater;
- plaster in the right amount;
- a bucket for mixing the composition;
- drill with mixer nozzle;
- level board;
- Scotch.
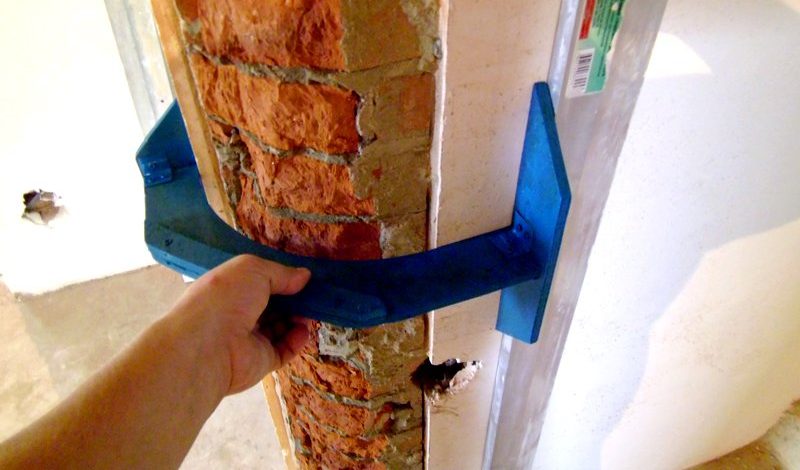
Exterior corners
The process of plastering external and internal angles has common features, but differs in many nuances. The processing of external corners is carried out in two ways: with or without a counter-shul.
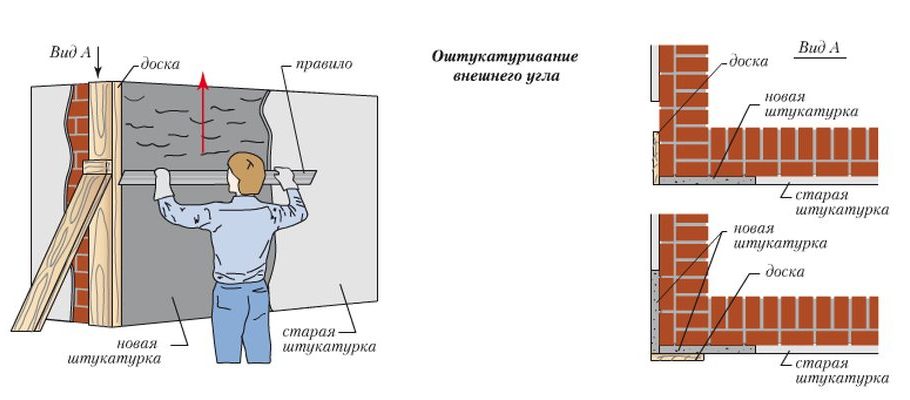
Finish without perforated corner
After a quality removal of all the protrusions and sealing of the recesses, a board with an even front part, which was previously wrapped with adhesive tape, is attached to the adjacent side of the corner. The ends of the board are fixed at the floor and ceiling, so that the indent from the wall is equal to the thickness of the future layer of plaster.
Apply the solution, perfectly smooth it with the rule, making movements in the direction of the corner. Two days later, after the solution dries, the board is dismantled and the same steps are repeated for the second side of the corner. After final drying, both surfaces are ground with sandpaper.
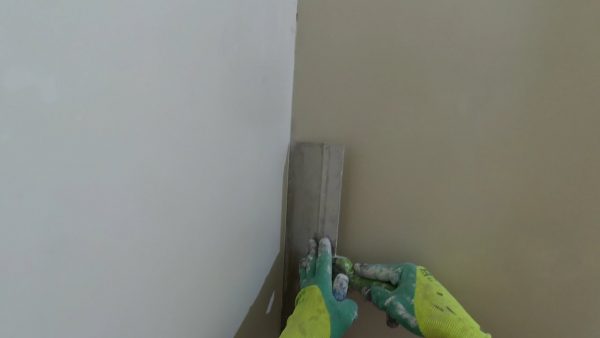
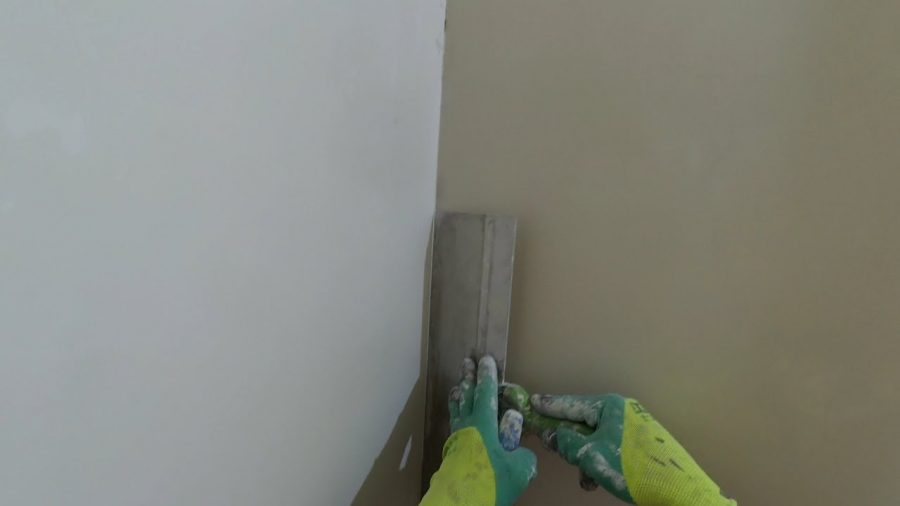
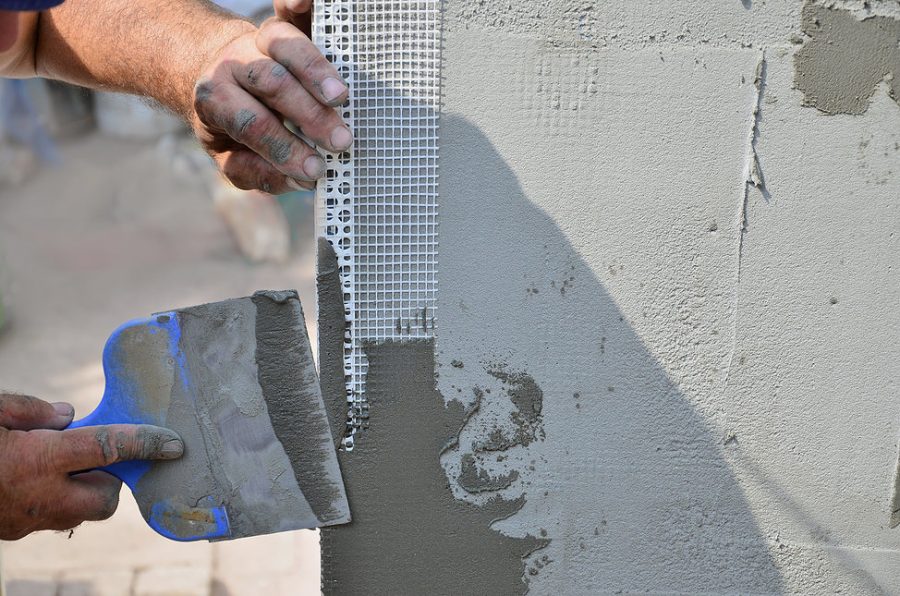
Work with the corner
The easiest way is to finish the joints between the walls with the use of a countertop. This is the corner for the outer corners of perforated aluminum. First, the material consumption is calculated (the sum of the lengths of the joints + 20%), the gypsum mixture is bred in the right amount. Apply the plaster on both sides, fixing the corners with pressing movements. The solution leaked through the holes is immediately removed with a spatula, sweeping them from top to bottom.
To assess the correct location of the corners, a level is applied, if necessary, the products are moved in the right direction, more mortar is added or part of the plaster is removed. After finishing the adjustment, one more layer of the building mixture is applied from the top of the corners, allowed to dry, cleaned with a construction grater or sandpaper.
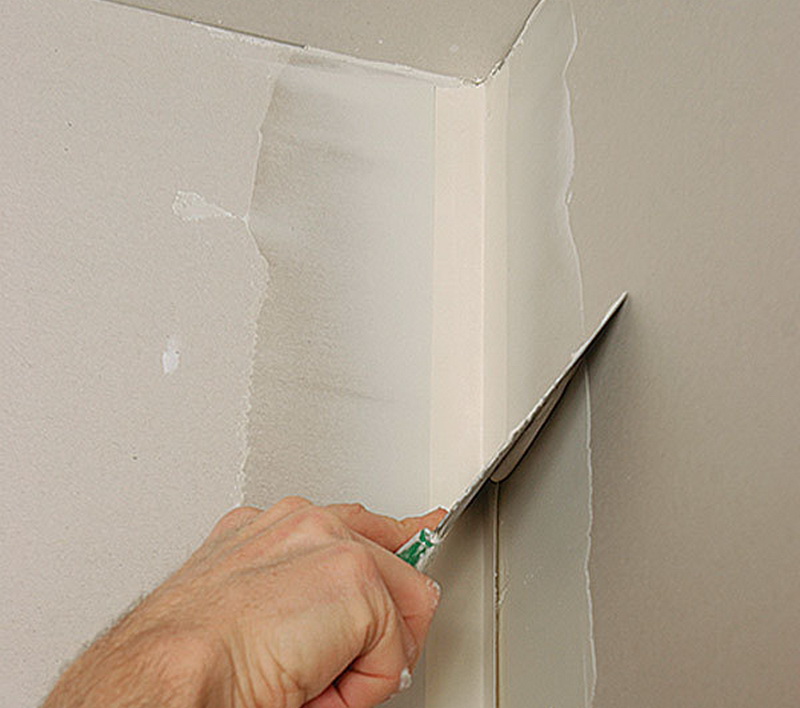
Plastering the inner corners
Finishing the inner corners can also be done in several ways, you just need to choose one of them.
Work with beacons
This method is well suited when walls are completely processed together with joints. The procedure will be as follows:
- Install guides made of wood or metal on the surface of two adjacent walls.
- The beacons are fixed around the perimeter at a distance slightly less than the length of the rule (they should be about 10 cm from the wall).
- Put the plaster on one, then on the second wall, fill the entire area between the lighthouses.
- The plaster is aligned with the rule, the excess is cut off at the corners with a wide, sharp spatula.
- They form an angle with the help of an angular spatula, moving from top to bottom and periodically wetting the tool with water.
- Allow the material to dry, then remove the guides and fill the voids with a new portion of plaster.
- Lighthouses are removed, perform a covering (last) layer over the entire area of the wall; if the wall is intended for laying ceramic tiles, dispense with cover.
to contents ↑
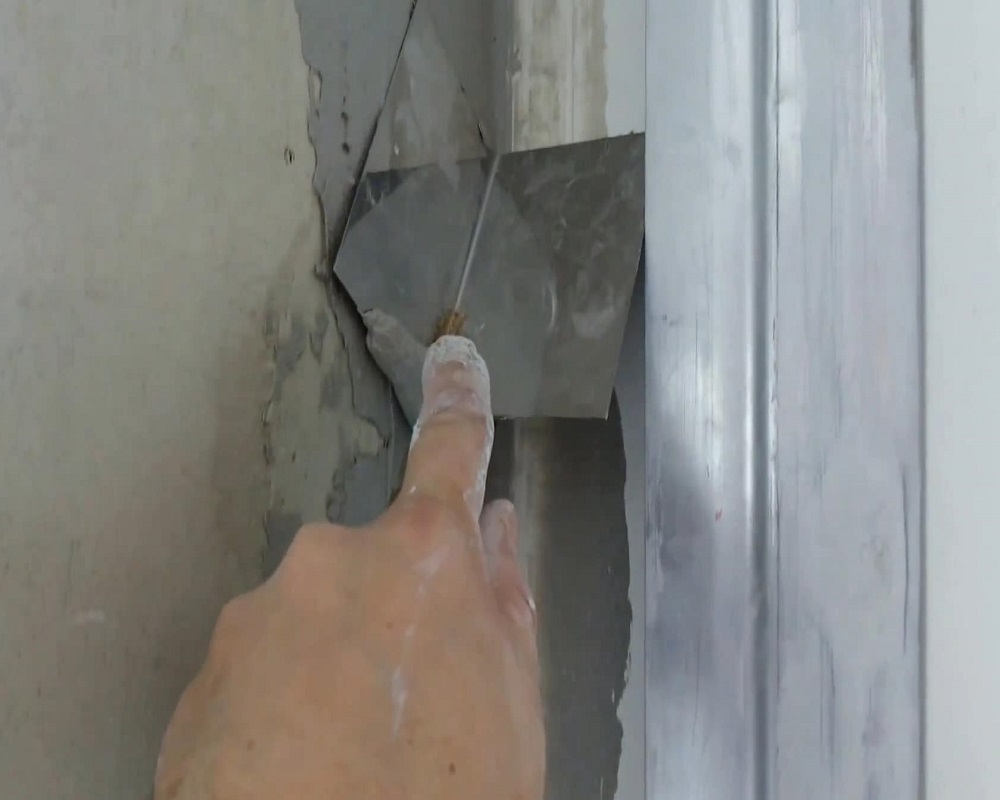
Plastering with profiled corner
This technique is used when the main area of the walls is already plastered. Acquire a profile with a reinforcing stack, measure and cut it to the desired length. Apply a little solution only in a corner, apply a corner, press it in and hold with a straight spatula. Since the corner is easily deformed, you need to work with it very carefully.
The solution leaked through the holes is cut with a spatula, moving it from the corner with short movements. Wait for the plaster to dry, then completely finish the corners, hiding the corner under the layer of mortar.
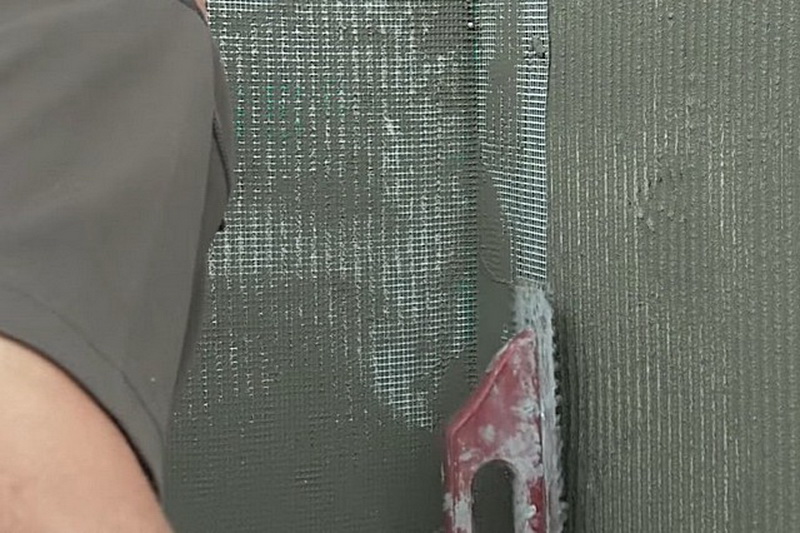
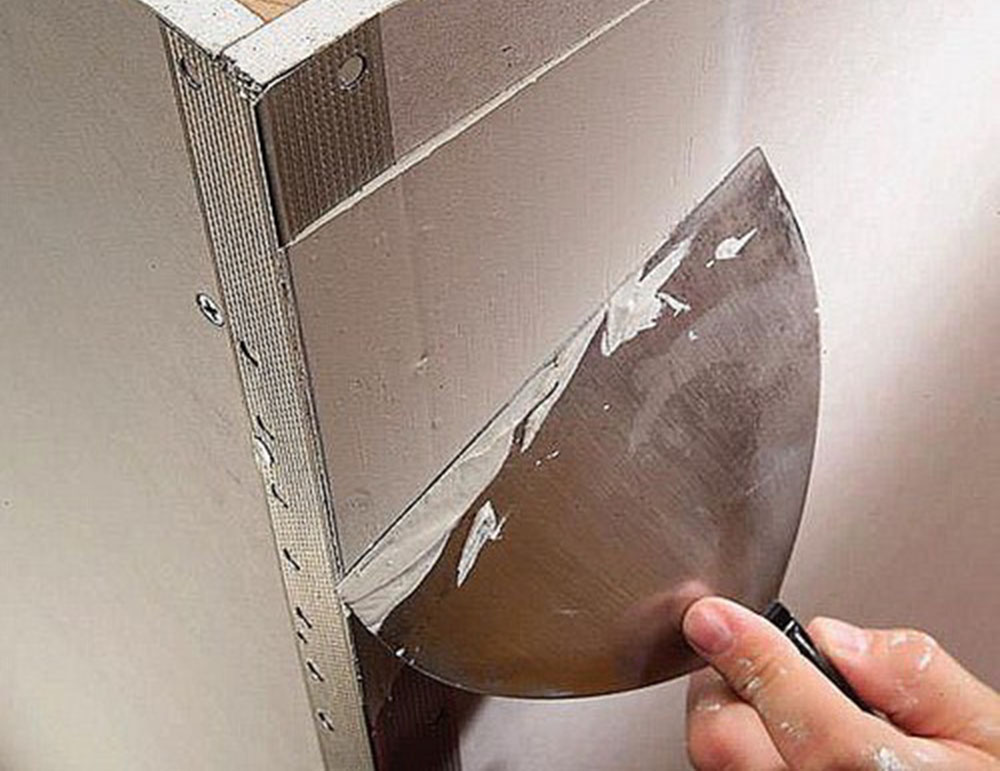
Reinforced finish
Reinforcement is used to strengthen the joint of the walls, for example, when facing with drywall. For work, they get a sickle - reinforcing tape. You will also need a rectangular wooden block 60 cm long and diluted plaster. Act in this way:
- Plaster is applied to the joint in a small amount, capturing about 10 cm of the plane of the walls on both sides.
- Cut the right amount of sickle, press it to the top of the corner, then unwind the roll at arm's length.
- Gently distribute the tape so that it does not move to the side, repeat until the entire corner is covered with a sickle.
- With light pressure, a block is applied to the reinforcing tape, making a joint of 90 degrees from plaster.
- The excess solution is removed with a spatula, and the tape is carefully ironed.
- After drying, apply another layer of plaster, form an angle using an angular spatula.
Angle Processing Errors
It happens that plastering works are carried out without a preliminary analysis of the condition of the walls. In this situation, after the solution dries, cracks, and sometimes peeling areas, may appear on it. Beginners make other mistakes during the plastering of surfaces:
- Lack of primer. In this case, the adhesion quality of the solution with the base will decrease, and the leveling effect will be less pronounced.
- Coating directly on concrete. Most often, this leads to detachment of the plaster. The situation can be saved by using ready-made polymer blends with high-quality binding additives.
- Work with long breaks. Corners need to be plastered in one go, otherwise they will dry out unevenly.
- Plastering raw corners. If the base is poorly dried, its moisture content will remain above 4%, the solution will not be able to reliably stay on the surface.
- Quick failure of the outer corners. To prevent such zones from being damaged, you should not save money and always use metal corners that strengthen the surface well.
- Cutting a counter-grinder with a grinder.If you do not use scissors for metal, the protective zinc layer on the products deteriorates. As a result, rust will develop over time in the installation area of the corners.
Rounded corners plaster
Before finishing the corners, level the base in a standard way. A rounded bend is made of plastic wire, it is applied to a plywood sheet and a contour is drawn. By cutting the plywood, a template is prepared. A layer of plaster is applied to the surface of the rounded corner, the desired relief is formed using a template. To rub the corner, use a soft felt that polishes the surface to smoothness.
If all the recommendations are followed, plastering the walls and corners can be done completely with your own hands. Despite the complexity of the work for beginners, with accuracy and following the technology, a positive result is guaranteed.