To design door or window openings, a technique such as plastering slopes is often used. The principle of operation resembles the alignment of the walls, but has a lot of features. With proper execution, plastering will help to improve the aesthetic attractiveness of the object and significantly increase its service life.
- Why plaster the slopes?
- Tools and materials for work
- Material for processing slopes
- How to make a solution for plastering slopes?
- Calculation of the amount of plaster
- The process of plastering window slopes
- Training
- Insulation of slopes for plaster
- Reinforcement corners
- Lighthouse fixation
- Plaster slopes on lighthouses
- Rough plaster
- Finishing layer
- Finish finishing
- The nuances of plastering slopes
- Features of plastering door slopes
- Preparatory work
- Beacon Installation
- Creation of notches and reinforcement
- Plastering the slopes of the front door
- Finishing work
- Stucco arched doorways
Why plaster the slopes?
Most often, plastering slopes is carried out after replacing a window or front door. During installation work, the part of the wall adjacent to the structure is destroyed, and it has to be restored. The option of installing plastic slopes is not always available, especially when it comes to an arch-shaped opening. In difficult situations, plaster helps out, which gives more freedom in actions and opportunities.
In addition to improving the aesthetics of the object, plastering slopes is carried out with the following objectives:
- elimination of small cracks, crevices and chips that were already on the wall;
- concealment of all mounting elements, fasteners;
- protection of windows and doors from moisture;
- improvement of sound insulation, thermal insulation.
The stucco slope can be decorated in different ways: to paste over, paint, beat, drape. Plastering window slopes has much in common with the decoration of doorways, and yet the differences in operations are quite important and must be taken into account by the master.
to contents ↑Tools and materials for work
For comfortable work, it is better to immediately prepare all the necessary materials and devices so as not to be distracted during the main process. For plastering slopes you will need:
- a building level of 1 m or more;
- the rule is strictly without damage, chipping, curvature;
- metal tape measure;
- container for mixing the plaster;
- trowel and spatulas - angular, medium, wide, small for throwing the mixture and leveling it;
- building grater, suitable for the selected plaster;
- sharp clerical knife;
- gun for sealant;
- a pencil for marking (a marker, felt-tip pen is better not to take - they leave bright traces);
- roller and brushes for applying a primer and paint;
- construction mixer or drill with a nozzle;
- square;
- hard metal brush;
- hatchet.
Since the work will have to be performed at a certain height, you should prepare a stepladder or other device from which it will be convenient to carry out all the manipulations. Also, for finishing slopes, you may need:
- polyurethane foam (if window or door installers save on material);
- sealant in the tube under the gun;
- cellophane;
- primer;
- beacons (guides, corners or wooden planks);
- corner profiles;
- plaster;
- reinforcing mesh;
- durable gloves;
- masking tape;
- adhesive for insulation.
to contents ↑
Material for processing slopes
The plastering of door slopes and windows may be the same, but when choosing a mixture you need to take into account a number of important points regarding the conditions of its use:
- Strength. If the material will be applied to the outside of the building, it should be extremely durable, frost-resistant.
- Environmental friendliness. In high-quality plaster for internal use there are no harmful components, it is odorless and does not emit toxins during the entire period of operation.
- Profitability. If you have to buy large volumes of leveling plaster, there is no point in overpaying. It is worth buying durable, but inexpensive material for rough work and more “advanced” - for finishing.
- Drying time. Cement plasters always dry longer than gypsum or polymer, even in summer. This must be taken into account to prevent getting wet on the street or the appearance of drafts, temperature differences inside the room.
Based on these criteria, for interior work in rooms with normal and low humidity, it is worthwhile to purchase gypsum plaster, and for outdoor use - cement mortar with water-repellent and heat-insulating additives. In addition, for rooms you can buy lime-cement (for high humidity) or lime-gypsum materials.
If the house is located in a seismically active zone, you should spend money and take more flexible plasters on a silicone, silicate or acrylic basis, which do not crack over time.
to contents ↑How to make a solution for plastering slopes?
To dilute the plaster you will need a clean container, cool water without impurities, as well as a construction mixer. It is important to strictly observe the mixing ratios specified by the manufacturer of the components, otherwise the result will be disastrous. For example, a composition that is too thick will crack after drying, too liquid will drain upon application, and will not align well. Among other things, the low content of binder will lead to a quick peeling of the plaster from the slopes.
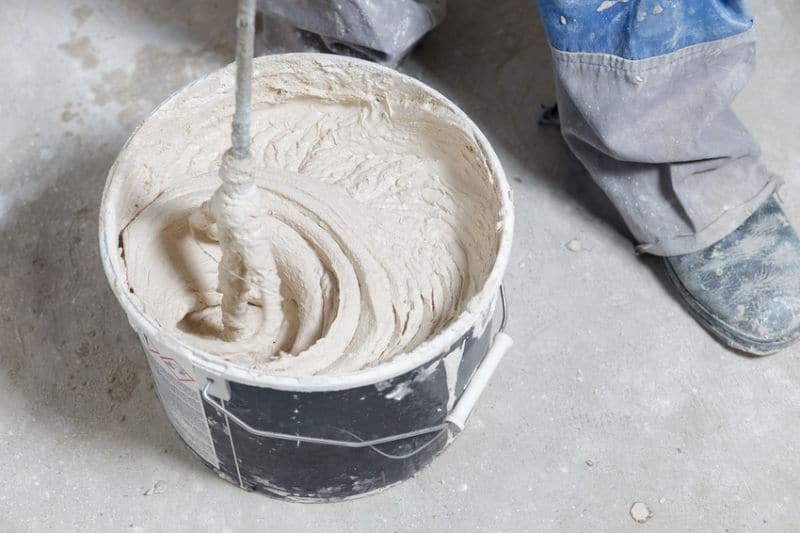
It is not necessary to breed a lot of plaster mix at once, especially when it comes to gypsum. If you do not have time to use the solution, it will harden and become unsuitable for application. Typically, cement plasters are made in such a way that they can be applied in an hour, and gypsum in half an hour. An ideal consistency adheres slightly to the mixer blade and is easy to apply on the wall.
to contents ↑Calculation of the amount of plaster
One to two square meters of the surface will require 0.2-0.5 kg of dry construction mix of a large fraction. As for the fine-grained plaster, it will be consumed more - about 0.5 kg. In order not to make a mistake when buying, you need to multiply the resulting amount of the mixture by a safety factor of 1.1.
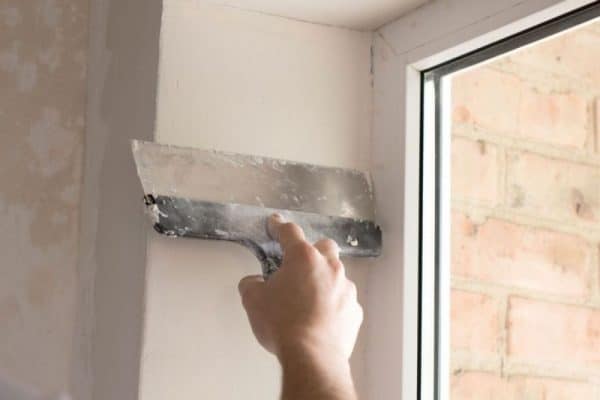
The process of plastering window slopes
Plastering in relation to slopes is more complicated than when processing conventional walls. The area here is smaller, but there are many structural elements. Plastering can be carried out with or without insulation, with or without beacons. It is permissible not to use beacons if the old windows are carefully replaced with new ones, when the old plaster is kept in excellent condition and there is no strong structural damage. If the installers knocked down the plaster, it is better to use beacons - so the layer will lie perfectly evenly.
Most often it is necessary to plaster vertical slopes - the sidewalls of the window, as well as the upper slope - the supreme. The bottom element is usually covered by a window sill and extremely rarely left uncovered.
to contents ↑Training
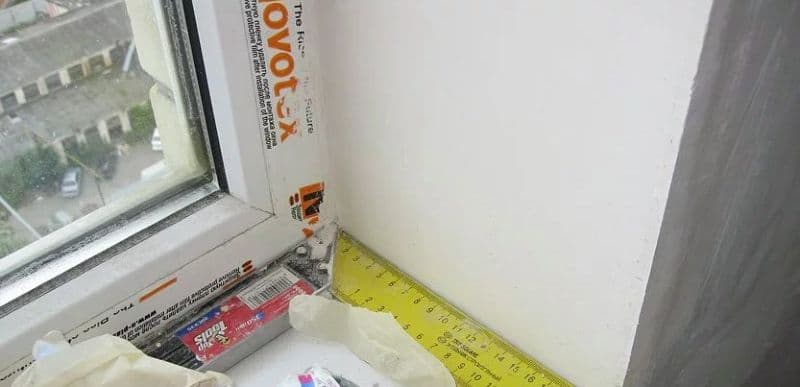
The surface of the windows and frames is carefully prepared before starting work, otherwise the adhesion to the stucco mixture will decrease. Act as follows:
- evaluate the correct installation of the window frame, box (if there is little foam, perform additional foaming);
- when the plastic film is still preserved on the new windows, leave it in place (otherwise, glue the frames with tape);
- the glass itself is protected with cellophane, securing it with pieces of masking tape;
- small cracks, cracks close up with sealant;
- the seams of the masonry are embroidered to a depth of 1 cm, also covered with sealant or mastic, and the largest are sealed with cement mortar;
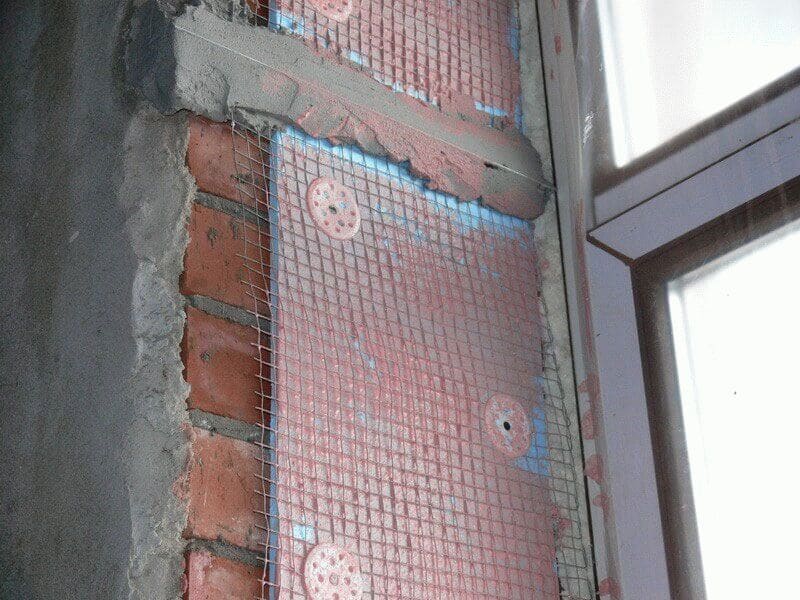
- to enhance adhesion, the concrete base is covered with notches, the brick base is scratched with a metal brush (if the walls are wooden, they nail shingles to them - it can be replaced with a reinforcing mesh);
- whisk away or remove all dust with a vacuum cleaner, grease stains, dirt;
- old unnecessary metal elements are removed, fasteners made of metal isolate;
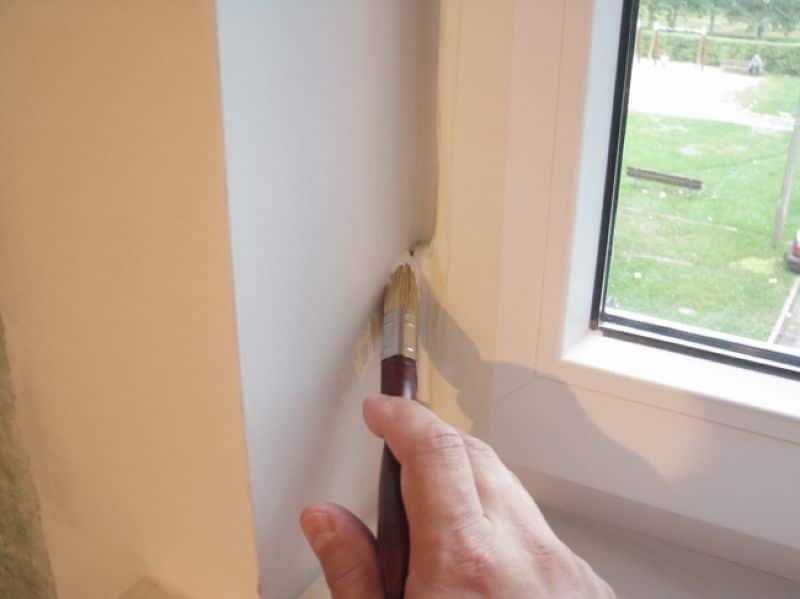
- the entire base is primed on 2-3 layers with complete intermediate drying.
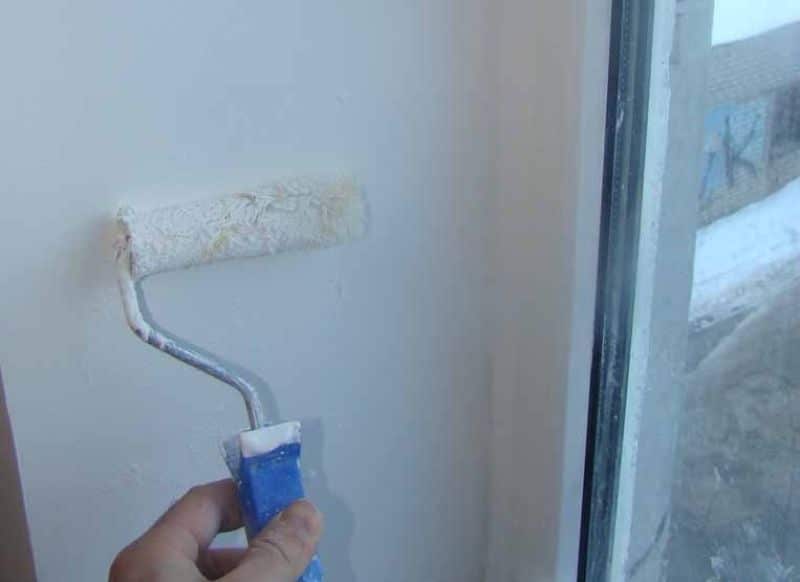
When working with slopes, do not skip the priming stage. The application of a primer helps to strengthen the adhesion of the plaster to the wall, as well as strengthen the weak surface. As a result of priming, a layer is created that can interconnect even poorly compatible materials, such as gypsum and cement. Also, the soil will close the pores through which the substrate can absorb water from the plaster, which reduces the quality of the finished layer.
to contents ↑Insulation of slopes for plaster
The use of insulation on slopes is the right solution, because it will help maintain comfortable conditions in the house, prevent moisture condensation on the windows, near the windows, and eliminate the appearance of cold bridges. It is especially important to warm the window slopes in areas with a cold climate, where severe frosts are observed in winter. When shedding foam and the appearance of small cracks without an additional layer, heat will quickly be blown out of the room, a fungus will settle on the windows.
Warming can be done with different materials. It is most convenient to lay sheet polystyrene or polystyrene under the plaster. The first costs an order of magnitude cheaper, but deteriorates from dampness, so an additional layer of waterproofing will have to be done. Penoplex is suitable for external and internal works, it is easy to plaster it. Mineral wool is also suitable for external use. Another option for internal insulation is the application of special warm or pearlite plaster, under which it is not necessary to lay sheet material.
The procedure for working with a heater is as follows:
- cut the material into pieces of the right size;
- build construction glue according to the instruction;
- apply the adhesive composition to the slope with a thin layer using a spatula;
- glue the insulation, carefully aligning it;
- make another layer of glue, fasten the reinforcing mesh for more reliable fixing of the plaster.
to contents ↑If you decide to use sheet insulation, you can plaster without fixing the beacons - the layer will still turn out even.
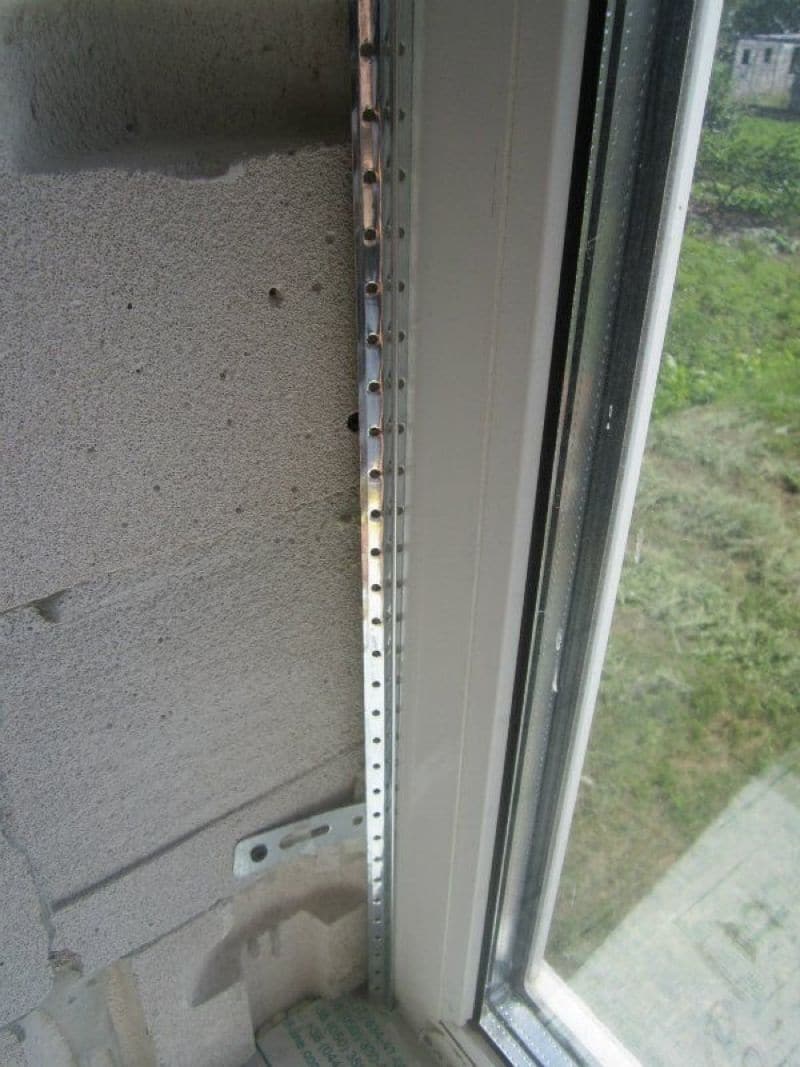
Reinforcement corners
Reinforcement reduces the risk of cracking. The inner corners (husks) are reinforced with fiberglass or sickle. Apply a little mortar or glue to the corner, align it with an angular spatula, apply a cut piece of mesh. Press the mesh with a spatula, pushing it into the solution, one more thin layer of the composition is smeared on top. Let the plaster dry, wipe it with a construction grater.
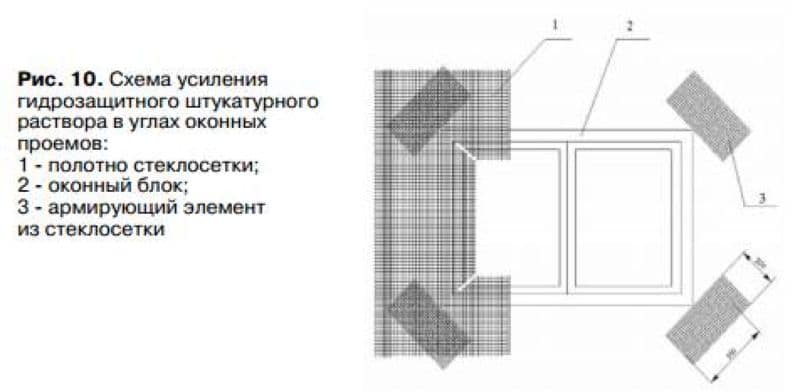
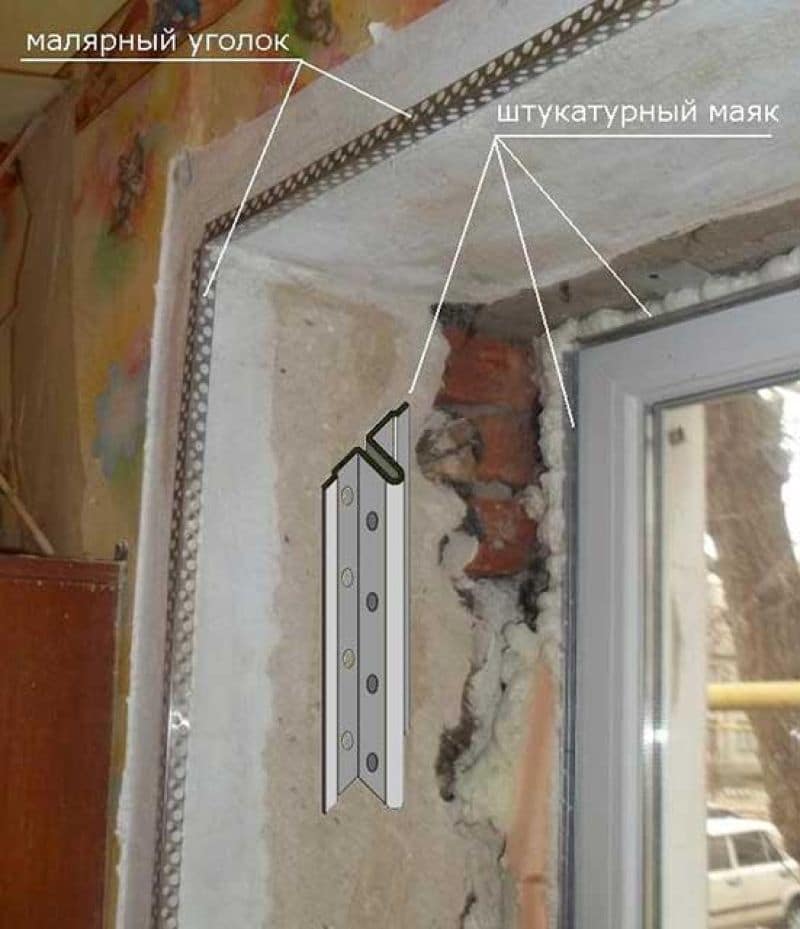
Outside corners (oysters) also need to be reinforced, otherwise they quickly get off. For reinforcement, special corner profiles made of plastic or metal are used. Measure, cut the profile to get a part of a suitable size.
to contents ↑Apply plaster on an angle on both sides, apply a corner, controlling its position with a level. The corner profile is pressed into the solution, another layer is applied on top, leveled, and polished after drying.
Lighthouse fixation
Before attaching lighthouses (guides), markings are made to prevent errors. Ready-made plastic or aluminum profiles, pieces of plywood, edged boards attached to self-tapping screws can serve as beacons for slopes. To fix the beacons, 3 self-tapping screws are screwed in, putting the caps in the same plane according to the marking verified by the level.
Next, apply the solution so that its heaps are slightly higher than the heads of the screws. The profile is mounted on self-tapping screws, pressing it into the plaster and controlling the position with a level. Beacons on gypsum plaster can be used after 2 hours. Work with cement beacons begins only after a day. If faster plastering is required, instead of mortar, one-time fasteners are used to fix the profiles: umki, clips, ears.
to contents ↑Plaster slopes on lighthouses
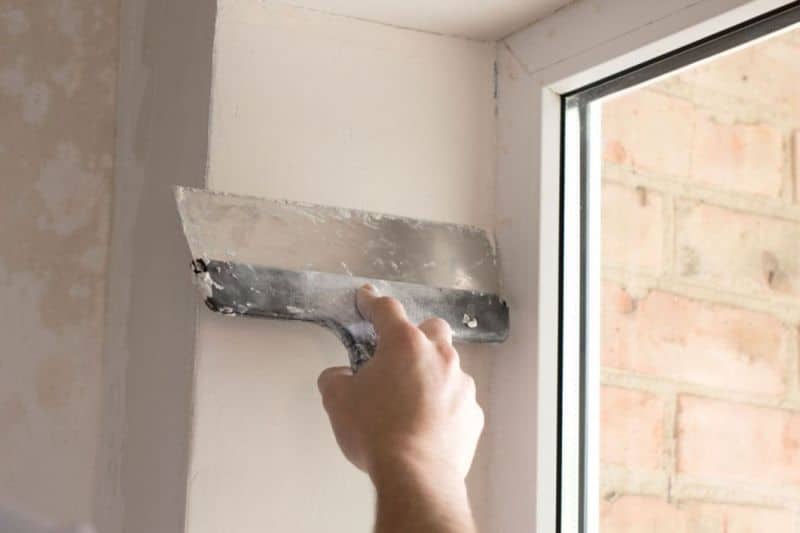
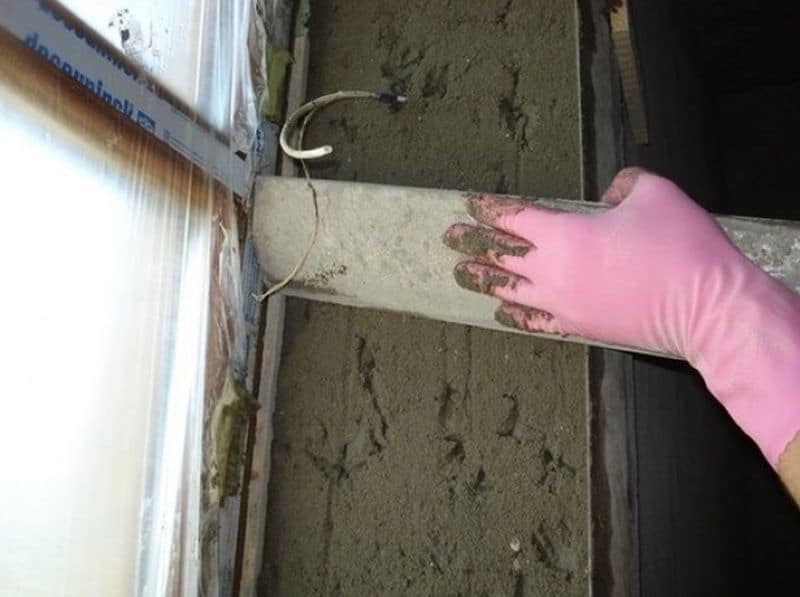
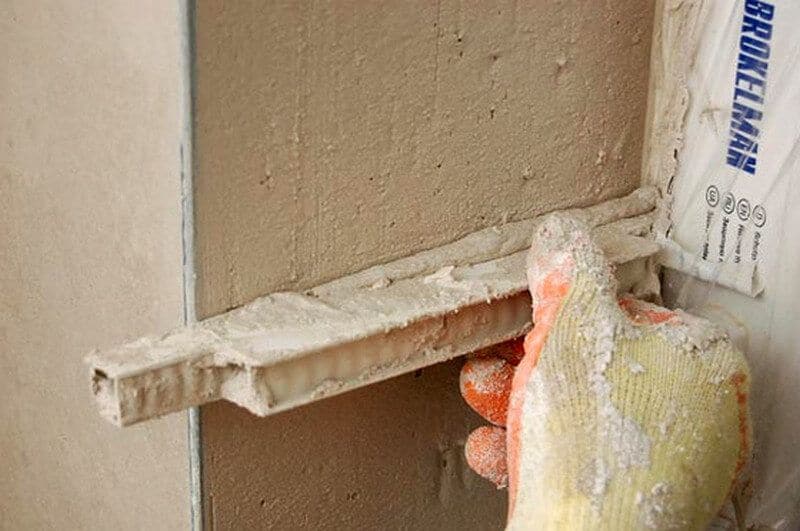
Since the distance between the lighthouses on the slopes is small, the application of plaster is carried out with a middle spatula and a short rule. The solution is sprayed onto a slightly moistened base. Lead the rule along the guides, making swaying movements, remove excess plaster. It is important to monitor the evenness of the corners literally from the first pass, removing the excess solution, although the ideal evenness cannot be achieved right away.
to contents ↑
Rough plaster
All plastering works are carried out in 2 stages: draft and finishing. For the first stage, coarse plaster can be used. It is thrown on the wall between the beacons, starting from the upper slope, then moving on to the side (along them they move from bottom to top).
For beginners, working with the upper slope may seem difficult due to the difficulties of applying plaster, since a smooth concrete beam usually acts as the basis. The mass sticks to it badly, but high-quality priming and notching accomplishes this task. The plaster is gained with a wide trowel and try to apply it with a small broach.
If the solution has to be applied to silicate or clinker bricks, it is worth buying specialized compounds that help reduce the absorption of such surfaces. In cases where the adhesion still remains low, a layer of tile glue is applied using a notched trowel, creating a wave. Glue will be an excellent base for plaster, provide excellent adhesion to the base.
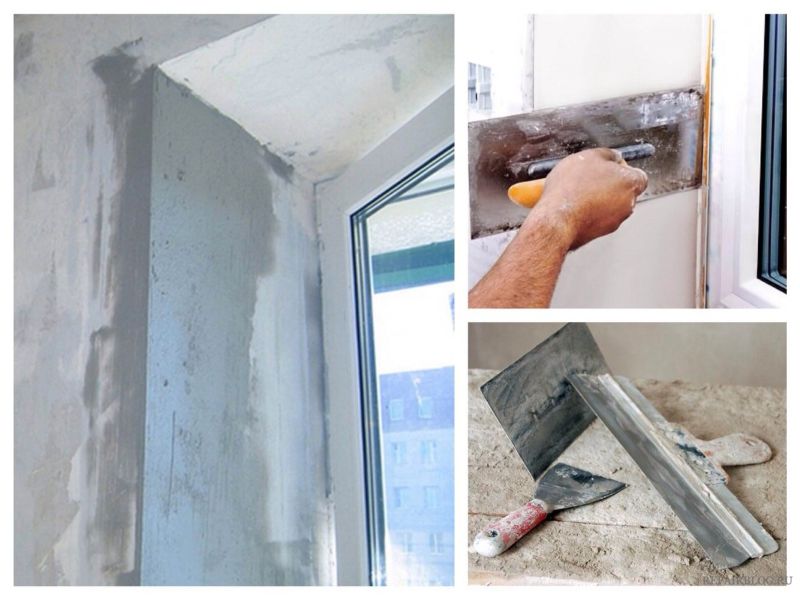
to contents ↑Finishing layer
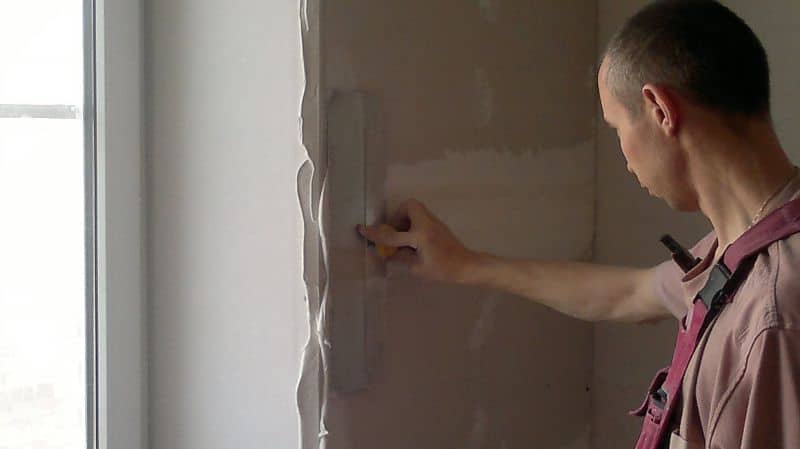
After mashing the dried layer of the rough plaster, a finishing solution is applied. It is too early to start the second stage of work, otherwise the first layer may float, deteriorate. Finishing plaster is made more fluid, carefully applied with a construction grater, stretched, and evened out with a circular motion. When the pits appear, add a little plaster and overwrite them.
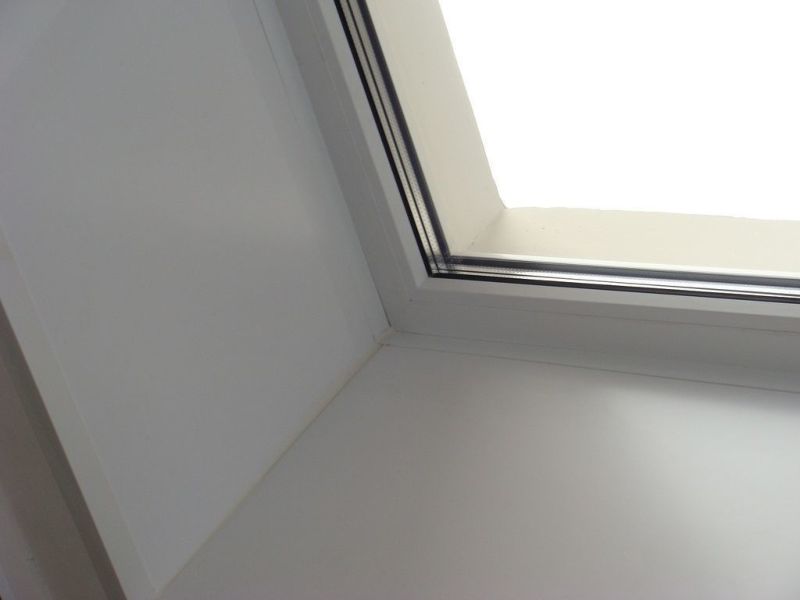
Finish finishing
As the finishing layer, it is desirable to use a smooth putty or a snow-white finely dispersed plaster. It is rubbed to remove the smallest irregularities approximately 16-24 hours after application, so that the material is securely set. Then they paint the surface or finish it in any other way.
The nuances of plastering slopes
It happens that when using mineral solutions during the plastering of the slopes of plastic windows, cracks appear over time. This is due to different expansion coefficients of the plaster and PVC, therefore, small defects are formed with temperature changes. To prevent such consequences, it is recommended to install damping (compensation) gaskets made of foamed polyethylene or other raw materials in the places where materials adjoin.
Before starting work with window slopes, you need to carefully read other professional tips:
- Before plastering, you need to make sure that the frames are securely fixed, installed symmetrically (for this purpose, use a square and level); if defects are identified, it is important to correct them immediately;
- if there is no foam, the gaps between the windows and the wall can be caulked, although foaming is much more convenient and faster;
- when using fibrous materials should be treated with an antiseptic;
- at first always internal slopes are plastered, then external;
- for every 10 cm of wall thickness in the opening area an extension is left on each side of the sidewall in the amount of 1-2.5 cm;
- the upper slope is always reinforced, even if the adhesion of the base with the plaster is sufficient.
to contents ↑
Features of plastering door slopes
Plastering door slopes has a number of differences with working with windows. The door itself must be installed strictly parallel to the floor, otherwise it will not be possible to make the slopes perfectly even.
Preparatory work
First, loose stucco, other old finishing materials, and falling pieces of brick are removed. Sticking out areas of plaster carefully beat. Wipe the base with grease neutralizers (solvents) if oil stains are visible on it. Be sure to clean the old paint, all the dust, dirt.
to contents ↑When the slots are poorly replaced when installing new doors, they immediately eliminate this drawback. They slightly moisten the base, spray the foam, give it the desired volume and solidify. After polymerization, excess foam is cut with a sharp knife.
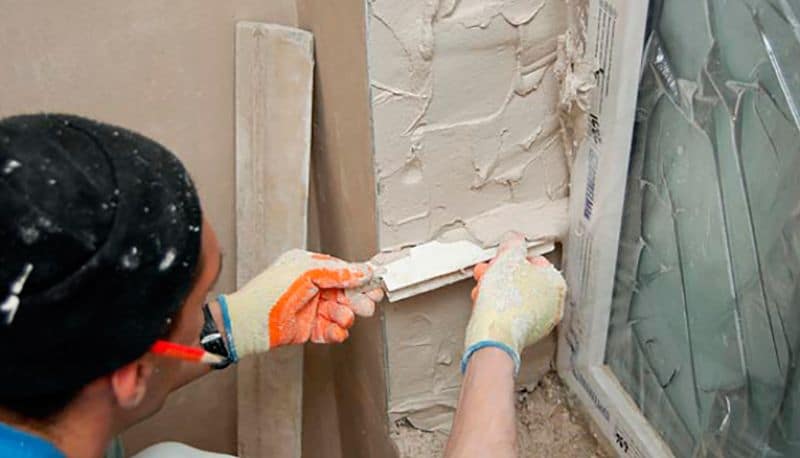
Beacon Installation
It is most convenient to work with door slopes using guides (beacons). To get smooth, hard outer corners, perforated paint corners are attached, which can also play the role of beacons. Each product is cut according to the height of the doorway, the upper edge is cut at an angle of 45 degrees. Fasten the lighthouse by gluing it on the plaster, carefully pressing it to the corners. After it is aligned, so that the edge is flush with the wall.
The excess solution that has come out through the holes is removed with a spatula. Take a rule or level, apply to the corner, checking the evenness of its position on the side of the slope and on the side of the wall. Repeat the work from the second side of the door and from above. In the zones of the junction of the corners, check their position for differences.
to contents ↑If the doors were installed correctly, then the door jamb can also serve as a second guide. A template is cut out of a smooth board or plywood to help level the plaster and remove its excess. When the template is missing, a rule or a spatula can play its role, but along the jamb, the required number of beacons (screws or piles of mortar) are set.
Creation of notches and reinforcement
For applying notches with a depth of 5 mm and a length of 5-10 cm, you can use the usual small hatchet, but it will be more convenient to use a bushman (a hammer with conical protrusions on the surface). Also for making notches, a chisel, a puncher with a special nozzle are suitable. Thanks to such recesses, the plaster will more reliably cling to the slope.

In order to strengthen the plaster, the base is reinforced with a polymer or metal mesh with cells of 10–40 mm. Cut the fabric of the desired length, attach it to glue (for plastic nets) or fix it with self-tapping screws (for metal nets).
to contents ↑Plastering the slopes of the front door
After mixing the plasters, they gain mass with a spatula, put on the surface of the site, level them with a rule or a pattern along the beacons with a layer of 1–1.5 cm. First they are passed along the sides, then along the top.
to contents ↑The excess solution is removed by conducting the template (rule) in a zigzag manner, and not in a straight line, so that the plaster “swells” a bit according to the type of vibration in the concrete. This simple technique will help to condense the solution and better smooth it. After drying, they overwrite and grind the slopes.
Finishing work
Each type of topcoat requires its own degree of smoothness of the rough plaster, so they are determined in advance with it. For example, for gluing with artificial stone or for applying decorative plaster, you can not bring the coating to the ideal, while for painting or gluing with thin wallpaper, the base should be absolutely smooth. Beginners in plastering usually stop at applying the starting solution and use a dense finish.
If you decide to paint the slopes, you will have to continue the plastering work. Once again, they carefully clean the surface, removing even small flows and lumps. Apply a layer of finely dispersed plaster or finishing putty. As the solution solidifies, it is ground to perfect smoothness, primed and painted.
to contents ↑Stucco arched doorways
When decorating arched openings, their straight side slopes are plastered in the same way. The arch itself is finished with pre-made patterns of plywood. In the interior arches, two such patterns are fixed to the wall with screws from 2 sides. For the entrance arched opening, the first guide will be the template, the second - the profile of the door itself. To align the plaster in this situation, a rule of the type malki is applied, with a protrusion at one end. The surfaces of the templates are glued with tape, otherwise the tree may stick to the stucco.
Curved sections of arches necessarily reinforce. After attaching the reinforcing mesh and patterns, the solution is applied by spreading and aligning in one direction. After leveling the mass on the opposite vector to fix it. For mashing use a special grater with a rounded sole.
For plastering slopes it is not necessary to invite professionals. Having done the work yourself, you can significantly save on the installation of plastic, laminated or metal elements and perform any desired type of finish.