The quality of the plastering works greatly affects the appearance of the entire finish. That is why it is necessary to do the plastering of surfaces with maximum accuracy and thoroughness.
- What is a stucco beacon
- Types of lighthouses
- Metal
- Wooden
- Plastic
- Reusable steel
- Homemade
- String
- Laser
- Sizes and shapes
- Materials and tools for decoration
- Installation of lighthouses
- Wall marking
- Beacon Installation
- Installation of metal and wooden beacons
- Installation of beacons from a solution
- Installation of string beacons
- Preparation of working solution
- Lighthouse Application
- Arrangement of slopes and corners
- Finish leveling
- Do I need to remove beacons after plastering at home

The most effective means to smooth the walls are plaster beacons. If you want to learn how to work with them, even a novice can, because this technology is simple.
What is a stucco beacon
Stucco walls on lighthouses - a technique familiar to every master. Lighthouses (profiles, guides) are devices of different types of materials that serve as limiters of the putty layer. They are designed for a more even and beautiful application of the stucco mixture, to reduce the time and labor involved in leveling the surfaces. Previously, all craftsmen used home-made beacons, now there are ready-made disposable and reusable products on sale.
The use of beacons has many advantages. They are inexpensive, resistant to mechanical stress, flexible and easy to use. Thanks to the beacons, even a thick layer of finish will be even, while without using them you will have to constantly check the level of plastering. The builder applies the solution, focusing on the position of the profiles, so they are usually placed on the entire plastered surface.
Types of lighthouses
Depending on the material of execution and the properties of the beacons, they differ from each other. All of them have their own characteristics and specifics of application.
Metal
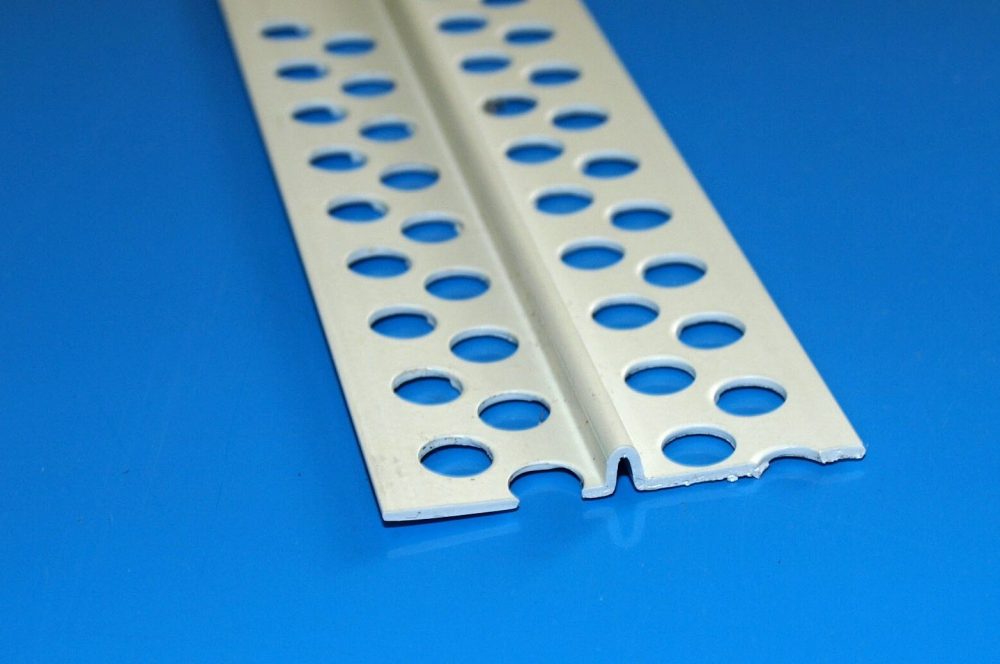
This is the most popular version of the profiles that are in construction stores. The installation of metal beacons is the simplest, for this you do not need special training. After completion of work, they are most often not cleaned. On sale there are metal beacons of different sizes, while small ones are used infrequently, and medium and large are most in demand.
Since a thin profile is used for the manufacture of products, it can be easily cut with scissors according to the required dimensions, which is a definite plus for the master. The disadvantages of metal beacons include the risk of rusting. Such products are made of ordinary carbon steel, and it is prone to corrosion. In some cases, this leads to the appearance of ugly red spots on the finish. In addition, if the beacons are too flexible and thin, for their filling, you will have to prepare a special solution to strengthen the structure, or use clips in addition.
to contents ↑Wooden
Such devices are made of rectangular wooden battens with a profile in the form of a channel.After the plaster hardens, they are removed. It is necessary to pre-soak each lighthouse with a water-repellent, otherwise the tree may warp and twist, and the coating will not be even.
Plastic
Such profiles are made of durable plastic. Their standard thickness is 3, 6, 9 mm, length - 3 meters, although there are other options on sale. The advantages of plastic beacons are undeniable:
- light weight, ease of transportation and storage;
- strength is not lower than that of metal products;
- non-susceptibility to deformation, return to original shape after bending;
- no risk of corrosion damage, rotting.
to contents ↑Disadvantages of plastic guides are also available. They are less resistant to shock loads than metal "brothers". In addition, the products are not suitable for facade decoration, as they lose strength under the influence of subzero temperatures. They require strictly correct fixation on the surface, otherwise they will bend when moving with a trowel.
Reusable steel
Lighthouses that can be removed and reused after plastering are much more expensive than disposable ones. They are made of very durable metal (more often - stainless steel or galvanized), they will never lead even when applying a thick layer of the mixture. Due to the high price, such beacons are most often used by professional builders.
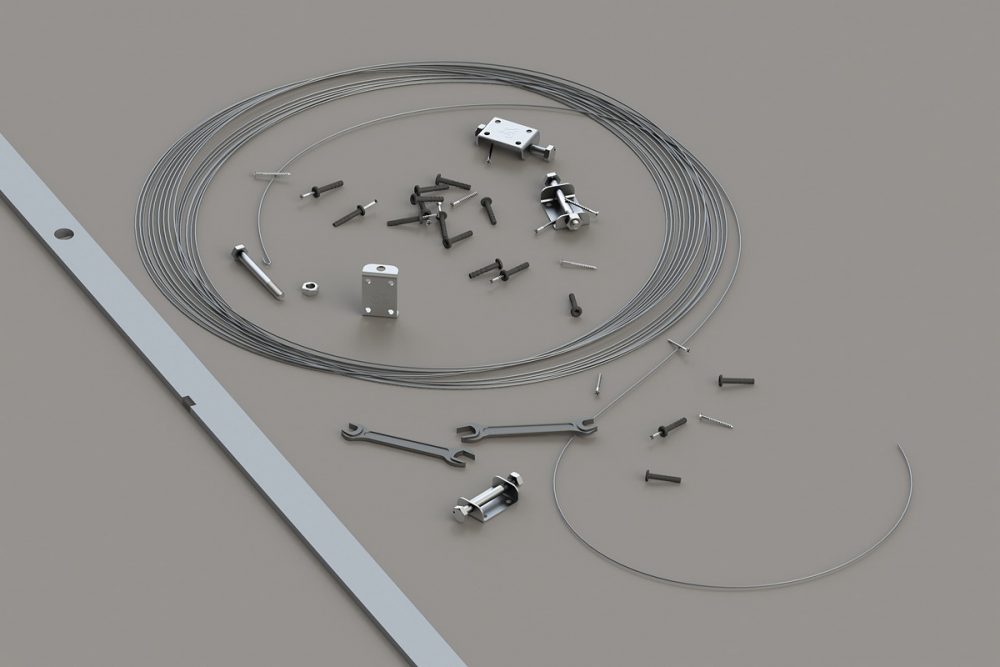
Homemade
Often, masters use various home-made devices that play the role of guides. For example, when finishing wooden surfaces, wooden blocks of the right size are used, which are easily fixed with self-tapping screws. Experienced finishers even make beacons from the mixture, applying it with "heaps" in level or on the hats of screws screwed in advance. You do not need to dismantle them, because they are completely hidden by plaster.
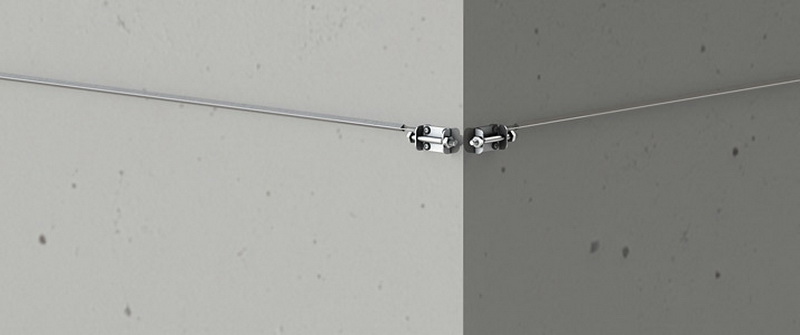
String
These products are also home-made analogues of purchased beacons. For their installation, screws are screwed in and a thin wire, string is pulled between them, checking the correct location of the level. The free space that formed under the string is filled with plaster. It is necessary to remove the strings before the solution has finally solidified. If you make a mistake and install the string beacons incorrectly, in the end you can get a curved surface.
Laser
Such "beacons" are projected onto the walls in levels, or laser levels. Similar devices create marking lines in one plane. If you install the device, set the vertical plane parallel to the position of the base, the laser beam on the floor will draw a line to adjust the thickness of the finishing layer. At this mark, you can install self-tapping screws with a certain height.

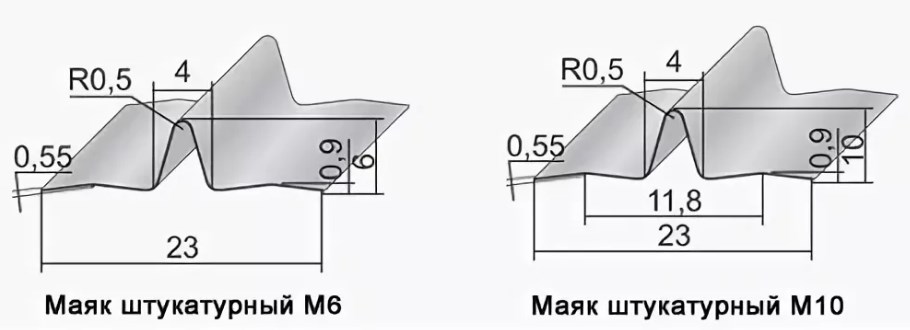
Sizes and shapes
On sale there are guides of various dimensions - from 3 mm to 3 cm. As for the length of the products, it can be 1-6 meters. They must be selected depending on the depth of the depressions and the height of the bulges, that is, on the degree of surface roughness. The more mixture you have to apply, the larger the limiters should be. Devices 2-3 meters long are usually used for repairs in residential buildings and apartments. Six-meter profiles are more suitable for plastering warehouses, industrial premises, as well as for exterior decoration.
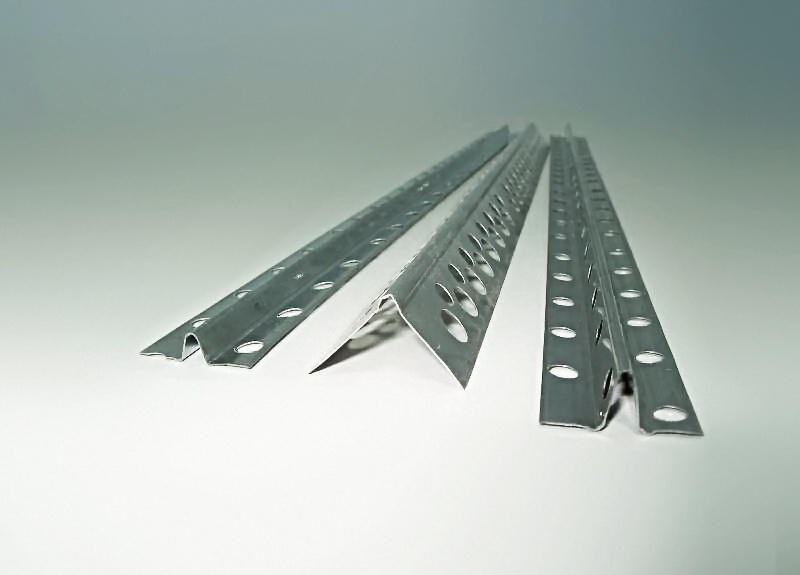
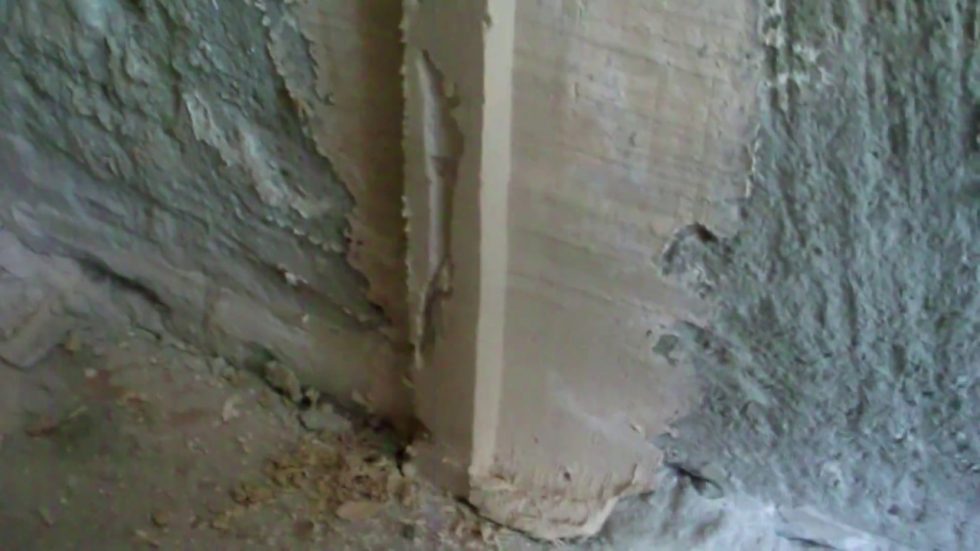
Straight guides are perforated products having a V-shaped protrusion that will serve as a guide during operation. Corner beacons have the same protrusion, but in parallel are equipped with shelves located at right angles. They are used to align and increase the strength of external corners.Corner profiles do not have great rigidity, therefore during installation it is necessary to regularly check the straightness of their installation.
Materials and tools for decoration
To install the guides and apply the stucco mixture, different tools may be required depending on the specific type of product and the technology used. Usually an exhaustive list of devices and consumables looks like this:
- construction level (any) and plumb;
- strong thread or fishing line;
- self-tapping screws;
- dowels;
- screwdriver;
- capacity;
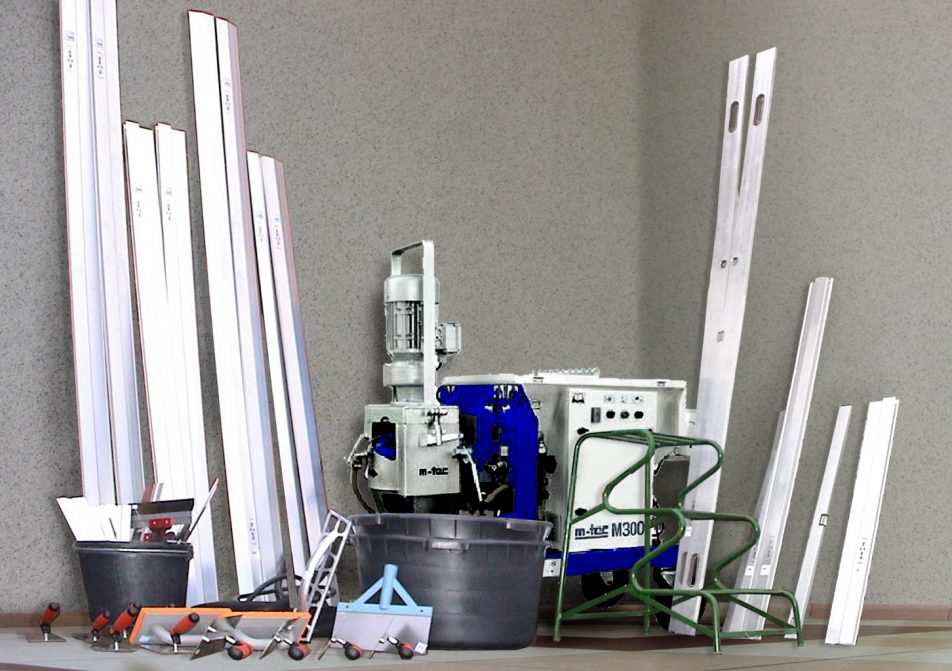
- drill with mixer nozzle;
- grater or grater;
- rule
- spatulas;
- Master OK.
You should also purchase the actual beacons, which are selected in accordance with the estimated thickness of the coating. As for the length, it is better for beginners to take standard products at 3 meters. If mechanized plaster is expected, an apparatus for applying the mixture (plaster bucket or gun) is also prepared.
to contents ↑Installation of lighthouses
Start the plastering work with the markup, then install the profiles, and then proceed to the very process of plastering the surfaces.
Wall marking
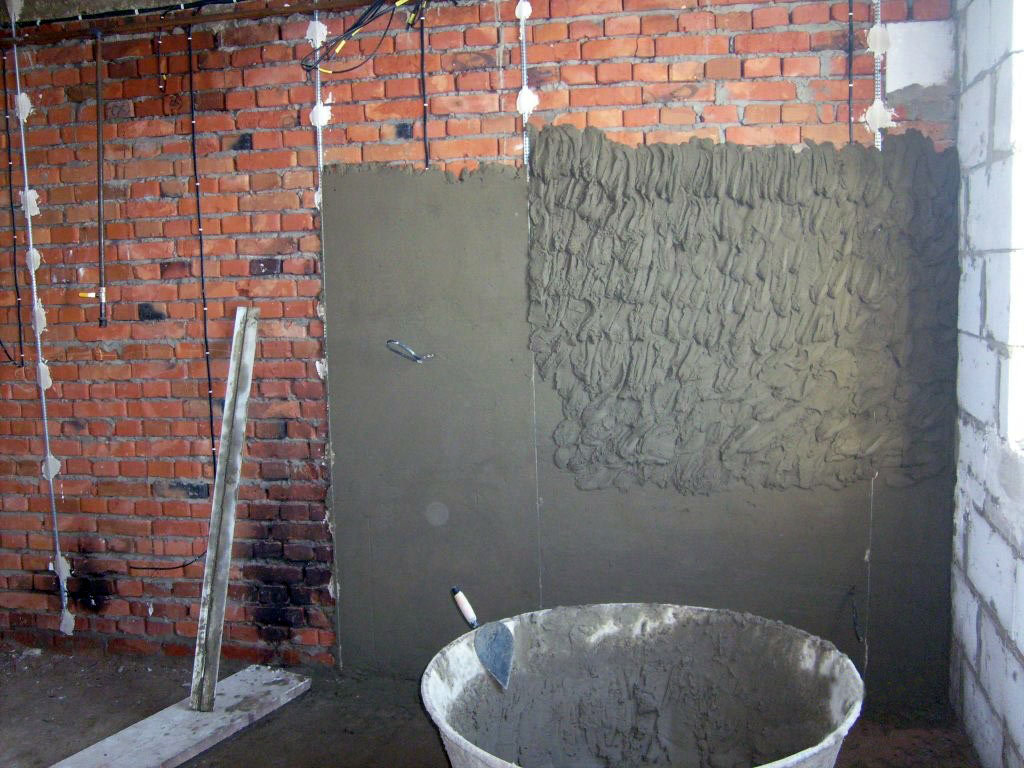
Marking is carried out on an already prepared base, which has been cleaned of the old falling off coating, rid of rot, mold and carefully primed. To set up the beacons, you can use the simplest method - manual marking, which is carried out in the following sequence:
- They retreat from the corner by 30 cm. Draw a strictly vertical line in level, repeat the operation from the second side of the wall.
- Measure the distance between the lines, divide it by 1.5 meters, thus calculate the number of required beacons.
- Finished accessories are cut so that they are 30 cm shorter than the height of the ceilings.
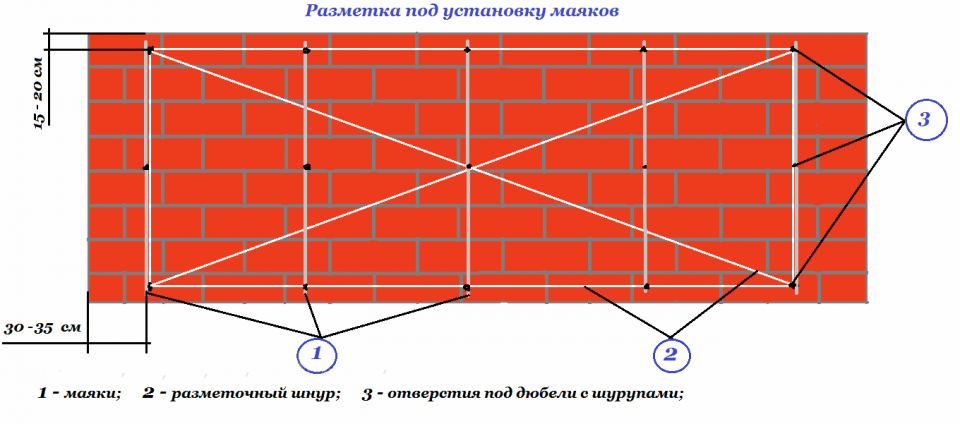
- Above and below the lines, holes are drilled, self-tapping screws are put in them. Draw the entire wall area with lines every 1.5 meters.
- Screws are screwed into the holes in the first two strips, the threads are pulled between them. Where the thread will intersect with the rest of the lines, they also put fasteners.
- Calculate the location of the screws. To do this, add the wall obstruction indicator, the thickness of the lighthouse and add a small margin (about 0.5 cm). Self-tapping screws are leveled by this amount.
- Pull the threads diagonally, hold a beacon under this plane (it should only touch the thread a little).
to contents ↑Professionals prefer to set beacons using a laser level. With its help, a blockage of the surface is found, having previously placed the device against the wall and turning on the cross-shaped beam. This indicator will give an idea of how thick the plaster layer should have. After that, with the help of a level, they draw vertical lines on the wall every 1.5 meters, on which subsequently the beacons are put on glue or on self-tapping screws.
Beacon Installation
Each type of profile has its own characteristics of installation and mounting on the wall, but they are all suitable for any type of base.
Installation of metal and wooden beacons
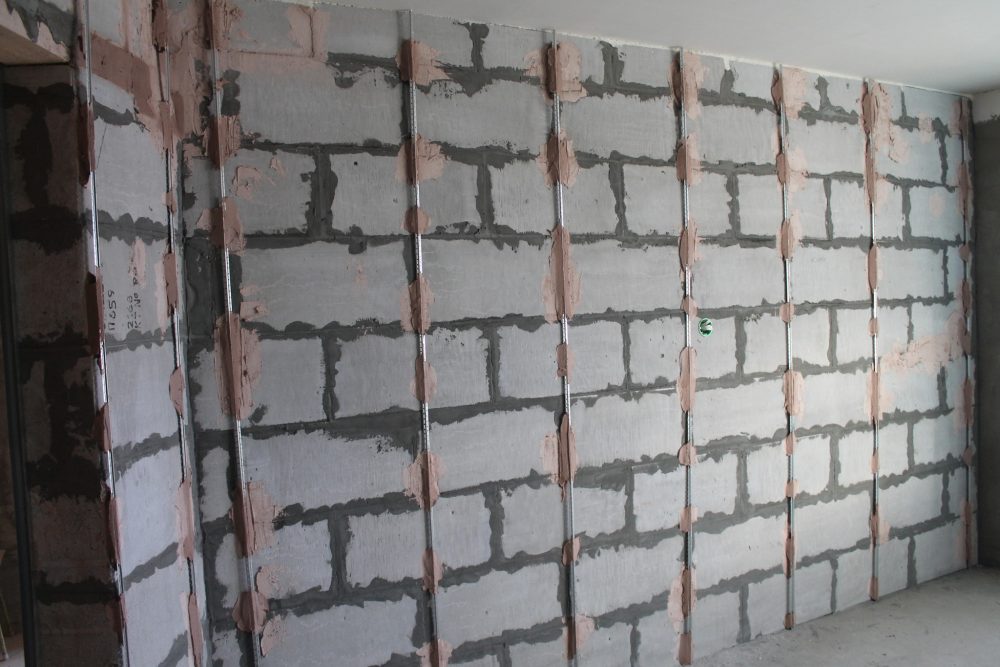
Such beacons are placed at a distance of 120-170 cm from each other (the standard indicator is 1.5 meters). The extreme guides are located 30 cm from the walls, but this distance can vary depending on individual conditions and can be 15-20 cm.
If the markup was done correctly, then further actions are not difficult. Once again check whether the screws are correctly located, using the level. If necessary, correct their location. Next, they fit profiles or wooden slats on the hats of the screws so that they abut along the entire length, they are fixed with a solution. The latter is prepared in advance, and after the lighthouses are pressed with a long rule to the head of the screws. Excess solution will immediately protrude through the perforation. After the initial setting of the mortar, the profiles are fixed with dowels or a cement mixture is added so that it reliably holds them on the wall.
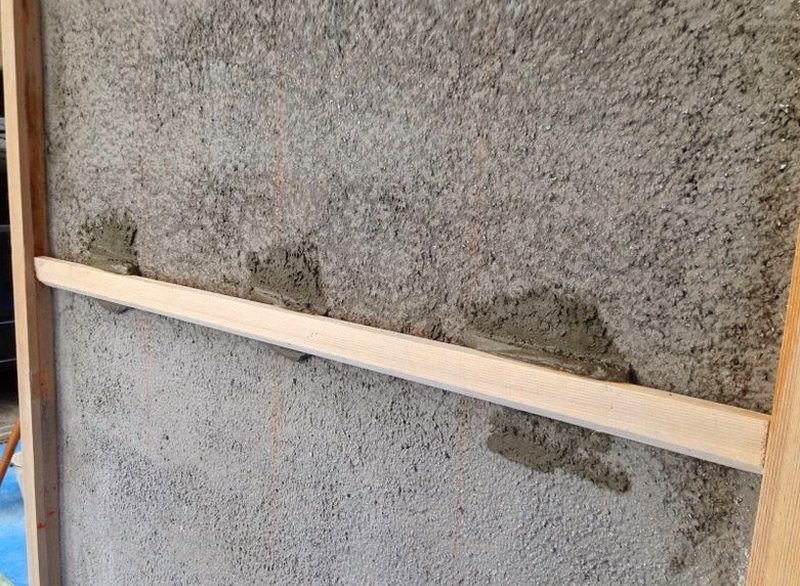
to contents ↑Installation of beacons from a solution
This method is well suited if the solution layer is small. It is ideal for gypsum mixes. The preliminary stage (marking) is also carried out, and then the order of work will be as follows:
- knead the solution, apply in heaps directly to the caps of the screws;
- after a slight setting of the solution, excesses protruding beyond the caps are removed;
- as the labels harden, a rule is vertically attached to them, a solution is poured into the space between it and the wall;
- tap the rule with a hammer to level the strip of solution, then carefully remove the device;
- with the appearance of voids, pits, potholes, all defects are overwritten with a small one-and-a-half;
- repeat such actions throughout the marked markup.
Installation of string beacons
This technique is even simpler than already described. When making markings on aligned beacons, they immediately pull the steel wire (thread, fishing line), which will serve as a guide for leveling the wall. After putty is applied so that it protrudes slightly beyond the wire, the excess is removed.
Preparation of working solution
The stucco mixture is made according to the manufacturer's instructions, which is always on the package. Dry powder is poured into clean water, mixed well with a construction mixer for 5 minutes, until the consistency of the mass becomes homogeneous. After another 5 minutes, the product is re-kneaded, after which it is ready to work.
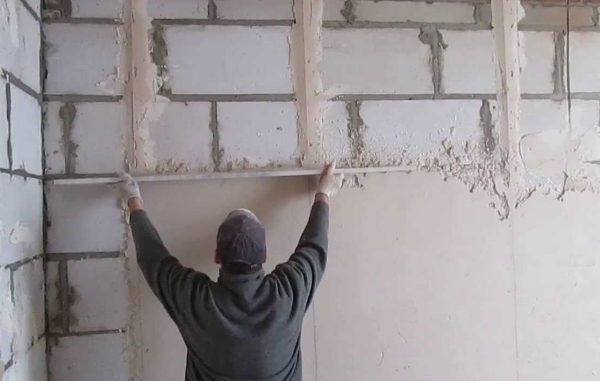
Lighthouse Application
The prepared mixture is applied using a trowel, putty knife, trowel between installed beacons. It is very convenient to use a bucket for this purpose, but if it is not there, you can simply spray the product with a spatula. The finished layer should protrude slightly beyond the vertices of the profiles.
Next, make the solution stretch as a rule in zigzag movements from the bottom up. After completing work on the entire base and setting the cover, the beacons are removed or left, if possible. Furrows from products are filled with a thicker consistency of plaster.
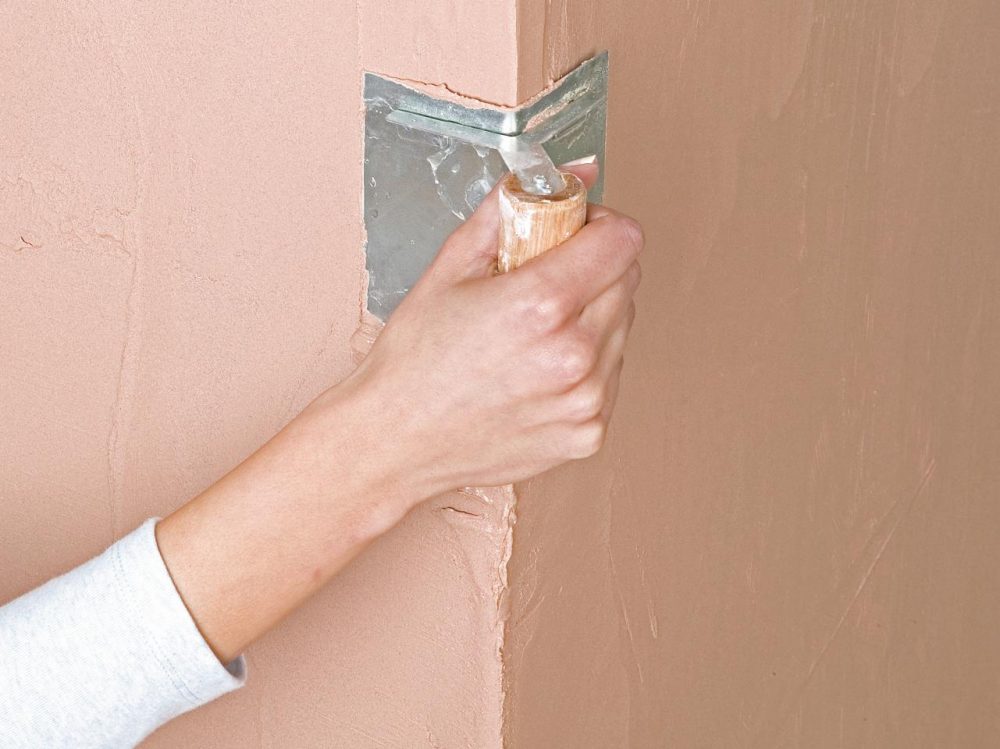
to contents ↑Arrangement of slopes and corners
Internal corners form an angular spatula. They are ironed, adjusted to perfect evenness, checking the level. Door, window slopes are made with the expansion inward. Dull corners are smoothed out with a wooden lath or molded using a special profile for slopes.
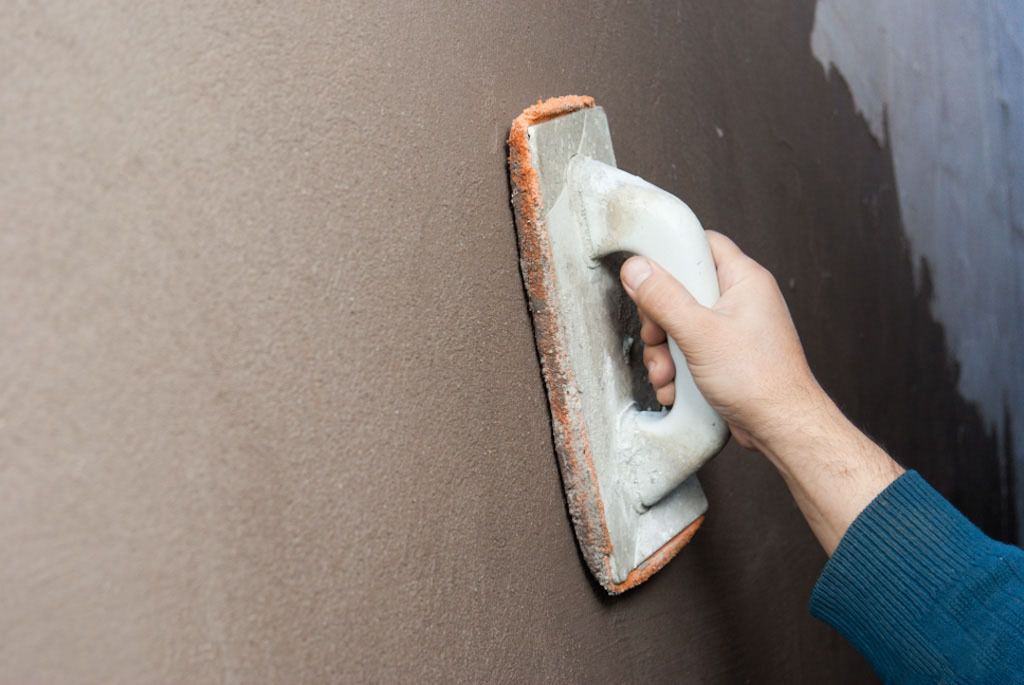
Finish leveling
Mashing is done as the final stage of decoration. All actions are carried out only after the solution has completely dried. A similar mixture, but more liquid consistency, will be required. The procedure is as follows:
- slightly spray the base with water;
- apply the liquid solution to the grater, spread with a thin layer;
- they put the tool at an angle of 45 degrees, carefully wipe the surface with literally 1-2 square meters;
- excess solution accumulated on the grater is removed.
to contents ↑If it is assumed to be tiled, then troweling is not necessary. Irregularities will only improve the adhesion of the ceramic to the base.
Do I need to remove beacons after plastering at home
The opinions of professionals on the issue of whether to remove the guides differ. Some people prefer to pull them out and close up the resulting groove, others leave them in place. The advantages of removing beacons are as follows:
- rusty spots can appear from metal guides, which greatly spoils the appearance of the finish;
- for various reasons, over time, the product is able to move away, while the plaster cracks and falls off;
- when fixing furniture, heavy paintings there is a risk of damage to the lighthouse by the fastener, which will cause delamination of the finish.
If the quality of the metal profiles is in doubt, it is recommended to remove them after finishing the plastering work. Corrosion protection at inexpensive lighthouses is usually not at a high level - its layer is thin, or there is no coating at all. When leveling is carried out in a humid room, the risk of rust is significant, and red spots will still break through a layer of putty.

As for the departure of the lighthouse from the base, this happens in such situations:
- a large step between the screws that hold the metal;
- low-quality putty, giving strong shrinkage;
- building vibration.
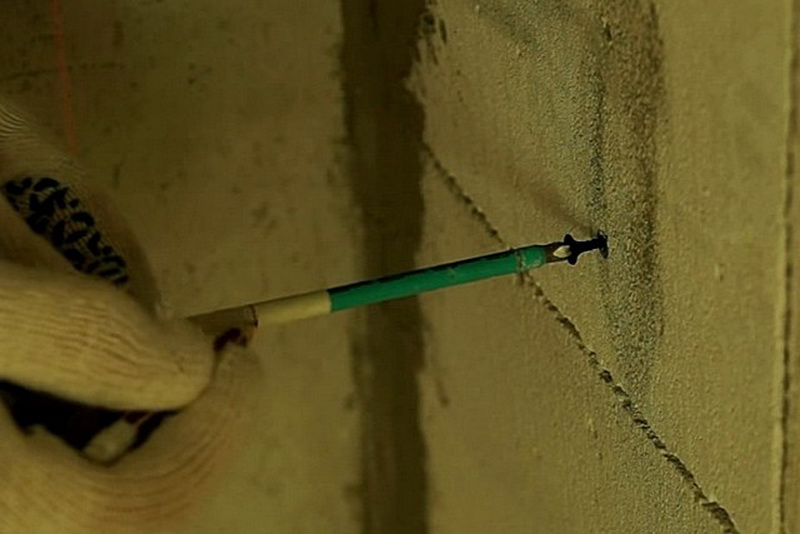
When these situations are likely to occur, beacons are best removed. This can be done both in fresh and in hardened finishing mass, although in the second case the extraction will be more difficult. Fresh plaster refers to a well-cured, but not yet full strength mortar. The dismantling technology is as follows:
- determine the attachment points of metal fixtures using a magnet (for plastic and wooden products, mark the pencil on the ceiling in advance);
- carefully clean the plaster in the area of the lighthouse;
- pry off the edge with a chisel, bend it;
- grab the lighthouse with pliers, wind onto yourself, carefully pull out.
Removal is best done in small pieces - 15-20 cm. After the traces of the products should be covered with a solution. It is definitely not recommended to remove the beacons if decoration is underway for decorative stone and ceramic tiles.
Lighthouses greatly facilitate the work of finishers, if it is aimed at high quality and perfect evenness of the finished coating. It’s easy to apply: you just need to be careful and strictly follow the technology.