Decorative plaster is amazingly beautiful. With the help of simple tricks, you can transform the interior and give the repair a highlight that others do not have. In addition, it really opens up scope for creativity. Many people think that it is impossible to do without the help of professional masters, but in fact decorative stucco with one's own hands is quite possible.
- Relief Plaster Tools
- How to apply plaster on the walls
- Preliminary preparation of wall surfaces
- Solution preparation
- Application Features
- Dyeing
- Wall decoration with textured plaster
- Structural
- Textured
- Venetian
- Polished imitation
- Embossed venetian
- Bark beetle
- Pebble Coatings
- Embossed prints
- Decorative plaster "Wave"
- Plaster "Travertine"
- Stucco "under a stone"
- Stucco "Dune"
- Plaster "Furrows"
- "Under a fur coat" plaster
- Sgraffito plaster
- Stucco hatching
- Plaster "Rock"
- Which is better?
- Ceiling Application


Relief Plaster Tools
This procedure is quite complicated, but any repair work has its own subtleties that must be taken into account. If you master the technique of applying plaster with your own hands, then the rest is a matter of technology.
We begin our master class for beginners with a list of tools and accessories that will be needed during the work:
- set of spatulas in different sizes;
- containers in which you will dilute the solution;
- graters, graters and trowel;
- sponges, rollers and brushes;
- masking tape and sheets of polyethylene (they are useful for closing the floor and baseboards).
The electric drill with a special nozzle, which kneads the solution in the tank, will greatly facilitate the work. And do not forget to purchase the main thing: plaster.
to contents ↑How to apply plaster on the walls
Our simple step-by-step instructions will help you to easily cope with this work and save a lot of time.
But before proceeding directly to the finish, it is necessary to correctly prepare the wall surface. Without this, you cannot lay the plaster normally so that it does not peel off over time.
Preliminary preparation of wall surfaces
For interior decoration, it is necessary to remove the old coating from the walls. This can be done with a spatula. Remember to wear a respirator and safety glasses.
As soon as the surface is completely cleaned, apply the starting plaster and align the walls, then use a reinforcing mesh and fix the result.

All protruding roughnesses and irregularities are carefully cleaned, and cracks and potholes are filled with a special solution. Before proceeding to further work, check the level of the walls, and then apply a primer twice so that the textured plaster is held tight and does not move away from the wall.
to contents ↑Solution preparation
Particular attention is paid to its composition. To save time and effort, you can use ready-made dry mixtures, which are enough to dilute with water in a plastic container.
It is important to remember that when plastering external and internal coatings, speed is very important. The solution dries quickly and hardens, so knead it immediately before starting work.
To prepare it yourself, you need:
- pour water into a clean container (liquid temperature should be about 20 degrees);
- add the mixture in small doses;
- mix thoroughly with a drill and nozzle.
Proportions can be seen on the packaging of decorative plaster. This will help you determine the exact number of components.
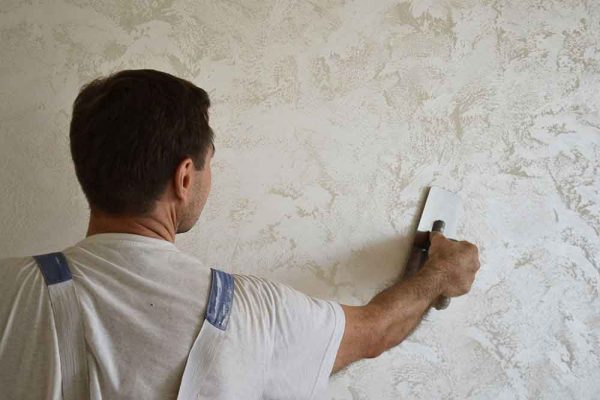
to contents ↑Application Features
How to finish yourself? First of all, you need to remember a number of simple rules:
- the solution is applied to the spatula;
- it should be carefully rolled out over the entire surface of the wall, avoiding large clods;
- excess can be removed with a smaller spatula;
- it is not recommended to make the layer thicker than 3 mm, otherwise it will turn out to be too heavy, and a thin layer will not completely cover all the pores in the coating.
Try not to lose time. The coating really dries very quickly.If the wall area is too large, then divide it with masking tape into several separate zones and work with each one in turn.
to contents ↑Dyeing
If in your case it is a plaster based on acrylic resins, then you can safely add colors of the desired shade to the solution. This will give it a uniform and pleasant color. When working with other types of plaster, you can leave it white and stain it for later. It is carried out using a roller and brush.
Wall decoration with textured plaster
The most difficult work is behind us, and we are starting the most interesting and creative stage: giving the wall a special textured surface. There are so many interesting ways, and you can choose the one that suits you.
Structural

This plaster dries very quickly. Its main feature is a flat coating with small inclusions. Such a surface can have a variety of patterns, ranging from simple cavities to complex patterns.
to contents ↑Please note that the pattern on this material can be either vertical or horizontal. This technique is well suited for repairs in the home or office.
Textured
A striking difference of the textured plaster is a special ribbed surface, which creates an amazing coating. To achieve this effect, you need:

- apply the solution to the wall;
- without waiting for it to dry, go over it with a trowel, a roller, a ribbed spatula.
You can also use a rubber stencil with different patterns, so you can create a beautiful artistic finish. It is sold in any hardware store.
to contents ↑Venetian
Venetian plaster is considered the most beautiful and attractive, because it combines both structural patterns and textured surface. Moreover, it very often imitates all kinds of textures and motifs.

It is applied on a tinted surface. To achieve an expressive effect, you need to add a special color to the primer several shades darker or lighter than the finish.
to contents ↑Polished imitation

To use it you need:
- perfectly level the surface, dry and coat with a primer;
- prepare the mixture;
- add dry pigment or color to it.
To recreate a polished imitation of natural stone, it is recommended to use about 3-4 colors. This will help to create characteristic veins and natural shades.
The solution should be applied with a small spatula to a larger one, and several shades should be applied immediately. The mixture is applied to the surface and aligned diagonally. As coverage is needed, add dark or light areas.

At the final stage, varnishing is applied, which gives the surface such a pleasant shine. You can enhance the effect with wax.
to contents ↑Embossed venetian
This option requires more thorough preparation, which is done with a spatula. It is necessary to impose several layers, they can not be cleaned completely. Previously, the surface should be treated with an acrylic primer, which will help increase adhesion.

To make characteristic patterns, you can use:
- polyethylene;
- a piece of cloth;
- fur;
- sponge;
- felt;
- felt.
Bark beetle
Another popular type of decorative plaster. It requires mixtures with marble filler, which allows you to create an imitation of wood, eaten by the larvae of a beetle grinder.

When mixing the solution yourself, it is recommended to use marble granulate. The plaster is applied by the method of scattering and is somewhat reminiscent of a happer. Level the surface with a small grater.
to contents ↑
Pebble Coatings
The solution is prepared from a mixture based on polymers, so that the finished coating acquires a mosaic structure. In order for the surface to acquire a distinctive appearance, glass or marble chips are added to the mixture. It is applied exclusively to the prepared wall, smooth and clean.

Embossed prints
This option helps to imitate a stone or facade under a brick, and therefore is great for decorating a balcony. To achieve a perfectly even pattern (print), you should use special stamps that can be purchased at the store.

to contents ↑Before punching, the mold must be moistened with water. Only after that she is pressed to the plaster.
Decorative plaster "Wave"
A great solution for those who value conciseness and freedom of form. "Wave" is made on the basis of lime-sand plaster. The prepared solution is applied with long curved lines, and you need to monitor the rise of each ridge.

Such a technique requires considerable practice. It is important to consider the general pattern of waves. This will help to achieve a uniform look.
to contents ↑Plaster "Travertine"

A characteristic pattern is created by throwing clumps of plaster with added color. For smoothing, you should use either a trowel or a metal spatula. Due to the presence of two layers, peculiar islands appear - imitation of travertine.
to contents ↑Stucco "under a stone"

Decorative solutions help to make a beautiful drawing of natural stone. To do this, they should be leveled with a trowel. The secret to creating a special texture lies in the scratching, which is done with a bristle or hair brush. This allows you to achieve a special coating characteristic of boulders.
to contents ↑Stucco "Dune"

The dune resembles a sandy surface. When using it, several layers of plaster are also superimposed, and they should differ from each other by only 1-2 tones. A grater is used for leveling, and if you want to give the surface a shine of quartz sand grains, you can add a small fraction of marble or crushed glass to the solution.
to contents ↑Plaster "Furrows"

With this type of decorative plaster, everything is extremely simple. First you need to put the finished mixture on a perfectly smooth wall, and then make furrows with a corrugated spatula. It is sold in hardware stores and is more than affordable.
to contents ↑It is recommended to use a tool with semicircular teeth. So the texture of the wall will be concise and pleasant.
"Under a fur coat" plaster
In fact, we are talking about a haper, which you can do in several ways:
- armed with a special tool connected to an air compressor;
- having sprayed the solution with an ordinary brush or even a broom;
- applying the mixture through a fine mesh.
As a result, characteristic fragments appear on the surface. After painting, they look especially attractive.

Sgraffito plaster
This method is good in that it allows you to recreate a beautiful multi-layer mural, but at the same time it is very complicated. After applying several layers of plaster, you need to literally scrape it with a sharp object, exposing a texture of a different color. The result is beautiful patterns.

Stucco hatching
Hatching is quite simple, and therefore suitable for most people. For this, a fine-grained solution is used, and it is necessary to wait an interval of about 2-4 hours after applying the layer. Strokes are done either with a gear cycle or with a comb.After this period, you can repeat the procedure using the Trojan, which will make the coverage more expressive.

Plaster "Rock"
Its main feature is imitation of chipped stone. “Rock” is made by hardened plaster, into which coarse aggregate has been added. The texture is created with a tongue or groove.
Which is better?
Now you know about all types of decorative plaster, as well as their key features and application methods. Which option is better, you decide. Here you need to consider both personal preferences and the concept of interior design.

If you prefer a creative impulse, do “Waves”, and if you are closer to natural textures, choose a stucco with imitation stone. Above all, do not be afraid to experiment.
to contents ↑Ceiling Application
Such work exhausts very quickly and also requires constantly raising your hands and head, which leads to rapid fatigue. To make your task easier, apply plaster to the ceiling with a layer no thicker than 5 mm. This will significantly speed up the work and help you save energy on other tasks.