The service life of the fence depends not only on the quality of the concrete. Throughout the entire period of operation, the structure is exposed to adverse environmental factors: rays of the sun, snow and rain, temperature changes, pollution and dusting, bird droppings, etc. Over time, the surface of the fence fades. Cracks form on the fence, since moisture, entering the pores of the material, freezes in cold weather and, thus, destroys the material. Painting a concrete fence will slow down negative processes and give the structure a more attractive appearance.
- Preparation for painting
- How to clean a concrete fence?
- Impregnation of concrete surfaces
- Priming
- Concrete structure painting
- Paint selection
- Materials and Tools
- Types of paint
- Fence painting tips
- Stone Fence Painting


Preparation for painting
If any plants are planted near the fence, benches, sculptures or other objects are located, they must be adequately protected from possible ink.
In order for the adhesion of the paint and varnish material and concrete to be at a decent level, its surface must be rough. Also, before painting, the surface should be cleaned well. A clean and rough surface will ensure high-quality adhesion of the paint to the concrete surface.
to contents ↑How to clean a concrete fence?
In addition to dry cleaning, you will need wet. For this, we wet the concrete structure with water and leave it for 10 minutes. Then we clean the surface with a hard bristle brush. Cleaning will be better if you use a cleaning agent or soapy solution. After cleaning, wash off the dirt with a powerful pressure of water from the hose. Places where mold or fungus was present are treated with an antifungal agent after cleaning. On the external metal elements embedded in the fence, we apply an anti-corrosion fluid.
It is also necessary to cement all cracks in the structure. To do this, we make a cement mortar: for one part of cement - three parts of sand. Water is added as necessary, until the mixture acquires the desired consistency.
to contents ↑Impregnation of concrete surfaces
After cleaning the concrete, you can proceed to its primer. The purpose of the work is to achieve increased strength of the material due to its polymerization, smooth out irregularities, and also remove dust.

The result will be better if the primer is on the same basis and from the same manufacturer as the paint. Impregnation can be made both in water and in solvent. Aqueous solutions can be used at high humidity, as well as impregnate fresh concrete with them. Water-based impregnations are odorless, therefore, they are suitable for places where there are increased requirements for paints and varnishes.
to contents ↑Organic based primers are characterized by deep penetration into low-grade concrete.Organic components allow the primer to be used in low temperature conditions (below 20 degrees below zero). However, if polyurethane is included in the impregnation, the minimum temperature should be at least 5 degrees Celsius.
Priming
For surface treatment we use a roller and a brush (in hard-to-reach places). We impregnate both sides of the fence with the same compositions so that the surface characteristics with respect to external influences are the same. The final drying period of the primer is 24 hours.
Concrete structure painting
Paint selection
Paints are divided into cold and warm. Blue and green are considered cold, while red, orange, purple and yellow are considered warm.
The painted fence should be in harmony with the adjacent buildings. The fence of the site, painted in one tone with the roof of the building, looks attractive. To select the optimal color, you can use the services of computer modeling, offered by some companies.

The lower part of the structure should be the same in tone with the upper part or darker. If the surface of the concrete looks aesthetically pleasing, has no obvious irregularities, you can paint it with a colorless paint.
Please note: matte paint hides surface defects, and glossy, on the contrary, emphasizes.
All paint should be from one manufacturer. Therefore, it is better to purchase paints and varnishes with a margin.
For smooth surfaces, textured paint can be used. With such a composition, the relief of the fence can be changed, which will thus gain an external originality. Also, textured paints best protect the material from moisture and temperature extremes.
to contents ↑Materials and Tools
To paint the fence with your own hands you will need such tools:
- paint tray;
- fur roller for painting flat surfaces;
- brush (used for applying paint to hard-to-reach areas);
- atomizer;
- protective suit, gloves, glasses;
- paint;
- paint thinner.
Types of paint
For painting a concrete fence, the following types of paint can be used:
-
- Silicate. It sets well, differs in temperature resistance, tolerates ultraviolet radiation, dries quickly.
- Oily. Resistant to moisture and ultraviolet rays. Disadvantages of oil formulations: dries for a long time and does not pass vapor well.

- Acrylic The best paint in terms of resistance to mechanical stress. It is ecologically safe, it lets vapor through, it is resistant to moisture, it sets well with concrete. It has a high cost.
- Latex. It is made on the basis of latex dispersion. It is inexpensive, but the service life of the coating will be less than in the case of an acrylic composition.
- Water emulsion. It features low cost, economy in consumption and a variety of colors. It is unstable to humidity, effects of temperature differences, chemicals and mechanical damage.
- Rubber The main property is elasticity, as a result of which the paint layer can be compressed and expanded depending on the air temperature. The elasticity of the paint prevents the formation of cracks on the painted surface.
Fence painting tips
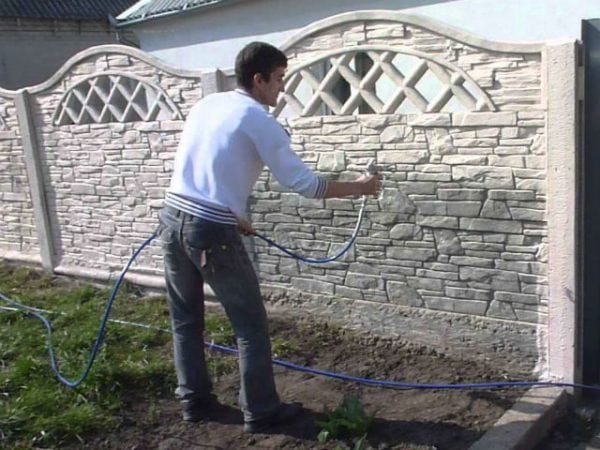
After the primer has completely dried, and as soon as the weather permits, we proceed to coloring the fence with our own hands. The first layer is applied using a roller. The paint applied in this way will last longer than in the case of spray painting. For coloring hard-to-reach spots we use a brush.After applying the first layer, we take a break for a day to dry the painted surface.
We use the sprayer to apply the second layer. This method is more operational in comparison with the roller and the coating is more even. Two layers should be enough so that the painted surface retains protective and aesthetic characteristics for a long time. However, if desired, you can apply a couple more layers.
Note! It is not recommended to paint new fences. It is necessary to wait at least a year for the structure to sit down.
The final drying of the surface will occur in 1-2 days. For work you need to choose a day with good weather without precipitation. The best time to paint the fence is the end of spring.
to contents ↑Stone Fence Painting
If the site has a concrete fence with a relief coating, it can be paint stone.
The most crucial step when painting under a stone with your own hands is marking. You will need a ruler and a pencil. With their help, the concrete base is divided into figures of the right size (future stones). In this case, you need to keep in mind the size of the masking tape.
Further on the marking we glue the masking tape. It remains to paint the non-glued surface. Choose a color palette option in accordance with your preferences.
After the paint has dried, carefully remove the masking tape. The remaining strips after it will act as the boundaries between the stones.
The process is simplified if self-painting concrete eurofence: Its sections are cast at the factory and have the relief of a stone or brick wall - it remains to paint the stones.
So, painting a concrete fence is a fairly simple process, which even a novice home master will cope with. To paint the structure with your own hands, you just need to be patient and repeat in practice the recommendations described in the instructions.