After installing the eurofence, the owner of the house sees in front of him the usual gray concrete structure. Such a fence looks rather dull. The situation can be corrected by painting the structure - in this case, the fence will receive a much more attractive appearance. How to paint the eurofence with your own hands will be discussed below.
Concrete and paint
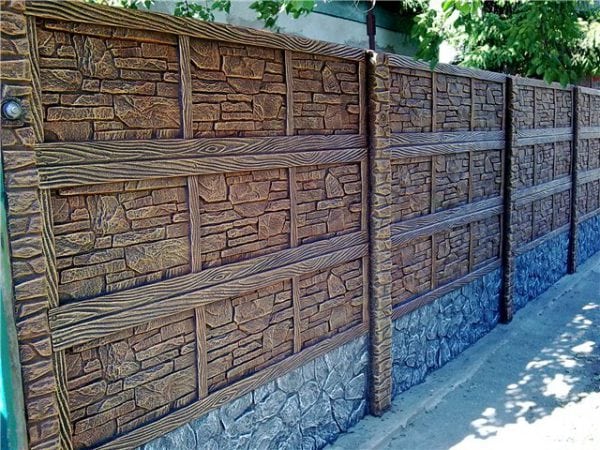
Eurofence is a construction made of concrete slabs and pillars, which, after installation, form a single architectural ensemble. The concrete surface may be corrugated, covered with patterns or look like masonry.

Since concrete products are supplied unpainted from manufacturing companies, the builder has the opportunity to paint the fence in any color. If you wish, you can create whole artistic compositions in accordance with your tastes and the relief of the plates.
to contents ↑The need for painting
Staining of the euro fence can be dictated by several factors:
- Improving the protective properties of the material. The painted surface copes better with negative environmental influences (for example, precipitation).
- Improving the design of the site. A properly painted fence can emphasize the merits of the site, the building and its elements, such as the roof and gate. Color combinations will provide harmonious landscape solutions.
- Psychological comfort. A monotonous concrete surface can only cause depression - a person, against his will, begins to associate his place of residence with a dull gray structure. But warm or comfortable colors give a good mood.
Material selection
Paint for eurofence must comply with a number of technical standards. First of all, the paint and varnish material should be intended for painting facades, since the fence is located on the street. Such a design is constantly exposed to such aggressive environmental factors as humidity, ultraviolet radiation, temperature changes, mechanical stresses. A prerequisite - the paint must contain antifungal additives.
Note! Eurofence cannot be treated with mixtures or fillings intended for interior use, since such materials are not intended for use on the street.
The most suitable type of paint material is acrylic exterior paint. This paint-and-varnish coatings well resists moisture and is characterized by dirt-repellent qualities.

Surface preparation
The preparatory process is carried out in the following order:
- We apply a deep penetrating primer to the surface cleared of dirt. To do this, you can use both a wide brush and a spray. A spray is preferable, since in this case the primer will spread better over uneven areas of the slab. We wait until the soil is completely dry.
- We process the existing surface defects with putty. For this operation we use a rubber spatula, which allows you to bend around all the irregularities of the euro fence. It should be noted that puttying is a rather labor-intensive process, but one cannot do without it.
- We cover the joints of the plates and the junction with the posts with cement and sand mortar. We prepare the solution based on the following ratio: for each part of cement we take three parts of sand. Instead of cement-sand mortar, other mixtures suitable for the properties can also be used.
- When the putty surface dries (on average, the process takes 24 hours), we clean the material with an emery cloth.
- Again we process the plates with a deep penetration primer. Moreover, it is recommended to do this several times. This will create the most reliable protective layer that protects the plate from destruction under the influence of environmental factors.

to contents ↑Note! Do not save on primer. It is unlikely that in this way it will be possible to seriously reduce costs, but the costs of operating the eurofence due to its poor coverage will increase significantly.
Painting
Like the application of soil, painting will be more effective if it is done using a spray gun. If it is absent, you can use a brush or roller, but the process will take much more time, and the quality of painting will be more difficult to ensure.

Before applying the main coat of paint, it is recommended to pre-apply the color on the plate. This can be done when the primer is applied to the finished surface. We add a little paintwork material to the primer, as a result of which the finishing primer will get the shade of the planned paint color. A similar approach is relevant if a monophonic painting of the eurofence is planned.
Mix the paint until the composition is homogeneous. Next, dilute the paint. In this case, you need a viscometer (a device for measuring the density of the material). If the paint is too viscous, the spray gun will fail or work intermittently. If you have experience, you can do without a special device, determining the density on the eye. Next, select a suitable nozzle (from 2 millimeters or more) and begin painting the fence.
Paint is applied in a thin layer - from the top to the bottom. Such a motion algorithm will prevent the occurrence of sagging. All work can only be done in warm sunny weather. Extremes are unacceptable: both heat and minus temperature. Each subsequent layer of paint material is applied only after the previous one has completely dried.
Regarding the paint consumption, the following can be said: for sure, the consumption declared by the manufacturer will differ from the real one. The point here is not the manufacturer’s tricks, but the peculiarities of the euro fences, since the relief and porosity of the material inevitably increase the paint consumption. The average consumption of paint and varnish material per square meter of concrete fencing will be 250-300 grams.
When painting the eurofence, perhaps the only difficulty may be working with a spray gun. However, there is nothing difficult in handling this device if you carefully read the instructions and follow its instructions.