If there are no special problems with painting the walls, then you need to work hard to transform the ceiling. The main working tool is the roller, which allows you to evenly and quickly paint the walls. The speed of execution is important, because otherwise roughness may form. We will figure out how to properly paint the ceiling with a roller with your own hands, so that the result pleases with its impeccability.
- Choosing a paint roller
- Roller classification
- We prepare the ceiling for painting
- DIY effective ceiling painting technology
- Painting Tricks

Choosing a paint roller
In order to facilitate such a time-consuming process, like painting the ceiling, you need to choose the right tool. The rollers consist of a clasp (a metal rod on which everything rests), a cylinder and a handle. In stores, you can find rollers with different lengths of the shaft and handles:
- short - up to 30 cm;
- medium - from 30 to 45 cm;
- long - over 50.
Sometimes clasps are sold without a rod, hollow in the calculation that they can be used for painting walls and ceilings at close range, and also so that each customer can choose a rod of a suitable length. Some models are immediately equipped with a telescopic handle (similar to the one in the fishing rod), which extends up to 2 meters or more.
Even if you intend to use a stepladder, the best tool will be the one that is equipped with a telescopic extension for the roller (fishing rod), so you do not need to reach for the ceiling, and it turns out with the same effort to affect the entire area.
to contents ↑Roller classification

Among the materials that make up the cylinder cylinder, distinguish:
- foam rubber;
- pile;
- fur;
- wool;
- velor, etc.
Preferred are long-nap tools that pick up “dosed” paint (the foam rubber gets too wet) and helps to apply color evenly, even if there are bumps. Tops of perfection are rollers made of natural fiber (for example, fur, especially sheepskin). They serve long enough, and the material does not fall out.
When choosing a roller in the store, pay attention to the following parameters:
- The tightness of the pile. If you pull on the "threads" and they do not hold tight, do not buy such a tool so as not to waste time peeling off hairs from the ceiling;
- Diameter. The large size of the "drum" allows you to collect a significant amount of paint, but then the weight of the tool also increases, which is not very convenient;
- The presence of joints. Rollers made of artificial material, as a rule, have a greater uniformity of pile applied over the entire surface. Avoid products that have a pronounced joint, otherwise the ceiling will be uneven in color.
We prepare the ceiling for painting

Before you start directly painting with your own hands, you need to clean and level the surface. The process is divided into several stages:
- Using a wet sponge or a special polishing machine, we remove the old whitewash and clean the ceiling of collected dust.
- In the presence of bumps and depressions, it is necessary to level the surface with putty or cement. Find out more how to putty the ceiling for painting.
- We go through sandpaper to achieve the most even ceiling.
- We apply a primer and wait for complete drying.
- If there are skirting boards, they need to be painted with a brush.
to contents ↑But before carrying out painting work, do not forget to remove all the furniture from the room or cover it with plastic wrap, and lay newspapers or polyethylene on the floor. Now you can proceed to the final stage.
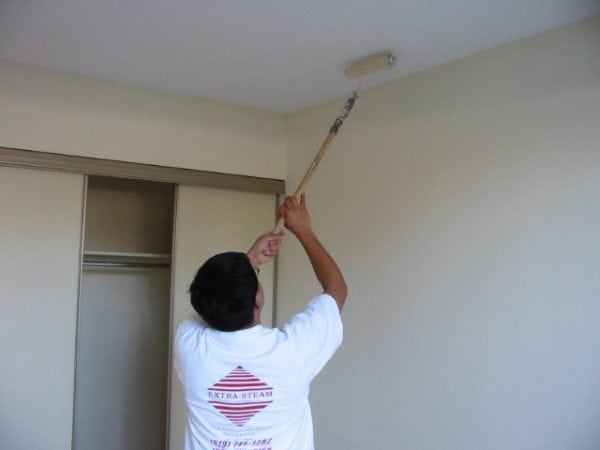
DIY effective ceiling painting technology

The whole difficulty of doing DIY work at heights is that you need to move around the room while maintaining the evenness of the paint, while quickly enough within 15 minutes or half an hour.
Do-it-yourself staining consists of several steps:
- Cooking tools: a small amount of acrylic or water-based paint is poured into the pallet. When we make the second layer, it needs to be diluted a little.
- Immerse the roller in the paint, looking to cover the surface on all sides. We remove the excess by rolling several times on the tray (often made corrugated). This will save us from smudges and protect the floor and head from drops.
- After the handle for the roller is attached, and if there is a telescopic system (rod), a convenient length is set.
- Holding the shaft of the roller at a slight inclination from the head, we begin painting from the window (or the front door), so the outgoing light helps us to monitor the correct application.
- After completing the first layer, you need to wait about 10 hours until it hardens.
- Paint is applied in 2-3 layers. The latter should go perpendicular to the very first.
Painting Tricks
Newcomers with experience can give some tips:
- The corners should be worked out with a brush, since only specialists can easily operate the roller on any surface.
- If you linger on one place for a long time, it turns out that one track will already begin to harden, and when you hit it with a roller with fresh paint, swelling may form, so your actions should be clear and quick.
- For the purity of the layer, it is better to call a second person who will ensure that all areas are processed without gaps.
- If you notice that you have overlooked the area somewhere and haven’t painted it, then in no case should you apply paint in one place. Wait for the complete layer to dry and walk over the entire area. So you protect yourself from the spotty ceiling.
It's no secret that it is not so difficult to carry out the finishing work yourself without calling the brigade. Certain skill and patience are enough. If you first decided to make repairs at home with your own hands, then before you start painting the ceiling with a roller with a built-in extension, practice on a piece of wallpaper or on a wall. So you learn the convenient length of the handle and learn how to hold the tool.