Plain wall covering - the most commonplace finish. It can quickly get bored, besides it does not give much scope for imagination. Originally decorated surfaces, on the contrary, will turn a house or apartment into a cozy nest pleasing to the eye.
- What are plaster stencils
- Types of stencils
- Choosing the right picture for the room
- Advantages of using stencils
- How to make a DIY stencil
- Image transfer
- Drawing a stencil on a wall
- Foundation preparation
- Stencil fixing
- Padding
- Screening
- Template removal
- How to make a pronounced bas-relief on the wall
In order to fully demonstrate their creative abilities, it is recommended to use a stencil for decorative plaster. With it, the walls can be decorated with any drawings, which looks aesthetically pleasing and very impressive.
What are plaster stencils
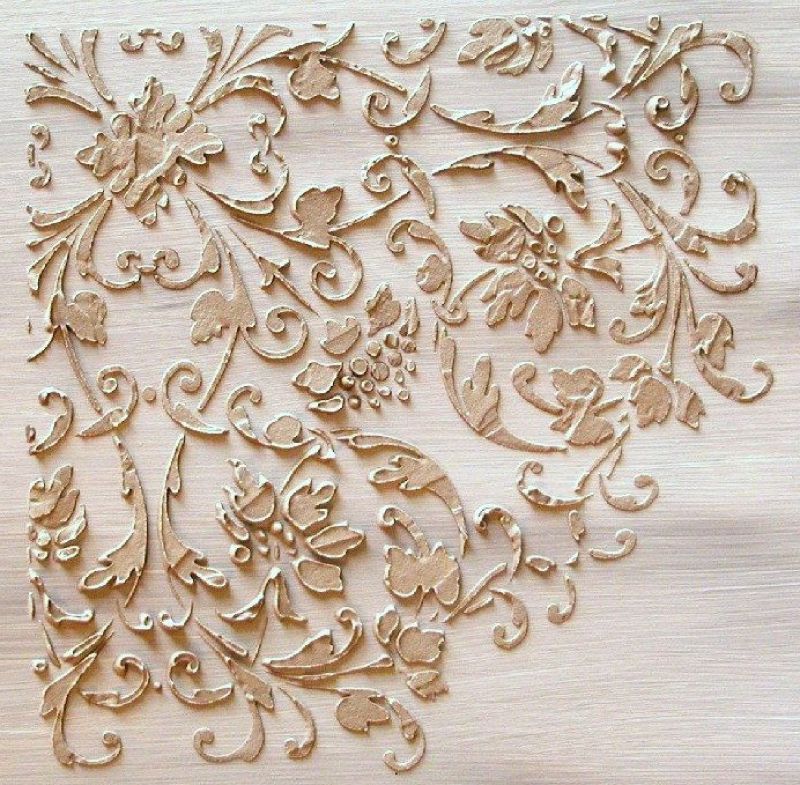
Often, masters use curly rollers to create an ornament on the wall. They are drawn on stucco that has not yet hardened, and slightly depressed pictures remain on the surface. Stencil for plaster works on a different principle. This is a sheet of plastic, rubber, silicone or other material of a certain thickness with a pattern embossed on it.
The stencil allows you to make the pictures on the wall three-dimensional, convex, because the pattern on the surface is slightly protruding. There are thin stencils, through them paint is applied to the images. In this case, the picture will be completely flat.
Stencils replaced the difficult to create and expensive at the cost of bas-reliefs. Previously, stone or gypsum carvings were used to make three-dimensional drawings, but now you can make an unusual decor with your own hands without extra costs.
The theme of the picture on the wall can be any, as well as a shade, and there are two options for choosing color solutions. In the first case, the decor has the same color as the main tone of the wall, while it stands out only with the texture. For the second option, contrasting colors are used, as a result, the picture is bright, catchy, immediately attracting attention.
to contents ↑
Types of stencils
The easiest way is to purchase a ready-made stencil in a hardware store, although you can make it yourself by choosing the image you like. Stencils are also ordered in printing workshops, where they are executed using a plotter and laser trimming. It is better if the template is transparent: this way you can control the process of applying plaster in the course of work.
Depending on the material of manufacture, stencils are as follows:
- Paper. Usually they are cooked on their own, printed from the Internet or cut out from magazines. The cost of products is minimal, but they are disposable and do not allow to obtain a three-dimensional image.
- Plastic Such templates can be used many times, they are quite thick (up to 5 mm), they are sold in any construction stores.
- Silicone and rubber. They are distinguished by durability, ease of mounting on the wall, help to create even the most complex drawings with many carved details.
Choosing the right picture for the room
The executed drawing should correspond to the general style direction of the interior. Pictures that repeat the ornament of furniture, curtains look rather successful, remind other elements of the decor. The use of stencils in children's rooms is especially popular, because with the help of plaster you can depict the characters of fairy tales and cartoons on the walls. In the bedroom, living room or other rooms in the house, designers advise making such drawings:
- Imitation of masonry or brickwork. Suitable for kitchen, hallway, living room. Rigid stencils in the form of bricks are used for the implementation, which are implemented in rolls and are stretched immediately to the entire wall or to a separate area.
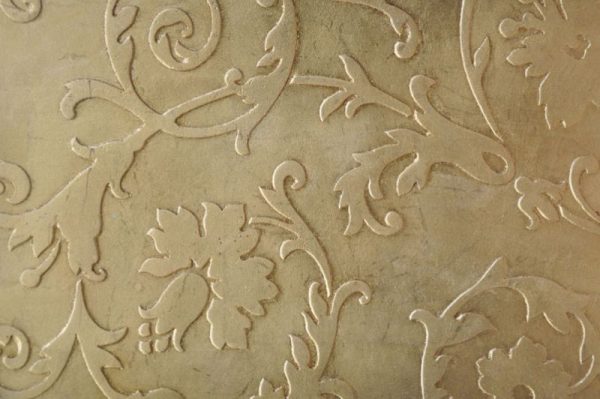
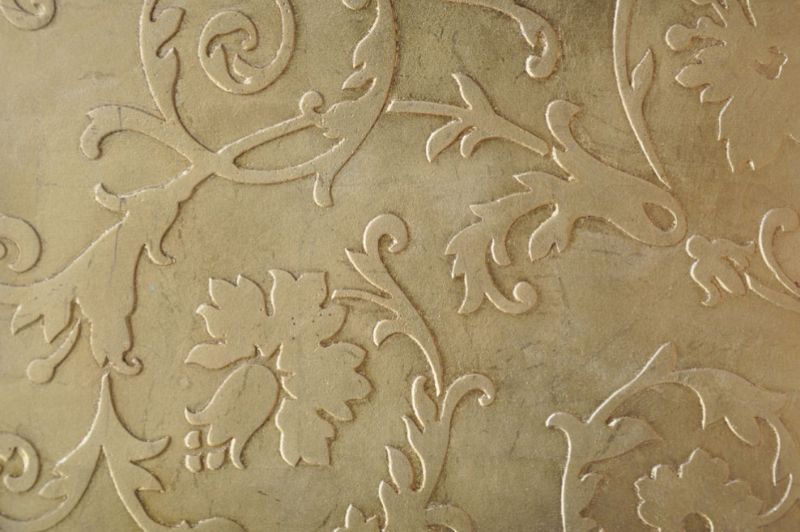
- Nature - flowers, leaves, trees, plants. Small repeating motifs can decorate rooms of any size, and overall paintings are suitable only for spacious rooms. Some elements can be distinguished on the wall with a carved frame.
- Animals, birds. Solo pictures of large sizes look especially impressive, however, they do not fit into every interior style.
- Geometry. Such patterns are applied in even stripes around the perimeter of the walls, ceiling, or in another way.
- Reptile skin, animal skins. Typically, this decor is applied on a specific section of the wall or covers its entire area.
When choosing a picture, a number of recommendations should be taken into account that will help make the right decision:
- if a hieroglyph, a symbolic image is chosen as a stencil, it is worthwhile to clarify their meaning in advance so as not to encounter unpleasant facts afterwards;
- it is not advisable to make the ornament too bulky, as it is rather difficult to perceive;
- it should be noted that the bright elements of the decor immediately shift the emphasis in their direction;
- no need to abuse the use of stencils - in most cases, it is enough to decorate with them only one wall or its separate zone, strip.
Advantages of using stencils
Having made the decision to decorate the room with stucco using stencils, you can fully use your imagination, because there are an infinite number of options and color schemes. If you wish, you can choose a drawing for any interior - classics, modern, provence, etc. Stencils have a variety of sizes, which allows you to use them in different rooms, even in the smallest.
Unlike the roller, the template gives a three-dimensional image, which looks unusual and catchy. With the help of stencils, there is a chance to successfully zonate the room, highlight the necessary sections, and focus on them. The technique of applying stencils to plaster is simple, even a beginner can master it without problems.
to contents ↑How to make a DIY stencil
The easiest way to make a stencil is paper, but it can only be used once. After contact with the plaster, the product will become wet, lose its shape. It is recommended to immediately prepare the required number of stencils, if it is decided to decorate the wall with repeating patterns.
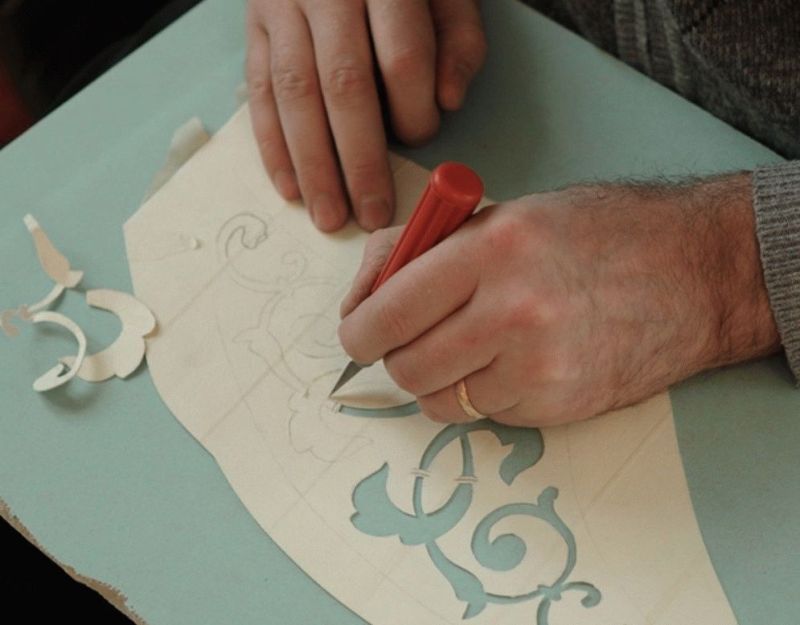
To create a stencil, you need to choose the right picture on the Internet, print it and cut it out. If you have an artistic taste, you can draw a template yourself, immediately thinking over the main colors and shades for decoration. If possible, paper is laminated or pasted with tape - so working with it will be an order of magnitude more convenient.
For reusable use, it is worth preparing stencils made of plastic - for example, from a transparent PVC folder for papers, a plastic bottle, a napkin, an acetate sheet. The paper template is transferred to plastic, pinned with buttons, circled with a pencil or marker, cut out with a stationery knife. Another available option is to apply silicone glue or hot-melt glue along the contour of the painting, let it dry and remove the finished stencil. This process requires accuracy and a certain skill.
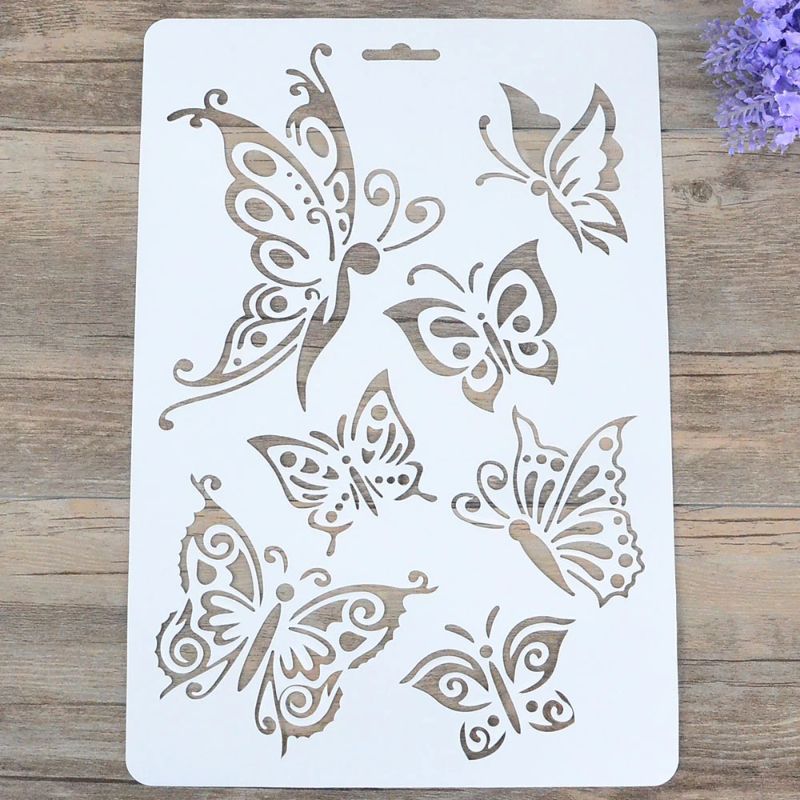
Image transfer
To copy pictures, you can use tracing paper or a sheet of thin white paper. Another option is to circle the image with a marker, cut out the internal cavities, including the smallest details, and then circle the contours on plastic or other durable material.To transfer repeating patterns to the wall, you need to mark it with a pencil on the level and ruler, otherwise there is a risk of skewing the elements. Cutouts on stencils should be strengthened with adhesive tape, bending its edges on two sides (front and back).
to contents ↑
Drawing a stencil on a wall
For work, you will need the selected stencil, decorative fine-grained plaster, primer, as well as tools and devices:
- spatulas of different sizes;
- fine sandpaper;
- paint;
- brushes and rollers;
- container for plaster;
- masking tape or glue spray.
If you are working with plaster and templates for the first time, you should practice on a rough basis, for example, on a piece of drywall. This will help to complete all the actions on the wall without errors.
Foundation preparation
The wall should be clean, dry, with a finished finish. To obtain the rapport effect, as in wallpaper, on the whole wall or in a separate section, appropriate marking is done. If the stencil will be used only once, a suitable place is chosen for it, the boundaries are indicated.
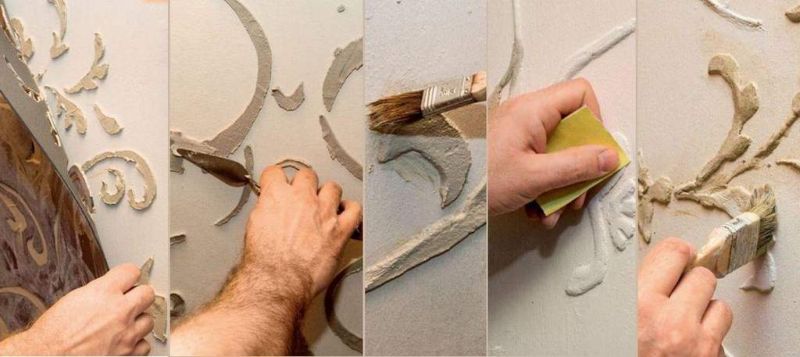
Stencil fixing
To fix the template, you will need a "temporary" glue or masking tape. A sticky element is applied to the back of the stencil, then the product is applied to the wall, held until it is firmly fixed. During gluing, the evenness of the location of the template and the correct ratio of individual elements to each other are necessarily evaluated.
Padding
Using a brush, soil is applied to the area that will be hidden under the plaster. After it dries, it will be possible to begin further work.
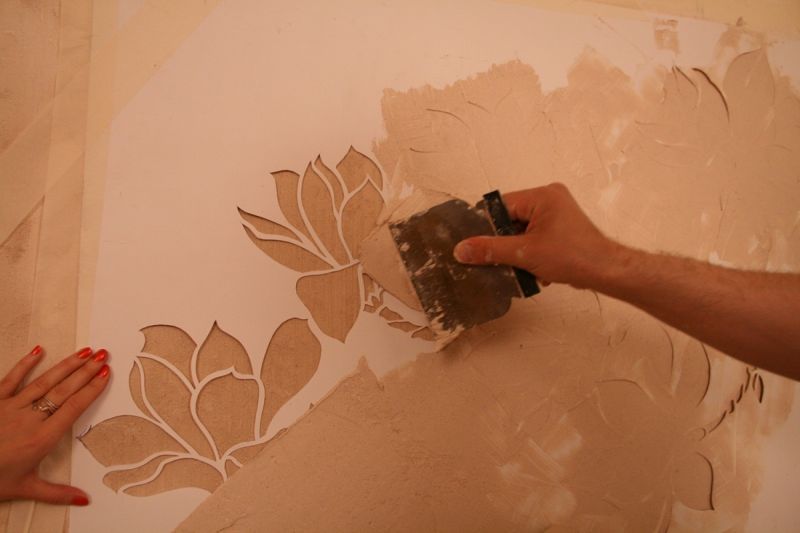
Screening
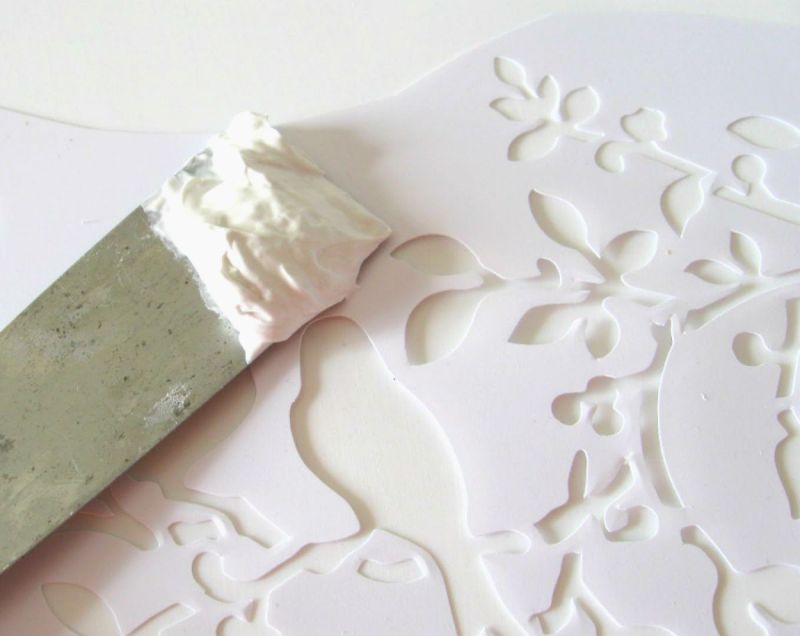
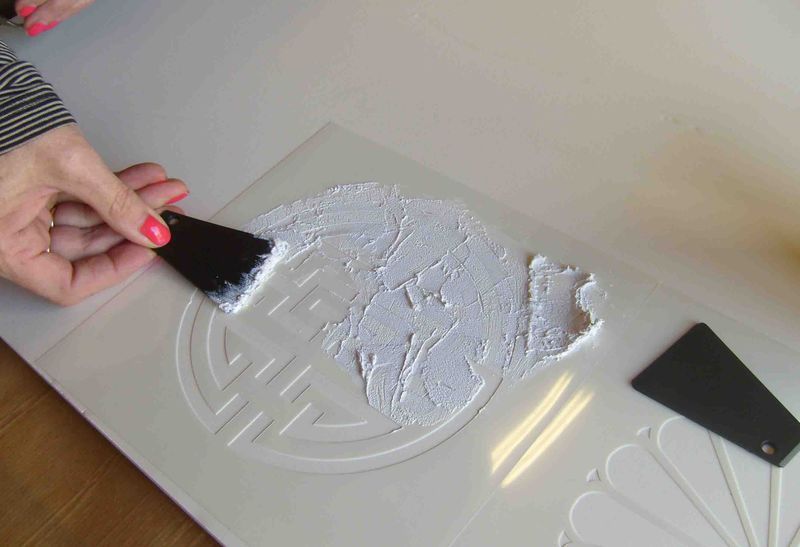
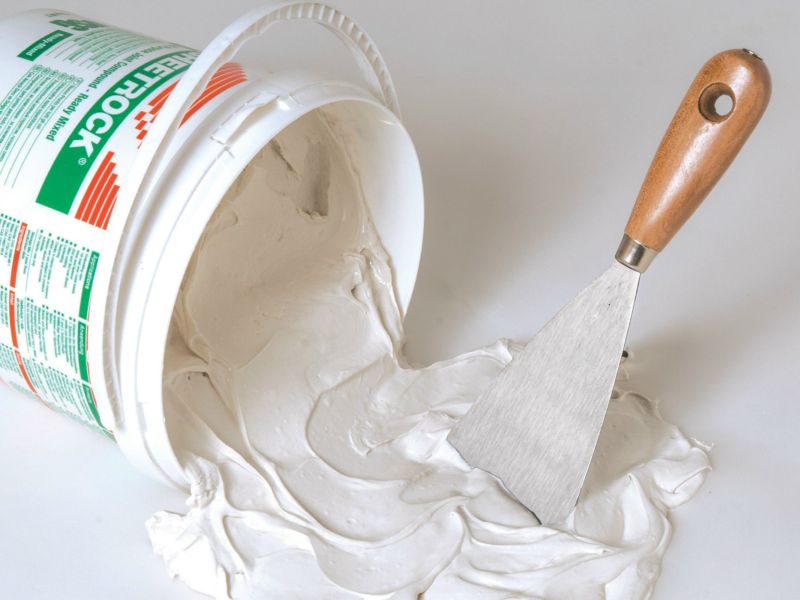
The plaster is diluted to a state of thick paste, in which there are completely no lumps. If the mixture is not viscous, it will not hold and will not form a bas-relief, and when removing the stencil, the contours may be damaged. A small portion is taken from the container with the plaster, applied directly inside the stencil, while it is completely covered. In the area of cuts, the plaster layer is compacted as much as possible. The edges of the sheet do not close.
Template removal
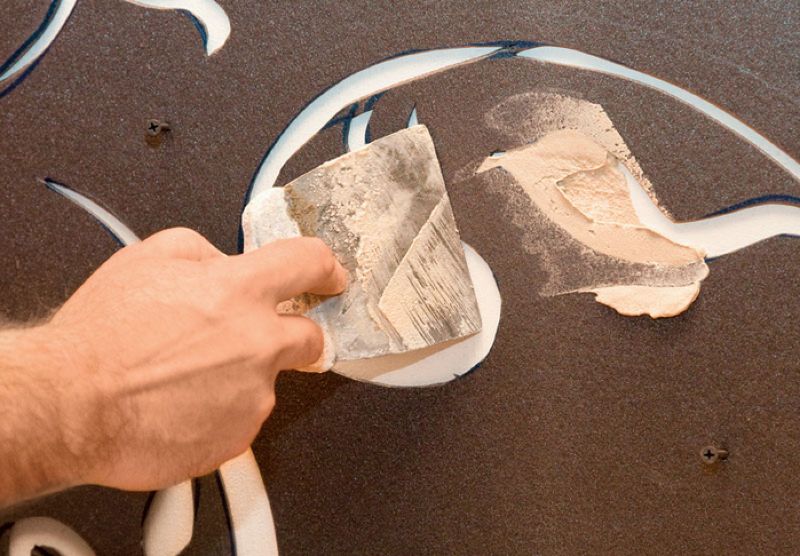
After some hardening of the plaster, but until the cure is complete, the stencil is removed by smoothly pulling on the edges of the sheet. In the end, when small cracks appear along the contour, it is removed by decisive movement.
to contents ↑Blurred edges after drying are ground to form sharper contours. If desired, some details can be rounded with a sharp knife to give the picture a realistic look.
How to make a pronounced bas-relief on the wall
After drying and grinding the drawing, the work can be completed. Nevertheless, additional coloring of the plaster will make the decor even more spectacular. The finished bas-relief is painted over with any suitable paint using a brush, a small roller or a regular foam sponge. You can use different shades of paint of the same color, or contrasting tones. First apply darker colors, then in the center - light. Such a technique looks particularly beautiful in floral designs.
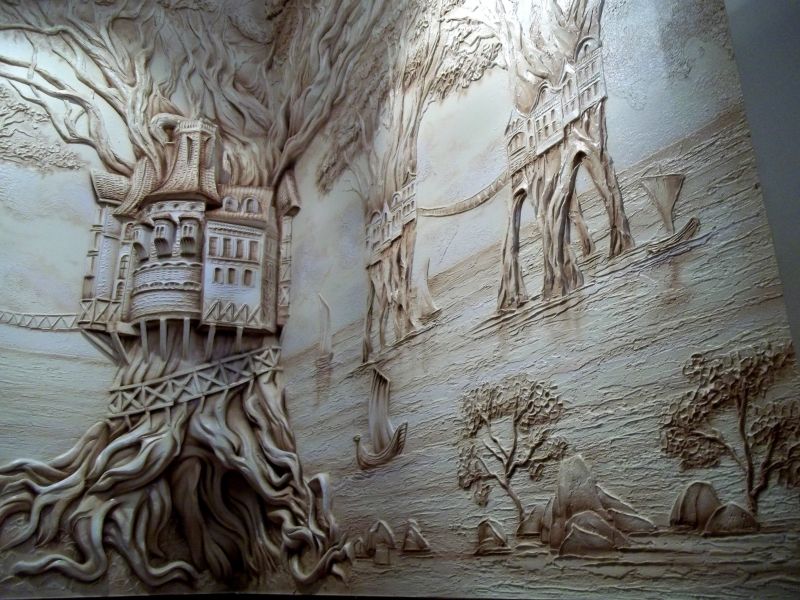
You can also apply other interesting methods for coloring bas-reliefs. They are covered with pearl paints, gold or silver, bronze. Using thin brushes on a volumetric decor, you can create a unique pattern that is perfect for large, solid pieces. It is convenient to cover the dimensional elements with spray paint, having previously closed the borders with the base with tape.
Using stencils is a great way to diversify the interior of your home. Three-dimensional drawings are suitable for office premises, transforming them and giving individuality and style!