Construction, repair, restoration or redevelopment often take place using chipboards. They are quite simple to operate, affordable and do not require complex preparation. Although some preparation - puttying - is still needed, otherwise applying paint, varnish or decal on the wallpaper will not be possible to achieve the desired quality.
- Surface preparation and choice of putty
- Acrylic and latex
- Oil-glue and oil
- Epoxy
- Puttying
- For painting
- Under the wallpaper

Surface preparation and choice of putty
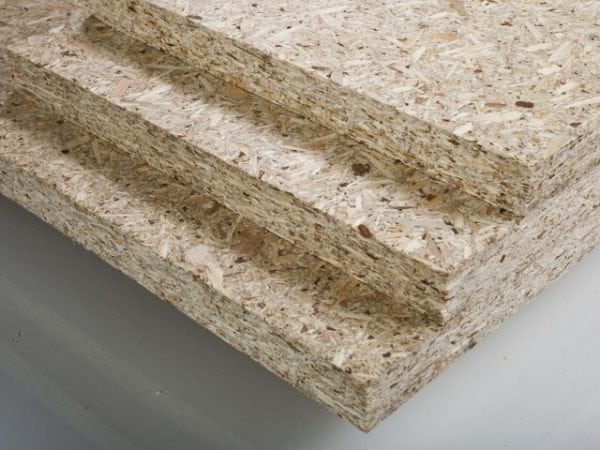
Everyone who has encountered repair or construction work knows very well how carefully it is necessary to prepare walls, floors, ceilings and slopes on windows for painting. After all, the very first layer of the applied coloring composition will help to manifest the slightest defects on the painted surface. This applies not only to concrete slabs or brick structures. Specialists quite often have to answer the question of whether it is possible to putty particleboard. Answer: puttying on the surface of a particle board is not only possible, but also necessary.
Such a plate is characterized by roughness and a huge number of tiny defects that are invisible at first glance. In addition, it absorbs moisture very well, which leads to its deformation, cracking of the applied coating and deterioration of the aesthetics of the interior. The use of correctly selected putty will help to avoid such phenomena. Thinking about what to putty on chipboard, it is worth paying attention to the numerous modern compositions created on the basis of acrylic or latex. Each of these compounds has its own distinctive features and positive qualities.
to contents ↑The choice is complicated by the fact that there are no formulations made specifically for particleboard on sale. The consumer will have to choose from a variety of putties designed to work with wood.
Acrylic and latex
Belong to the number of materials with low shrinkage, characterized by excellent elasticity. These are finely divided formulations with a high level of binder content. After application, they do not crack, do not crumble and make it possible to proceed to work with the finish coating.
Wallpaper can be easily glued to such a surface, it can be painted, polystyrene tiles and other materials intended for decorative decoration can be attached to it. Acrylic resin improves adhesion to the surface of the plate and due to its high elasticity makes it possible to create a textured coating. After drying, the layer becomes very durable and protects the plate from moisture, deformation.

The main difference and feature of latex putties is that due to the increased elasticity, it is possible to apply thinner layers of the composition to the base surface. The color compositions are made in wood shades and do not require finishing skinning.
to contents ↑Oil-glue and oil
They are used in cases where it is necessary to eliminate quite large flaws on the surface in the form of cavities or even small holes. Such means can be used to qualitatively seal the seams between the plates, it is easier to glue the wallpaper on them.
Epoxy
Putty based on epoxy resin and hardener is one of the two-component compositions. This allows her to harden fairly quickly, forming a high-quality and reliable protective layer. It is important to use hardener before use strictly in accordance with the attached instructions. Such putty is more likely related to building materials. In its composition there are additional substances in the form of fiberglass or even crushed metal chips. The composition can easily fix defects and defects that exist on the surface of the plate.

Puttying
Before you start painting, the surface of the plate is carefully treated with abrasive paper. You need to sandpaper with fine sandpaper after the assembly of the frame and the work on its lining are completed. The purpose of the performed manipulations is to obtain an absolutely smooth surface without the slightest flaws. In order for the putty layer subsequently applied to lie flat and hold firmly, the wall must be pre-impregnated with a primer mixture.
The primer is applied twice, in layers. Secondary processing is carried out after the first layer of soil has completely dried. Now you can think in order, how to putty particleboard:
- First of all, it is worth taking care of high-quality sealing of tile joints. When using the selected composition, the application occurs in such a way as to lay it as deep as possible inside the seam. Movement with a spatula is performed in such a way that there are no leftovers at the edges of the filler for the chipboard. Such a movement is called putty "on the seam".
- Then all the joints between the seams are glued with fiberglass tape, you can use the construction bandage "Serpyanka".
- After complete drying, you can begin to apply the first layer of putty. For work, you will need a steel spatula, the size of which depends on the skills of the one who will putty. The minimum size is the length of the canvas is 35 cm and the width is 10 cm. You can put the mixture on the canvas with a second spatula, the canvas of which is 10x10 cm. First of all, you need to repair all the dents and cracks on the surface of the chipboard, and then you can start puttying.

For painting
If the wall is being prepared for painting, then several layers of putty will be needed, the thickness of each should not exceed 3 mm. Each subsequent layer is applied only after the previous one has completely dried. The maximum number of layers is three.
After all the layers are completely dry, you can start sanding using fine sandpaper or a special mesh. It is better to fix it on a special stand or bar with perfectly even edges. This will prevent cavities or scratches during skinning. Having completed the work, the entire putty surface is thoroughly primed, getting rid of dust. As soon as the chipboard thoroughly dries, you can start painting.
We recommend that you get information about which is better to choose. chipboard paint.
to contents ↑Under the wallpaper
Under the wallpaper, the chipboard wall is covered with one or two layers of putty. It is important to perform movements so that there are no differences in one plane. Pay special attention to puttying corners - both internal and external.

It is best to use a special spatula-corner, but if it is not available, then you must first putty on one wall and only after the mixture has completely dried, do the same on the adjacent wall. The hand should move from the corner to the middle of the wall. Constant monitoring is important. The angle of 90 ° remains unchanged.
After drying, start working with sandpaper. Before stickering the wallpaper on the wall, there should be no hollows, scars or crumbs of putty. The putty plate can be coated with a primer, or you can use wallpaper glue instead.
Putting putty on chipboard is not much different from filling any other surface. It is important to choose the right composition for woodwork and use it as stated in the instructions.