Changing the design of the bathroom often requires major repairs in the room. This requires a lot of money. Therefore, the process of restoration of wall ceramics in recent years has gained significant popularity.
- Replacing Damaged Tiles
- Stitch Update
- Using vinyl stickers or film
- Drawing a paint
- The use of volumetric decorative elements
- Continuous tiling
- Overlapping tiles with other materials
Replacing Damaged Tiles
Initially, all tiles requiring renovation are inspected. From the entire volume of the facing material, you need to choose the tile that needs to be replaced. In order not to damage neighboring products, a chisel is used during dismantling.

Gentle excavation occurs as follows:
- Initially, all existing seams are thoroughly cleaned. To perform this work, a special scraper with a sharp blade is used.
- Using a standard concrete drill, several small holes are made in the central part. A chisel is inserted into them, tapping is carried out with a hammer until the tile is completely removed from the wall or floor.
- Carefully and carefully, with the help of a chisel and a hammer, the remaining part is knocked out from the center to the edges.
In place of tiles often remains of stucco or adhesive. They are carefully and carefully removed.

Damaged areas are replaced by a simple method:
- A new tile is tried on to match the old one and be on the same level. This is verified by a building level - hydraulic or electronic.
- Apply a glue mixture to the plane with a spatula. Its preparation is carried out in accordance with the instructions.
- The tile is installed in place of the old one, correctly pressed or taped. It is advisable to use a rubber mallet to prevent damage.
- Plastic crosses fasten a new product surrounded by old ones.
- As soon as the glue dries, the previously installed crosses are removed. Grout all the seams carefully.
After drying with a damp cloth, remove excess mixture. At the same time, builders do not recommend using detergents.

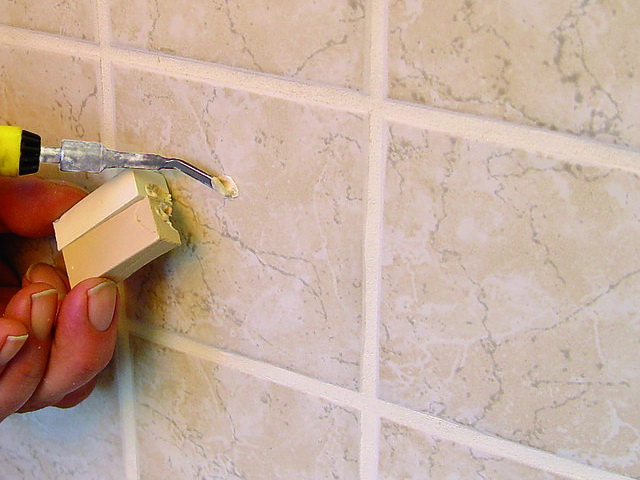
Stitch Update
In order for the seams to be attractive, they must be regularly cleaned with cleaning and detergents. Sometimes this method does not improve the appearance of the finish. In such situations it is necessary to replace the grout.
The process of updating the seams should be carried out in this way:
- Use a spatula or knife to remove obsolete grout. To soften it, builders are advised to use a special solution.
- The recesses that eventually formed are filled with new grout.
- After drying, it is advisable to proceed with the removal of the excess. This can be done with a damp cloth.
After updating the seams, the wall plane often begins to look like it was recently overhauled in a room. Performing such a job is cheaper than completely replacing a damaged and already ugly finish.
to contents ↑Using vinyl stickers or film
Cosmetically update the appearance of ceramics using vinyl stickers. They differ in such advantages as:
- water resistance;
- wear resistance;
- resistance to certain chemicals;
- attractive design;
- interesting design;
- affordable price.
Vinyl stickers enhance the look of old ceramics. They allow you to completely change the design of the bathroom or kitchen. In construction stores there is a wide range of such products.
To stick vinyl films, it is necessary to clean the product from contamination. The surface is additionally degreased, as otherwise the stickers will not be able to adhere securely to the plane.

to contents ↑Vinyl films have a small price. They can often be changed. Label alignment is preferably done with a plastic spatula. This device allows the quality to smooth the film, removing air bubbles from under it.
Drawing a paint
A more durable and complex way of cosmetic renewal is applying to the surface of the drawing with paint. This process is as follows:
- Thinking over a sketch or drawing. The easiest way to do simple geometric images. Colored touches or black and white rhombuses can become an attractive feature of any room.
- Designed image markup. To do this, you need a pencil and a small ruler.
- Cutting insulating tapes. It is carried out by an ordinary office knife. For a standard square with sides of 10 cm, 4 strips of 10 cm and 4 strips of 5 cm will be needed.
- Gluing previously cut insulating tapes on old products. At this stage, you must be as careful as possible.
- Primer made patterns. It is advisable to wipe with a brush or sponge all the places that were not pasted with insulating tape.
- Application of epoxy paint. It is carried out three hours after the primer. The latter should dry on its own without exposure to hair dryers or other heating devices. Otherwise, a large amount of dirt and dust will remain on the surface.
- Additional secondary coloring. It will be needed if the wall decoration is very dark or textured.
- Removing insulating tapes a day after creating the pattern.
Additionally, at the end, if necessary, it is allowed to manually correct the figure. If leaks form outside the tape, they can be scraped off with a blade. Within 24 hours, water should not get on the pattern.
 The stencil allows you to simplify the application of the image. It adheres to the surface and is removed after the epoxy layer has dried. Designers attribute ease of use and low cost to its advantages. As a result, you can get a more beautiful and high-quality work.
The use of volumetric decorative elements
Volumetric decorative decor makes wall ceramics attractive. Such decorations are often used:
- beads;
- small shells;
- pebbles, etc.
You need to attach the decor with a glue mixture. It is best to decorate those parts of the wall that are not soiled very quickly. Textured decor is much harder to wash.
Continuous tiling
Continuous staining is the easiest renovation method. It is used when the finishing material adheres well to the wall. There is a demand for the repair of cottages or rental apartments.
Preparation for a quality repair should occur in the following way:
- Detergents remove impurities.
- Using acetone or vinegar, the surface is degreased.
- The fine sandpaper removes the upper glossy layer, which improves adhesion.

Additionally, the surface must be treated with a primer mixture. The approximate period of its complete drying is 24 hours. Paint is then applied using this method:
- Material roller evenly distributed on the surface.
- The applied layer dries within 12 hours.
to contents ↑It is desirable to paint another 2 or 3 times. Full drying of all layers occurs three days after the completion of work.
Overlapping tiles with other materials
Old tiles can be covered with such materials:
- Putty mixture. Additionally, after drying, it can be sanded and painted. To increase the durability of the putty is transparent varnish.
- Silicone sealant. After its application, the tiles become brighter and brighter.
- Premium ceramics. It can be screwed or glued without the need to dismantle the old tile.
- Plastic. They cover the damaged parts of the walls.

There are several ways to restore a ceramic wall tile. Choosing the right one is necessary based on the availability of money and the skills for cosmetic repairs. Be sure to take into account the design of the room. If the restoration is carried out carefully and correctly, the old tile will take on the form of a new finishing material, having served for more than one year.


