Transitional painting is a creative way of unusual and attractive wall decoration using traditional paints. Also, this painting technique is called “ombre” in a different way, which is translated from French as “shade”. What is it and how is it performed? All this will be discussed later.
- Features of painting with tinting transitions
- The step-by-step process of creating a horizontal transition

Features of painting with tinting transitions
The traditional coloring of walls with paints in one color refers to the most inexpensive way of decorating. This finish of their surfaces is very simple, you can deal with it with your own hands. However, she looks bored, too simple. Therefore, before this type of painting more preferred sticker wallpaper.
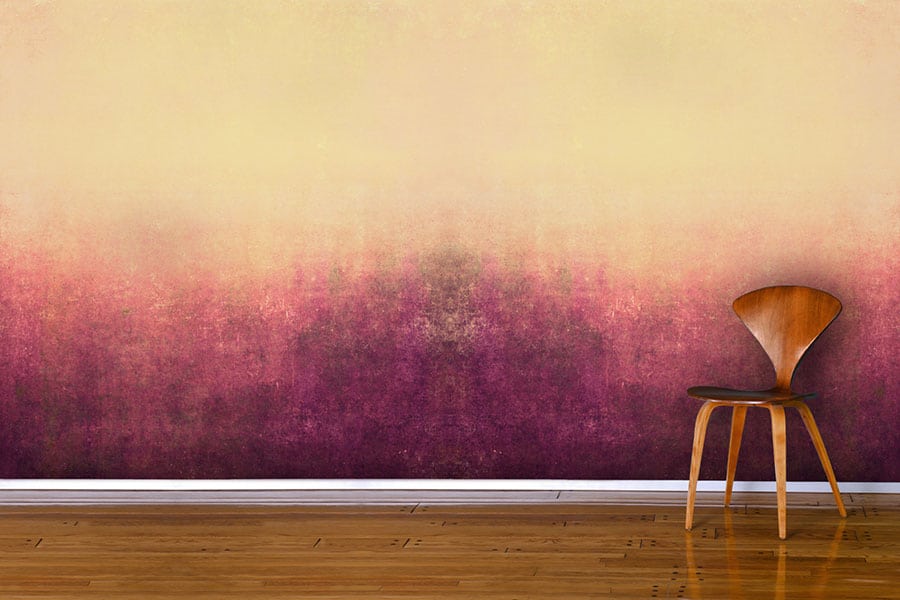
Now, thanks to the opening of the new ombre technique, everyone has the opportunity to inexpensively, but at the same time very effectively and unusually decorate the walls in any room. Why, in addition to an affordable price and a beautiful result, is it worth choosing a painting with transitions for decoration?
This method, simply put, is a combination of paints on one plane. Both close shades and completely different colors (up to 3) are used, which smoothly and gently transform into each other.
Due to this, a complex gradient surface is created where color and tint transitions can be performed in different ways:
- vertically;
- horizontally;
- diagonally.

This, in turn (depending on the location of the dark / light areas), helps to divide the premises into working areas. In addition, different grading allows you to create all kinds of visual effects in the rooms.
| Type of graduated painting | Effects |
|---|---|
| Lightening the upper part of the wall and darkening its bottom. | Visually increases the space. The ceilings seem taller and the floor looks more massive and stable. |
| Dimming the upper area of the wall. | Makes ceilings lower, but the room is visually expanding. |
| Lightening in the middle of the wall and darkening in the corners. | Allow the room to slightly round off visually. The space may narrow, and the details of the interior begin to stand out, becoming more prominent and contrasting. |
| The transitions of shades are waved or diagonal. | They bring more dynamics into space. The interior does not look very strict and geometric, due to the fact that all the angular outlines of the details are visually smoothed. |
| Spots with widening transitions. | They add depth to the wall planes and “break” their rectangular geometry. |
| Darkening in the middle of the wall with simultaneous clarification of the window and corner areas. | Visually makes the room lighter and more spacious. There is a decrease in contrast, due to which the lighting looks brighter, but, at the same time, soft and pleasant. |

All of the above makes this method of painting walls, unlike the traditional method, preferable, since they can effectively adjust both the width and height of the rooms, as well as create the desired atmosphere in the rooms. And although it is more laborious, the effect obtained from it is worth studying this technique. After all, there is nothing super complicated in it, so any adult who has at least some skills in painting work can cope with it with his own hands.
to contents ↑Step-by-step process for creating a horizontal transition
Horizontal ombre is the most popular, well-looking room decoration. It is possible to paint a wall with such a smooth transition from one tone to another with a brush or roller. But applying them, you still have to solve the problem of polishing the transition shade, and this will take a lot of time and labor costs. The result will be in the absence of good building skills is not as neat as we would like.

The best quality result can be achieved using a spray gun. It has a function for adjusting the intensity of the supply of coloring compounds, which allows you to create a natural “halo” of a lighter tone on the treated area. It can be used as a border between different-colored areas. That is, this tool is functional and easy to use, therefore, we will consider the process of painting walls with graduation using it.
The ombre technique with its application includes the following steps:
- First, the paint (in accordance with the type) of the primary color is diluted with a viscometer to the desired consistency.
- Then, in the same way, paint of the same brand is diluted, only in white.
- In the next step, color and white paints are mixed together until a uniform maximum light state.
- Then the resulting composition is poured into a spray gun, after which it paints the entire area. This will be the base color. After completion of work, the tool should be washed well.
- At the next stage, uncleaned paint is poured into a clean spray gun, after which it will need to apply a dark strip at the bottom of the wall. The painted area should not exceed one fourth of the entire height of the wall. When the upper part of the strip is created, in order to smooth the borders for a soft transition of tones, you will need to move the spray nozzle to the desired distance from the plane. Also at this stage, to achieve a lower supply of the coloring composition can be achieved by reducing the passage on the locking needle.
- Then the spray gun is again washed and already refueled with lighter paint. In order to avoid damage to the wall at this stage, first sprayer needs to work on cardboard. The purpose of this is to achieve by adjusting the supply of paint or changing the distance of the spray gun relative to the plane of a lighter color than it is on the upper border of the first applied dark strip. After selecting the right tone from the cardboard, you can proceed to painting the walls directly. In this case, apply a lighter strip over a darker layer to half its height. The upper edge of the second strip is also made lighter, as is the “halo” of the first.
- The subsequent, last strip should be applied in the same way. In this case, the paint should be slightly darker than the base color in which the wall was originally painted. At its upper boundary, it will also be necessary to create a “fog” by adjusting the distance of the nozzle from its surface. He should smoothly go to the base color to the ceiling.

Using the same principle, color transitions are created horizontally, diagonally. Of course, the first time painting with such a technique may not work. For proper execution you need to fill your hand. That is why all the steps described above should first be repeated on a large piece of cardboard that simulates a wall plane.

