Drywall as a finishing material is almost indispensable. It hides all the irregularities and flaws of the walls and ceiling, with its help you can create multi-level surfaces with any shapes that fantasy and taste can suggest. It is important to note that painting drywall without putty is not advisable. Consider the nuances and features in more detail.
- Why plasterboard is putty
- Where to begin
- Jointing and re-priming
- Putty of gypsum plasterboard surfaces
- The final stage of preparation for painting
- Drywall Paint
- Paint consumption and necessary tools
- Dyeing


Wall decoration with painting is a more affordable option. In addition, painting is easier than gluing huge sheets of paper, which still need to be measured and adjusted correctly for the pattern of neighboring fragments (if the wallpaper is patterned or embossed).
Painting gives great scope for the embodiment of the design component - with the help of various colors and additives, you can create any ornament or pattern that will make the decoration exclusive.
to contents ↑Why plasterboard is putty
At first glance, such a smooth material does not need additional alignment before painting. However, the putty functions are not limited to just alignment. Putty:
- increases the strength of the surface material,
- increases the adhesive properties of the base (the paint holds better)
- reduces surface absorption
- evens out the color of the applied coating.
Drywall in its essence is gypsum boards glued with thick cardboard. Despite its density, cardboard is still paper, and, therefore, absorbs moisture very well.
The paints that modern industry produces, for the most part, have a water base, that is, they will certainly be absorbed into the material. Because of this, paint consumption is significantly increased.

Another characteristic of drywall is its tendency to uneven drying. As a result, the painted surface becomes spotty.
If wall painting implied in a warehouse or utility room, the end result may not be of great importance. But in living rooms it is better to do everything according to the rules.
You can not putty before painting the entire area of drywall boards, but the joints and attachment points must be puttied. However, in this case, the secondary primer should not be applied in one layer, but in two.
to contents ↑Where to begin
The first step is to clean the surfaces of dust with a vacuum cleaner. Next, you need to check whether the heads of the screws with which the plasterboard plates are attached are “recessed” enough into the walls.
This is easy to do with a conventional spatula. Just slide it with a blade over the fastening points - the tool should pass without snagging or bouncing. The protruding screws are tightened with a screwdriver or a screwdriver.

Now all surfaces must be primed.Use deep penetration formulas and a brush-brush (a wide brush used for whitewashing) or a long-haired roller for this purpose. Usually this work is not difficult. The most important thing is not to miss a single centimeter of the treated surface.
to contents ↑Jointing and re-priming
The next step is to reinforce the joints with a serpentine tape and putty them. A tape with a width of 5 to 10 cm is laid on the seams so that the caps of the screws are also covered. Top you need to put a putty mortar and "stretch" it on the surface with a wide spatula.
After drying (this process takes about 12 hours), the seams are rubbed with sandpaper or abrasive mesh. So that there is no doubt about an excellent result, shine a flashlight on the wall at a slight angle. The slightest roughness will reveal itself as a shadow.
to contents ↑Next, a secondary primer is made in one coat. If painting without putty is implied, then an additional layer of primer is applied. If you want to do everything on a professional level, proceed to the next step.
Putty of gypsum plasterboard surfaces
All that is needed for the most critical step is a putty mortar and the tool with which it is applied to primed surfaces. It is better for beginners to purchase a ready-made solution, and “stretch” it - with a spatula 25-35 cm wide.

For those who have more or less got their hands in such works, you can prepare the solution yourself from powder putty. With an increase in skill, it becomes more convenient to putty the walls with a metal grater (width 25-35 cm).
Before starting work, it is very important to check that the putty is homogeneous, that is, that there are no solid particles in it that leave fissures on the surfaces. If you use powder putty, do not make the solution immediately from the entire amount available. The mixture begins to thicken after 40-50 minutes, so you need to cook it in small portions.
The procedure is as follows:
- A small amount of the finished solution is collected with a narrow spatula and transferred to a wide one - the one that is prepared for work. The putty is evenly distributed over the entire width of the tool blade.
- The process of filling the ceiling begins at the junction with the wall, the wall - from the upper corner (any). The spatula is located at an angle of 20-30 degrees to the surface. The solution is applied with a layer of 1-2 mm with sweeping movements, it is very important not to change the pressure force.
- Corners are processed last.

The final stage of preparation for painting
When the putty surfaces are completely dry, they should be sanded. To do this, use a special grater. Smoothness is checked by a flashlight.
If you find a cavity in a certain area, fill it with a putty mortar, and sand it after drying.
Further, professionals recommend another primer before painting. And finally, the drywall finish is completely ready for painting.
to contents ↑Drywall Paint
Plasterboard sheets used as decoration in the living room, bedroom or hallway can be painted with any water emulsion and water dispersion paints. With regard to the kitchen and bathroom, you can take oil paint, or enamel, or acrylic paint. A water emulsion and a water-dispersion emulsion is also suitable, but not any - it is necessary that its characteristics indicate increased resistance to water condensate.

Aqueous emulsion paint has gained popularity in the market of finishing materials in that it does not smell and has a snow-white color, which is easy to turn into any other with the help of a color scheme. Another plus of the water emulsion is the simplicity of giving it an invoice using either a long-nosed roller or special rubber.
Acrylic paint also allows the use of additives that transform the appearance of the painted surface. But texture is not its property.
to contents ↑Paint consumption and necessary tools
Average paint consumption - 1 kg per 5 square meters of surface.However, this figure may vary depending on the type of paint and the method of application.
The walls and ceiling are painted with a brush or roller with a drum 150-200 mm long:
- short pile (4 mm) is used for glossy paint,
- medium pile (4-8 mm) - for matte paint,
- long-nosed foam roller is not necessary to use, because on plasterboard he leaves behind stains;
- flat brush 60-80 mm wide:

The brush is used to paint the perimeters of the walls and ceiling, as well as the borders of the protrusions, if the finish is multi-level.
Important! Before using a roller with the possibility of replacing a fur coat, keep in mind that it cannot be changed until you have painted over the entire area of one wall or ceiling as a whole.
Otherwise, differences in texture will be clearly visible. If the design of the roller does not provide for the replacement of a fur coat, then another roller also cannot be used until the end of the painting process of one area.
to contents ↑Dyeing
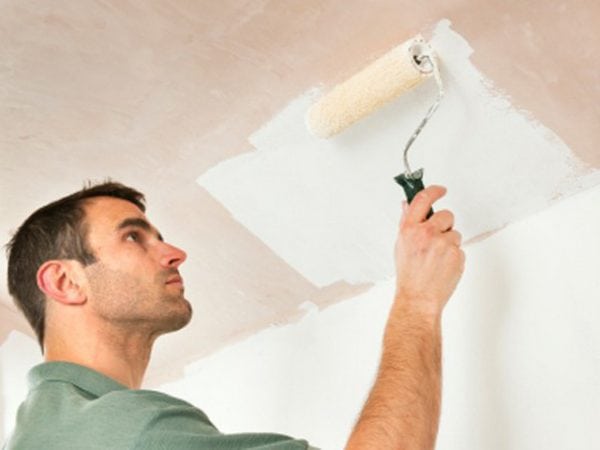
The ceiling in the room is the first to be painted. Before painting directly, you need to protect the top of the walls from accidental brush strokes with a roller. This is done with a plastic film and masking tape.
If you plan to make a multi-color drawing, then the borders of the fragments should be marked with a simple pencil. Masking tape is pasted on the outside of the border. After painting and drying the fragment in the same way, the next section is limited and stained.
Before painting the general background, you should walk along the perimeter with a brush, then a roller comes into play.
There are several rules:
- Painting is always carried out in several layers (at least 2), because after a single stain the putty will shine through. If only joints of drywall boards are puttied, the solution may be visible after the second coat of paint.
- Each layer is applied in one direction, the next layer is perpendicular to the previous one. It is worth covering the area with the next layer only when the previous one is completely dry.
- The walls are painted from the bottom up, which guarantees the absence of drips.
Upon completion of the painting, the perimeter of the ceiling must be decorated with a ceiling plinth.In general, when painting gypsum plasterboard constructions, putty cannot be dispensed with.
And save too. If you exclusively process the seams, you will need to apply an additional coat of primer and 1-2 additional coats of paint. It is better to follow the technology, because it has been developed by many years of experience and not without reason adopted. Read more about this technology in the article “DIY plasterboard painting«.