The needlewoman often raises the question of how to transfer the pattern from paper to fabric with maximum efficiency and preservation of important details. Drawing the contours of the image will be required for embroidery - manual or machine. There are many ways to transfer images to matter, it is worth considering them in more detail.
- Necessary materials and preparation
- Translation of the pattern on matter
- Copy paper
- Cigarette paper
- Nosing
- Transparent fabric
- Laser printer
- Solvent
- other methods
- Resize a picture
Necessary materials and preparation
Depending on the ways in which the drawing is supposed to be translated, different devices and additional materials may be required. Here is a sample list:
- carbon paper or tracing paper;
- thin cloth;
- a simple pencil, chalk;
- needle;
- transfer pencil;
- pins
- iron;
- lamp;
- glass;
- a printer;
- fabric and pattern.

In preparation, you should print the image. You can make a drawing in any program on your computer that performs graphic images and prints them. If the pictures are small, they are printed on one sheet.
to contents ↑All borders should be clear, bold, clearly visible - it will be easier to transfer the pattern to the fabric. You can even artificially increase the contrast and saturation of the lines, if possible, remove bright details from the picture.
Translation of the pattern on matter
The following are the main methods by which the image is transferred to the base.
Copy paper
The easiest way to transfer images is based on the use of carbon paper. It is produced in different colors:
- the black;
- white;
- color.
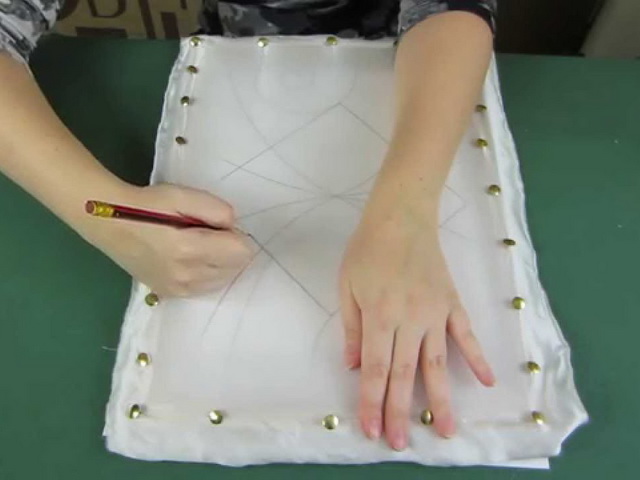
The color of the carbon paper should be selected taking into account the shade of matter. It is easier to find dark paper on sale, white is rare. To translate the drawing put a carbon paper, on top - a printed blank. A simple pencil circled the drawing, carefully clicking on the contours. You can prick the contours of the drawing with a needle - colored dots will remain on the fabric, copying the drawing.

It is impossible to achieve a clear result if the details of the picture are small: they turn out to be blurry. The technique is suitable only for smooth matter or burlap. On fleecy, fluffy fabric, the image will remain blurry.
The minuses of the method include the high “soiling” ability of carbon paper - usually ugly marks are visible on the fabric.
to contents ↑Cigarette paper
Tracing paper or tissue paper helps transfer the pattern onto fabric without carbon paper. The method is used for thick fabrics - velvet, velor, shiny bases.
First, you need to translate the pattern on tissue paper. Then the paper matrix is placed on top of the fabric, fixed with safety pins (instead of them, you can take stationery clips). Then, right on the tracing paper, the pattern is sewn with neat stitches, the paper is torn off so as not to damage the threads. The embroidered pattern is ready.

Nosing
The technique of creating a decal is suitable for all types of fabric - linen, cotton, silk, with a smooth surface or with a pile. There is no difference in the shade of the fabric - the base can be dark, light. Using the method, you can transfer a picture simultaneously to several sections of matter.
The procedure is as follows:
- Prepare the matrix. To do this, you need a board, which should be covered with felt and put the required number of sheets of tracing paper. Their maximum number is 6.
- Pin the drawing to the upper tracing paper. Use a needle to pierce holes in the pattern as often as possible. The needle should be thick and the gaps between the holes should be equal. To work it was convenient, the sewing needle is stuck into the pencil with the back side, leaving a sharp tip. Holding a pencil is much more comfortable than a regular needle.
- Separate the matrices, arrange them one by one (cloth plus tracing paper), chop them with pins. To wipe each matrix from the side of tracing paper with a solution of blue, kerosene, tooth powder. The solution will leave an imprint of the pattern on the matter through the holes.
- Dry the tissue for an hour, remove the tracing paper before that. The matrix can not be thrown away, but sweep away from it the remains of the solution and save.
- Draw the contour of the picture immediately or flash it with a thread.
The solution for light and dark tissue is not prepared in the same way. In the first case, 100 g of purified kerosene, 10 g of blue, 2 g of tooth powder are mixed. For the second recipe, 100 g of kerosene, 10 g of powder without blue are combined. Mix the product in a ceramic bowl.
Instead of tooth powder, you can take chalk for dark tissue, and activated carbon for light. Some needlewomen simply sprinkle light materials with blue without the use of kerosene.

Transparent fabric
There are thin, transparent fabrics on sale - non-woven, marquise, silk, veil, nylon, georgette, organza. They can also be used to translate pictures, if you plan to make the main product from them.
To work, you need to put a picture, fix the fabric with pins on top. The contours of the picture will be perfectly visible, so on the front side of the fabric you can immediately draw with acrylic paints without a rough draft. Work is best done on a thick wooden board, plywood.
to contents ↑Laser printer
For this purpose, you will have to purchase paper for freezing (freezer, freezer paper). It is usually used to freeze food, but the material has long been adopted by needlewomen. On the one hand, the paper is smooth and easily ironed to the fabric, leaving prints on it. The main fabric should be prepared on which the drawing will be made (preferably linen, cotton).
Operating procedure:
- Cut a sheet of paper for freezing, equal in size to A4.
- Iron the sheet with the shiny side to the fabric, iron all corners well so that the freezer does not come off.
- Cut the fabric along the borders of the sheet so that the threads do not stick out (they can ruin the printer).
- Put the blank in the laser printer, making sure that the drawing is obtained from the right side.
- Send the image to print (the printer may fail at first, then the procedure should be repeated).

If the picture will be further sewn onto clothing, it is necessary to use the Mirror Image function in the graphics program or in the printer driver window. In this case, the pattern is printed on the right side.
to contents ↑Important! Always use the preview before printing the image.
Solvent
You will need to print the drawing on thick glossy paper so that the paint probably does not leak through it. Then attach the corners of the picture to the paper with needles, buttons. Prepare a cotton swab, wrap it with a cotton cloth, moisten in a solvent. Impregnate paper onto the fabric with solvent.
To improve the result, attach the bottom of the spoon to the drawing, press it well along the contour. Ink will leak onto the fabric on which the same image will be obtained.

other methods
If there is no carbon paper at home, you can try to transfer the picture on the window - through the glass. Using tape, fix the fabric and pattern, then circle with acrylic paints and a marker. A more “advanced” variation of the method is the use of a light tablet.
Some craftswomen trim the outline of the pattern through tracing paper on a sewing machine. Here you will need some skill and work experience, otherwise the image will be uneven. The process is complex, time-consuming.
Another option is to use a pencil for translations. They transfer the mirrored pattern to the tracing paper, then apply it to the fabric, iron it with a large amount of steam. Such pencils usually do not lie on synthetics, so you will have to use only linen or cotton fabrics.
A simple way to transfer a picture is to use thermal transfer paper. It is bought in specialized online stores. The pattern is printed directly on such paper on the printer, then applied to the fabric, ironed with steam. The result will be much better if the printout is done in the workshop - the drawing will turn out to be juicy, not smeared even after washing.
to contents ↑
Resize a picture
Sometimes you need to change the size of the picture for the fabric - to make it larger or smaller. To do this, the image is divided into approximately equal squares, and on clean paper a grid is made of the same number of squares, but of a larger (smaller) size. Then, the drawing is manually transferred along the lines that are taken from each square.
The result is a picture with the desired parameters. It is best to break the drawing into many squares - so the finished drawing will be the most accurate. After it can be transferred to the fabric in any convenient way.


