Easter is approaching: in 2019, it falls on April 28th. It is very difficult to calculate which day falls on Easter: it takes into account the days of the spring equinox, the dates of the full moon and other data. Despite the fact that the holiday date is constantly changing, the tradition of painting eggs remains unchanged. Easter eggs begin to cook on a clean Thursday, using a variety of ways and unusual ideas for coloring.
- Easter Roots
- Types of Easter Products
- Preparation for painting
- Onion peeling
- Onion peel: options
- Onion husk and green
- Peeling stained with patterns
- Beetroot painting
- How to create patterns with rice and paint
- Food Coloring at Home
- Using a wax pencil to decorate
- Turmeric Dyeing
- Colorful eggs with a cloth
- Napkin for painting
- Marble method without green
- Marble Nail Polish
- Decoupage napkins
- Beautiful stickers
- Foil
- Drawing with markers and felt-tip pens
- Easter eggs with polka dots
- Striped Easter Eggs
- Easter egg mosaic coloring
- Natural dyes for Easter eggs
- Beets and cranberries
- Turmeric - Egg Coloring Video
- Nettle and spinach
- Blueberries
- Red cabbage
- Coffee
- Tea
- Juice of carrots, sea buckthorn, grapes

Easter Roots
Why is it customary to paint eggs on Easter, why is it necessary? There are various options where such a tradition came from. One of them says that the egg was brought to the Roman emperor by Mary Magdalene, an ardent supporter of Christ. She told the story of the resurrection, to which she received an answer about the implausibility of the story. “Eternal life is as much as a red egg,” said the emperor. After his words, the shell immediately blushed.

to contents ↑According to another version, the tradition is connected with the fact that the block with which the tomb of Christ was closed resembled an egg in shape. Another history of the emergence of tradition indicates that in the family of Emperor Aurelius, immediately after his birth, a chicken appeared that lays red eggs in a speck. As a result, the inhabitants of Rome began to exchange colored eggs.
Types of Easter Products
You can beautifully paint eggs with different methods. The most interesting and popular ways gave the name to these types of Easter eggs:
- Krashenki. This is a familiar product for everyone, the coloring of which was made in one color.
- Speckles. Such eggs must first be painted in a single color, and then arrange the droplets of wax and lower them in a contrasting color. After washing off the wax, the original specks will remain on the shell.
- Drapanki (shkryabanki). After coloring the eggs in one color, a pattern is scratched on its surface with a sharp object.
- Easter eggs. The work of creating them is the most difficult. The patterns on the eggs are painted with acrylics, liquid wax, embossed paste.
- Laziness. Such products are prepared without dyes using thermal stickers.
- Stickers. Eggs of this type are originally decorated with glued beads, cereals, beads, and other decor.
- Malevanki. Obtained by coloring by any convenient method. Most often, this method is used on wooden blanks.

To visually see the staining process, you can watch a developing cartoon or video on the Internet.
to contents ↑Preparation for painting
Before staining the eggs with their own hands, they need to be boiled. Before cooking, the product is taken out of the refrigerator so that it regains room temperature, otherwise the shell may crack during cooking or during painting. Other preparation rules:
- it is better to choose eggs of white color - on beige, brown, the final shade may be distorted;
- during cooking, add a spoonful of salt to the solution in 2 liters of water;
- Before putting into water, the shell should be washed with a sponge with a dishwashing liquid - the paint will lie evenly (instead of washing, you can wipe the product with alcohol);
- cooking time for eggs - 10-12 minutes.

Is it possible to eat eggs stained with food colors? Despite the harmlessness that manufacturers are talking about, it’s still better to use natural colors for baby food, they certainly will not do harm. When staining, you can introduce vinegar into the solution (a spoon of 9% solution per 1.5 liters of water), then the paint will last longer. After the end of the process, it is recommended to grease the shell with vegetable oil and polish with a dry cloth.
to contents ↑Onion peeling
The most popular dyeing method at home involves the use of onion peels. It is better to stock up with onions in the fall, gradually removing and accumulating husks. If necessary, you can take it from sellers of onions, usually it remains in excess in trays.
Onion peel: options
To properly color the eggs with onion husks, you need to know the features of staining. Depending on the amount of husk and onion variety, the color of the shell turns out to be uneven: from light brown to crimson red. For example, if you take 500 ml of water and husk from 4 large bulbs, then the shade of Easter eggs will be red-brown.
The classic option for coloring Easter blanks is as follows:
- take the husk, pour water;
- bring to a boil, simmer for 30 minutes;
- cool the broth in a natural way;
- strain the liquid, add salt;
- boil fresh eggs in onion broth for 12 minutes, and the water should completely cover them;
- immediately fill the product with cold water;
- wipe the chilled eggs to dryness.

You can also boil onion peel in water for 40 minutes and leave it to infuse overnight. Usually this leads to a more pronounced result when staining.
to contents ↑Onion husk and green
To get brown-green eggs with marbled patterns, you will need the usual pharmacy brilliant green and onion peel. A bubble of brilliant greenery (10 ml) is diluted in 1.5 l of water. You also need to prepare gloves for the hands, threads and a piece of gauze or a nylon stocking. Marble eggs can be obtained in this way:
- tear the husk into small pieces or grind it with a blender;
- wet eggs, roll in pieces of husk;
- fix the onion “powder” with gauze or stocking, tie with threads;
- take water, pour the green stuff, put on fire;
- throw eggs in a boiling solution, cook for 15 minutes;
- pour the product with cold water, then remove the cheesecloth.

to contents ↑To give the eggshell an even more interesting color, you can mix the husks from red and ordinary onions - the workpiece will have a red-gold background with a greenish pattern.
Peeling stained with patterns
Naturally, harmlessly and very beautifully, you can decorate eggs with a sprig of parsley, dill and onion peel. On a wet wet egg, lay leaves of greenery, fix them with a nylon stocking, gauze. The product is put in a pan filled with husk, poured with water, also sprinkled with onion peels on top. Cook for 12 minutes, then rinse, remove the stocking, remove the leaves. The white image of the plant pattern will remain on the shell.
to contents ↑Beetroot painting
The use of beets is another simple way to color Easter food. First you need to squeeze the juice of the vegetable, then put in it a pre-cooked product. Typically, keeping the juice for 3 hours is enough to get a pink color. Leaving the eggs all night, you can achieve a burgundy shade.
Also, to create a brownish-pink tone of the shell, the beets are peeled, rubbed on a grater, and poured with a small amount of water. A teaspoon of vinegar is poured into the liquid, allowed to boil, boiled in a solution of eggs for 15 minutes. After leaving them for another hour, only then washed.

How to create patterns with rice and paint
This option is one of the easiest ways to make egg decor for Easter. For its implementation, food colors of three tones (for example, Dr. Oetker brand) will be required. Vinegar 9% and rice (1.5 cups) will also be needed. Croup should be divided into three packages, divided equally, pour dye and a little vinegar into each of them to fix the result.
to contents ↑In packages in random order put already boiled hot eggs, shake well, then squeeze with colored rice. Tie the bags tightly, leave for 15 minutes, so that the picture appears on the shell.
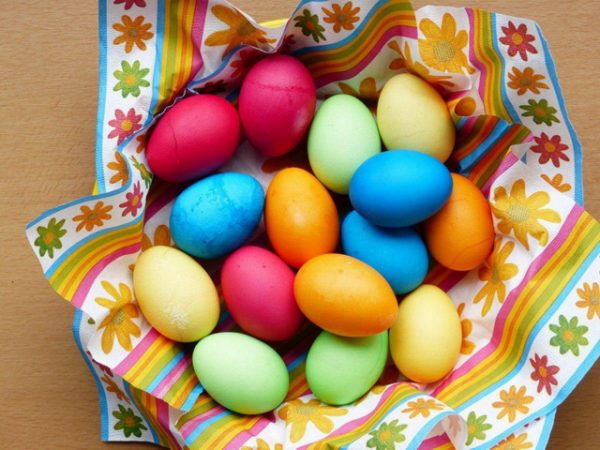
Food Coloring at Home
The use of dyes is a universal method for staining eggshells. There are a huge number of shades on sale - light and dark, pearlescent and matte. The easiest way is to purchase an Easter set in a store, dilute the dyes in disposable cups, immerse the already boiled product at the time indicated in the instructions. You can even mix dyes with each other to get new, interesting shades. It is recommended to pour a little 9% vinegar directly into the solution, so that the shell does not bite the hands after staining.
There is also a method of making rainbow eggs:
- take red, blue, yellow dyes, water, drying racks, vinegar;
- boil eggs, wipe dry;
- dilute each dye - take 100 ml of water on a tablespoon of pigment, pour a teaspoon of vinegar;
- dip the blank into the solution on one side ½, hold for 3 minutes, remove, dry;
- repeat the process on the other hand, dipping the egg in a different dye.

to contents ↑You can also spray on an already painted product with acrylics of a contrasting shade. This is convenient to do with a toothbrush or regular brush.
Using a wax pencil to decorate
First, you need to apply a pencil pattern to the shell to make waxing easier. If you have artistic skills, you can not do this. Using a wax pencil is more convenient, but in its absence, you can melt an ordinary colored candle. An already painted egg should be painted with wax melted over low heat, this should be done with a toothpick or match. After finishing work, wash the eggs. You can not do this with hot water: the wax will melt.
to contents ↑Turmeric Dyeing
Turmeric coloring is an original method of applying natural dyes. Pre-cooked eggs should be placed in a liter of boiling water, add 3 tablespoons of turmeric, pour 2 tablespoons of vinegar 9%. Dip the product into the solution, let it brew overnight. The next morning the shell will turn bright yellow.

Colorful eggs with a cloth
To implement this method, you will need pieces of bright fabric, which is prone to molting, about 18 * 18 cm in size. You also need white cotton fabric, 9% vinegar, water. The eggs must be wrapped in colored cloth so that there are no folds, fixed with an elastic band. On top of a bright wrap white cloth. Fold the blanks with their tails up in the pan, add water, add a little vinegar, boil for 12 minutes. After cooling, remove the "fur coat".
to contents ↑Napkin for painting
You will need ordinary white napkins, paints of any color, vinegar. Ready eggs are wrapped with napkins in 2-3 layers, mixed with water and vinegar, the solution is applied to the napkins with a syringe. You can water one blank with different colors to get colored spots. The cloth should be completely painted over. After 5 minutes, you need to remove the wrapper. Places that have not been painted over can simply be painted over with acrylics or left white.
to contents ↑Marble method without green
You can add a marble color to the product with food colors.First, boiled eggs are painted in a light tone (for example, yellow, light orange), then they are thoroughly dried. After dark colors are diluted with water, a little vegetable oil is introduced into each dish. Spend a toothpick over the spots of oil to make the "paths". Each egg is dipped into the water once, taking it with a gloved hand. After drying the workpiece, which shows the effect of marbling.

Marble Nail Polish
To carry out this technique, a water manicure technique is used. The procedure will be as follows:
- boil eggs;
- pour warm water into the container; drip nail polish;
- make any drawing with a toothpick - abstraction, stripes, etc .;
- take an egg, dip into the water with one side, then the other;
- the product is ready to be laid on a plate.
Also, with the help of varnish, you can simply paint the shell using different colors and interesting techniques.
to contents ↑Decoupage napkins
Specialized shops for creativity sell decoupage napkins with the theme of the holiday. Pictures must be cut, greased with egg white, attached to the shell. The technique is well suited for children, while the product is completely safe.
Beautiful stickers
This method is the easiest to decorate eggs. You can purchase absolutely any stickers - with ornament, flowers, Easter theme and many others. You need to choose small eggs, boil, put in stickers. Then pour boiling water into the container, put one piece on a spoon and dip in water. The thermal sticker will immediately narrow and begin to snugly fit the shell.

Foil
An interesting option for decorating blanks for Easter is the use of multi-colored foil, which is sold in any stationery store. Ready eggs need to be cooled, dried. Strip the foil so that they are enough to wrap the blanks. After that, you just need to wrap the last in foil and, if desired, glue the beads, confetti, rhinestones on top.
Drawing with markers and felt-tip pens
Painting Easter crafts with felt-tip pens is easy. You only need to come up with a suitable image in advance, sketch out the contours with a pencil, and then paint them in your favorite colors. Examples of successful decor are emoticons, faces of animals, floral themes, patterns and ornaments.
Easter eggs with polka dots
First you need to choose 2 tones that are well combined with each other, for example, blue and yellow. Then take both dyes, dilute in different containers. Dip the finished egg in the first container, hold for several minutes (as indicated in the instructions for the pigment). Next, you need wax. Any candle that needs to be melted will do.
Wax should be put on the workpiece points with a cotton swab. After the wax has hardened, dip the egg in a second paint, hold until a good color is obtained. To remove the wax, you need to hold the product a little next to the flame of the candle, and it is easily erased with a napkin.

Striped Easter Eggs
After boiling and cooling the eggs, you need to wind the threads or electrical tape on them, depending on what width of the strip is required. The electrical tape can be cut in half if it is too wide. Then you need:
- lower the workpiece into a glass with dye;
- remove and dry as it dyes;
- stick tape on already stained areas;
- dip the product in another paint;
- remove the electrical tape;
- Striped festive egg ready!

Easter egg mosaic coloring
To make paint with a marble effect, you need to paint the products in one color, then let them dry, sprinkle with vegetable oil. Then apply a darker tone, moving the brush in a chaotic manner. After drying, a drawing resembling a marble one will remain on the shell.
Natural dyes for Easter eggs
Many fruits, vegetables, plants are able to paint eggshells in beautiful colors. This is due to the presence of bright pigments in them, which can be absorbed into porous structures. Despite the less resistance of natural dyes, they are chosen more often for Easter, because the eggs obtained can be eaten without fear. Typically, birch leaves, hibiscus tea, and the products described below are used.
to contents ↑Beets and cranberries
Eggs can simply be boiled with peeled beets: in this case, it is permissible not to throw the vegetable away, but to use it for the salad. Also, the beets are ground on a fine grater, rub the shell with gruel, leave for 2-3 hours - the color will be very bright. Painting eggs with cranberries is easy: you just need to put them in the juice squeezed from the berries. You can replace cranberry juice with cherry.
Turmeric - Egg Coloring Video
To stain the turmeric shell, you need to do as recommended by the author of the following video:
Nettle and spinach
Plants can be used individually or together, the principle of their work is the same. It is necessary to grind the grass, add a little water to the “cream”, place eggs in it for 2 hours. You can finely chop the greens, add water, boil for 5 minutes, and then leave the finished eggs in this broth for 5-6 hours, the result will be approximately the same.
Blueberries
Blueberries give a beautiful purple hue to the shell. You need to make berry juice, grease the eggs well, or boil a “compote” of blueberries without sugar and place Easter buns in it for an hour.

Red cabbage
Staining with red cabbage gives the original blue hue to the eggshell. The procedure is as follows:
- cut cabbage into strips, pour water;
- turn on the fire, wait until the liquid turns dark;
- strain, pour in a little vinegar;
- soak the boiled eggs in this solution overnight.
You can also not filter the cabbage broth, but lay the blanks directly on pieces of vegetable: in this case, the shell acquires a marbled hue.
to contents ↑Coffee
Instant coffee (strong) will be an excellent alternative to dyeing Easter eggs with chemical dyes. Holding the blanks for an hour is enough, and they will become a pleasant brownish color.
Tea
The brown hue of the shell will be when it is about 3 hours in a tightly brewed black tea. If you use loose green tea, the finished shade will resemble herbal.

Juice of carrots, sea buckthorn, grapes
Carrot and sea-buckthorn juices will provide bright orange tones to the eggshell, without diluting them with water. Red grapes give the workpiece a blue color (like blueberries). Soak the eggs for 1-2 hours, usually this is enough to color them in the right shade. After drying, you can leave the products in this form or decorate with any methods you like, the matter is limited only by imagination!