Any person sooner or later faces the need for repair. Today in the construction market there are many tools and materials that will help to update the interior or exterior on their own. One way is to paint the interior of wooden surfaces - window frames, doors, floors or even walls.
- Features and disadvantages of drying oil
- The choice of paint and tools
- Surface preparation
- Staining recommendations


Many are not serious about solving this issue, so they buy the first paint they come across (that is, cheap) and get to work without first preparing the surface, which becomes the main mistake.
If we are talking about a clumsy process with a roller, the result of which is visible on each fence, then the direction is chosen correctly. But at the heart of any high-quality finishing operations is the attention to detail, which should be taken care of in advance. Otherwise, you can waste not only time, effort and money, but also completely ruin the supplies and the wooden object itself.
Therefore, it is important to consider the nuances. For example, what to do if the wooden surface has already been covered with a coloring or hardening solution: varnish, paint, impregnation or drying oil? The latter composition is more difficult than the rest, therefore, first of all, you need to understand: how and how to paint the drying oil, previously applied to the surface of a wooden material?
To answer this question, one should get a little closer acquainted with such building archaism as drying oil, and understand why its use in these days causes such heated debate, both in the professional community and in amateur circles?
to contents ↑Features and disadvantages of drying oil
Drying oil is a film-forming liquid consisting of sediments of vegetable oil (linseed, hemp, sunflower, mulberry, etc.), which is processed in a special way (overheating or oxidation). And the solvents and desiccants in the composition relate it to oil paints, varnishes, primers and putties. In other words, drying oil as a finishing mixture can be used as any lubricating or coloring material.

In Soviet times, oil based on drying oil was almost the only available means of painting surfaces. It was applied literally on everything: floor, walls, ceiling, doors, windows and even furniture. Removing dilapidated wallpaper layer by layer, old tiles in the bathroom or worn linoleum with a high degree of probability, you can stumble on proliferated surface. Previously, not a single repair was complete without it.
With the advent of new paint and varnish mixes on the shelves of construction stores, drying oil was used only for putty purposes to give the porous structure of the material integrity and protect it from moisture. Due to the viscous composition of drying oil, it has good filling capacity, which significantly reduces its consumption. Another area of its application is the painting of metal surfaces and walls and ceilings in office rooms (toilet, locker room, in the industrial kitchen), where there are hoods. In addition, it primed concrete surfaces and renewed wood in outdoor works.
For all its advantages, drying oil has a number of significant drawbacks, which are well aware of those who at least once tried to apply another paint and varnish substance to it without preliminary treatment. Among the obvious minuses should be noted:
- low adhesion (adhesion) in relation to other coloring agents, so even the most expensive paint “peels off” after a short time;
- strong smell, which neither in the process, nor after it never completely disappears and a stale, unpleasant atmosphere is created indoors;
- slow drying, from several hours to a couple of weeks, depending on the type and composition (the fastest is natural, and the longer synthetic);
- fire and explosion hazard, due to the presence of flammable solvents;
- inconvenience of use, since you need to work with it only in a warm room (over 20 degrees), preheating the mixture;
- fragility.

I must say that all of the above negative aspects are mostly characteristic of low-quality, cheap drying oil. Good coverage possesses them only partially.
It would seem that it is simply impossible to re-paint the surface soaked with drying oil. But the situation is not so deplorable as it seems at first glance. The main thing is to choose the right tools and paint.
to contents ↑The choice of paint and tools
When working with proliferated material, the choice of the right paint is of utmost importance. The one who tried to put paint on the drying oil invariably noticed: the freshly applied coating “bubbles” as it dries, and the opened bubbles have a yellow, resinous content and a characteristic smell of drying oil.
Nevertheless, there are several types of coloring substances and finishing materials that I can cope with a difficult drying oil. These include:
- Oil paint;
- alkyd paint;
- acrylate oil paint;
- pentaphthalic enamel (or in another way called PF-115);
- nitrocellulose varnish (or in another way called NTs-132);
- liquid wallpaper based on oil;
- self-adhesive paper or film.

Any of these options is perfect for painting not only wood, but also concrete and metal surfaces. You can’t try to paint drying oil with quick-drying nitro enamel or water-based paint: our cunning oil-based impregnation simply “pushes” a layer of paint. To use water-dispersion and water-based paint, the surface must be washed and cleaned well by removing the film from drying oil. In this case, 2-3 layers of water-based paint will cover the surface, but, unlike other formulations, do not impregnate it.
To the standard set of tools, several more new devices are bought:
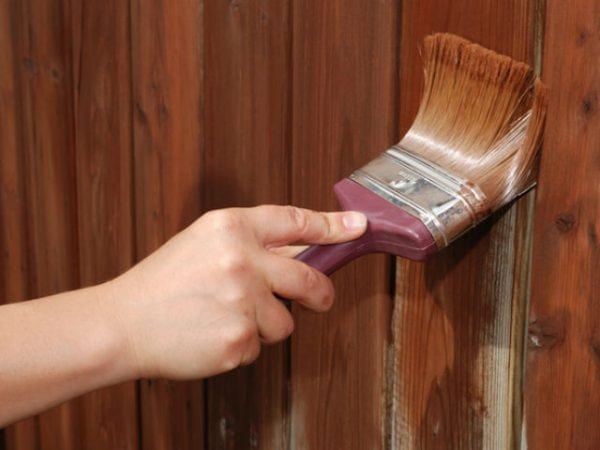
- roller or brush;
- spray gun, or spray gun;
- tray for mixing paint;
- a bucket of soapy water;
- clean rags;
- stiff bristle brush or sandpaper;
- metal spatula;
- tape machine or manual cycle;
- disinfecting composition (antiseptic, fire retardant, acetone, xylene, solvent);
- hard putty on wood or plaster on concrete;
- primer;
- gloves and a respirator.
For pasting with a self-adhesive film you need:
- stationery knife;
- powder or talcum powder;
- water with a washing solution;
- dry rag;
- pin or needle.

Everything you need at your fingertips. Nothing prevents you from getting started.
to contents ↑Surface preparation
The importance of pre-treatment of pro-proliferated surface has been mentioned more than once. Only the short-sighted amateur, who is not sorry for his wasted efforts and funds for materials, can omit the preparatory stages. A thrifty owner will prefer to do everything once, but thoroughly and well.
So, here is the sequence in which the processing work is necessary:
- To clean surfaces from mechanical pollution: traces of old paint or putty, rust, lime, grease stains, soot and dust.Depending on the type of material (wood, concrete, metal), you need to do this with a metal spatula or brush with hard bristles. Wash with soapy water. Allow to dry.
- Sand or, if possible, planing the top coat (the latter is for wood only) using coarse emery paper, a hand cycle, or even better a looping belt machine. Wash with water. Allow to dry.
- Seal all chips and cracks with plaster or putty. Sand with fine sandpaper. Wipe with a damp cloth.
- Primer. Allow to dry. Sanding. Wipe with a damp cloth. Wait for complete drying.
- Apply a disinfectant, not later than 6 hours after the previous stage. Allow to dry.
These carefully done stages will greatly facilitate the application of paint and prevent their deformation throughout the entire life cycle.
to contents ↑Staining recommendations

Now that the negative properties of drying oils are minimized to the maximum, it is time to start the procedure of painting or pasting the surface.
Painting work is carried out in several stages at a temperature of –30 to +40 degrees and relative humidity not exceeding 80%:
- To begin with, a strip layer with a brush is used to paint hard-to-reach spots, welds, end edges.
- The painting solution is applied one layer by vertical movements, from left to right or from the wall farthest to the door with a roller, brush or spray gun (at a distance of 20-30 cm). It is also allowed to dip the object into the paint mass of paint. The time for complete drying is expected.
- Metal surfaces are painted over in 2-3 layers and dried up to 3 hours, cement-sand, asbestos-cement and concrete should be painted in 3 layers, and wooden ones - 1-2.
- Rinse the dried surface with hot water (without adding soda or detergent) in order to get rid of stains. Wipe again before use.
- Get rid of the persistent smell of certain types of paints (let’s say oil), you can put 2-3 cans of salt water or grated garlic on a plate next to a stained place or indoors.
It is very important to wait until each previous coat of paint has completely dried before applying the next. The final drying time of the finished coating at a temperature of +20 degrees is at least 24 hours.
Check whether the surface has dried or not, perhaps by the traditional method - by putting a finger to the place of painting. If necessary, a longer period should be expected.
Transforming pro-proliferated surface is not an easy task. But with a skillful approach and competent selection of the necessary tools and finishing materials, you can revive the interior and give it a new, more attractive look that will please its diligent owner for a long time in just a few days.


Hello. covered parquet with linseed oil. It looks untidy and difficult to clean. I want to paint or varnish. Pts article is relevant, but it is not clear how to prime on top of the oil. The author writes a primer, but it is not clear which one. I hope for an answer.