Punctures of car or bicycle cameras are not uncommon. Despite the strength and reliability of rubber, it is still subject to damage, as a result, you have to contact the tire service. But there are ways to seal the camera with your own hands, while the cost of consumables will be minimal.
- Causes of Tire Puncture
- How to seal a car camera: procedure
- Search for damage
- Patch
- Sealing damaged area
- Bike Camera Replacement
- What glue to use
- Instruments
- Wheel dismantling
- Camera extraction
- Puncture Search
- Sticking a puncture
- Wheel assembly
- Alternative repair methods
- No glue
- Vulcanization
- Sealing the wheelchair
- How to fix a scooter wheel
- Sealing tubeless tires
- Tips for Avoiding Punctures
Causes of Tire Puncture
It is possible to damage the rubber chamber of a car or a bicycle — pierce, cut, or even tear it when hitting objects lying on the road. Usually the cause of the problem is nails or self-tapping screws, pieces of sharp, strong wire. Thanks to negligent people throwing bottles on the road, you can spoil the wheel with broken glass. It also happens that on the driver’s path there are other iron parts that have come off the vehicles.
Because of this "diversity" there is a risk of finding a damaged tire even on the track, so it is best to always have the minimum repair kit for rubber on hand. Most often, motorists driving on old, worn tires or those who purchased a low-quality product are faced with trouble.

How to seal a car camera: procedure
To repair the wheel at home, you need to get a piece of old rubber. You will need high-quality glue, for example, "Moment" or another, which is suitable for rubber products. Also to fix the problem should be prepared:
- sandpaper with medium grain;
- water tank (even a puddle will fit on the road);
- a piece of soap;
- scissors;
- solvent or other degreasing liquid;
- pump.
To repair cameras in any car store, you can purchase a ready-made kit, however, its price will be higher.
to contents ↑Search for damage
After a puncture of the wheel, a side cut, a shallow or deep crack, a puncture may form. Such defects lead to a violation of the tightness of the product. Air begins to escape through the hole, the camera deflates. It can sometimes be difficult to find a puncture site, especially in wet weather, when the tires are dirty. Most often, a defect is formed on the “contact spot” - there the wheel is in contact with the road. It is located no higher than 2/3 of the total height of the camera.

Less commonly, rim damage associated with damage to the rim tape occurs. Another possible problem is the rush of the camera from the got out iron threads of the tire cord. You can find the location of a defect by various methods. First you need to get the camera with any non-sharp object or a special tire fitting. After it must be visually inspected for holes. If there is no result, you can apply the following methods:
- Submersion in water. Put the camera in water, even a small container will do.Rotate the product in water until outgoing air bubbles become noticeable - this is where the puncture site will be. This method is even more effective when the water is soapy. Large-sized car cameras can simply be lubricated with soapy water.
- Fine dust. This is usually found on roads in dry weather. It is necessary to bring the camera to dust, with force to press on a product. When a trickle of air starts to come out of the damaged area, the dust will fly away.
- Arm. In calm weather, you can simply hold it with a wet hand at a distance of 1-2 cm from the surface of the camera. This is enough to feel the breath of air from the hole. To increase the effectiveness of the method, you can attract an assistant who will put pressure on the camera.
- Sound. If the street, in the garage is quiet, you can hear the sound of air coming out (a slight whistle) from a puncture. Pre-inflate the wheel to maximum elasticity.

After identifying a hole, it must be carefully marked with a ballpoint pen. Then you can start repair work. Similarly, it is possible to repair other rubber inflatable products, such as tubing for skating.
to contents ↑Patch
Applying a patch is a straightforward process. To properly prepare it, you need to take a piece of rubber (an unnecessary car camera or a shot from a cheesecake sled will do), cut an oval or round part with scissors. The patch size should not be large, only 15 mm overlapping the hole on each side.
Next, you need to sandpaper to clean the place on which the patch is applied, as well as the cut element itself. So the adhesion force of the parts will be better. After that, degrease both surfaces with acetone and alcohol.
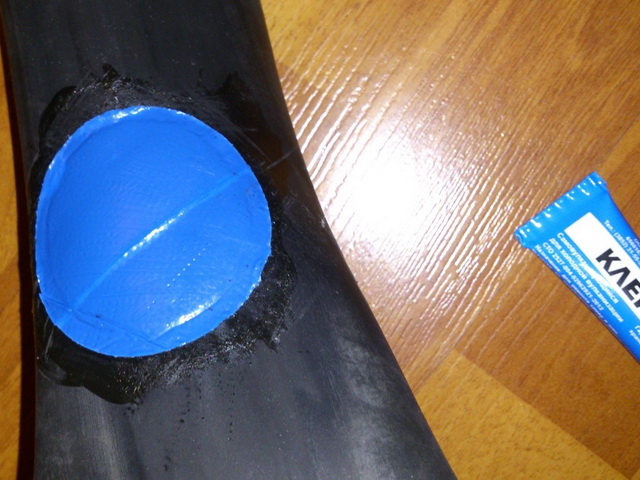
to contents ↑Sealing damaged area
Having prepared high-quality glue, you can start working with already fat-free surfaces:
- Apply glue to both substrates. Carefully smooth the adhesive layer with a small spatula, allow to dry for 3-5 minutes. If indicated in the instructions, perform another layer on top of the first. Do not make too thick adhesive seam, this can ruin the quality of the finished product.
- Press the camera and patch to each other. For a tighter fit of the part along the entire plane, the camera must first be laid out on a table, another flat surface. After gluing, the patch should be at the top.
- Take a hammer, tap from the center to the edges of the patch with spiral movements, so that the element adheres more reliably. It is enough to go through the patch 3 times.

After complete drying, you need to put the camera back in the tire, pump it up, return the wheel to its intended place.
to contents ↑Bike Camera Replacement
Hole on a bicycle wheel is also not uncommon. Repairing a camera for the first time to a novice may seem difficult, in fact, all actions are performed easily.
What glue to use
The glue must be suitable for rubber work. Typically, such funds are in the bicycle kit, but the amount may be insufficient. It is better to additionally buy a small tube of glue (30-60 ml) to always have it at hand.
The glue must be flexible, because the product is regularly subjected to stress, displaced, so too stiff seam will quickly collapse. For this reason, glues based on cyanoacrylates (superglues) are not suitable for chambers: a solid, unbendable compound is formed that will not last long. Any superglue can be used only as a temporary measure before a trip to tire fitting.
Suitable adhesives include:
- "The moment of rubber." Its price is low (about 120 rubles), the drying time is 1 hour, but you should wait a day before using the camera.
- "Glue 4508". It boasts excellent moisture resistance, a high degree of adhesion. Great for repairing rubber.
- "Glue 88 N". Designed for bonding rubber with metal, attaches a patch to the bicycle camera at least qualitatively.
- "Radical". An elastic product that is not afraid of water, resistant to low temperatures.

You can also use Red Sun glue, which is included in the repair kit for bicycle cameras, but its quality often leaves much to be desired (depending on the manufacturer). You can find it only in bike shops, supermarkets of sporting goods. Usually glue is sold complete with a patch at a price of 100-150 rubles.
to contents ↑Instruments
With the active use of the bicycle, it is better to immediately assemble a repair kit with the necessary accessories. In addition to glue, patches, it can be useful:
- plastic mountings for disassembling the wheel and its subsequent assembly (they can be replaced with an ordinary universal key, a screwdriver);
- pump;
- sandpaper with medium grain;
- a piece of chalk to mark the puncture (a ballpoint pen is suitable);
- a basin, a bank for finding the place of damage;
- vice, press for reliable gluing of a patch.

Wheel dismantling
First you need to remove the wheel from the bicycle: disconnect the rim brakes, as they may interfere with further actions. Next, turn the bike over, unscrew the fixing bolts on the sleeve or unscrew the eccentrics. After the wheel can be easily removed. If a hole is revealed on the rear wheel, you need to hold the chain while simultaneously moving the axle towards the saddle, then remove the wheel - this method is easier.
Camera extraction
Difficulties usually arise not with the removal of the wheel, but with the removal of the camera. But with a tool and minimal dexterity, it will certainly work out. The wizard will do this:
- Disassembling is best done with a plastic tool. So the risk of damage to the camera is practically absent. It is necessary to completely lower the chamber by unscrewing the spool from the nipple. In inexpensive bicycles, you usually have to hold the spool with your hand; in higher-quality ones, a special groove on the cap is provided. Some bicycles involve removing air from the chamber before removing the wheel, because the rubber is too wide and clings to the frame, the brakes.
- Find a place opposite the position of the nipple, so that it can begin to disassemble. Place the mounting between the rim and the tire down vertically, without touching the camera itself inside. After 15 cm from the installation, install the second one in the same way (instead of them, you can use any convenient devices, even large coins).
- Acting like levers, raise the tire so that part of it is outside the rim. Remove the rest of the tire with your hands.
- Pull valve out of rim groove. Remove the camera, which will be ready for repair.

Puncture Search
You can find the puncture site using water, a soap solution. To do this, lower the camera into the container, look at where the bubbles begin to come out. Unfortunately, this method is rather inconvenient, time-consuming, because after that you will have to thoroughly dry the chamber. If water gets through the nipple inside the problems will be even greater.
It’s much easier to do this: pump the camera well, bring it to your ear and hear where the air comes from. After the puncture site can be localized and marked with chalk, pen. No less often, a hole is detected by a simple inspection of the camera. It is also important to check for damage near the valve: if they are present, you will have to turn in the product to a professional repair shop.

Sticking a puncture
The surface of the chamber in the puncture area must be cleaned with sandpaper, degreased with acetone. In the field, sometimes you have to wipe the rubber with an ordinary clean cloth. Remove the protective film from the ready-made patch from the repair kit, apply glue to both surfaces. Press the patch with force, fix it for at least 10-15 minutes (the exact time of the initial setting is always indicated in the instructions for the adhesive). After leaving the chamber to dry completely.
As in the case of a car camera, a patch for a bicycle wheel can also be made from a piece of old rubber. It is only important to take a strong, unstretched, undamaged rubber that will last a long time. The procedure will be similar, you just need to more thoroughly clean, degrease the patch.

Wheel assembly
First, the glued chamber must be checked to assess the quality of the repair. It is pumped up to an elastic state, they listen if air comes out from under the patch. If everything is in order, you can assemble the wheel:
- inspect the inside of the rim - the insulating tape should remain intact;
- let the air out of the chamber;
- tuck the camera inside the tire, pump up a little;
- by means of mounting, install a tire with “contents” on the rim;
- carefully pump the wheel, tighten the fasteners;
- evaluate the correct operation of the wheel.
Alternative repair methods
It happens that there is no repair kit, it is also impossible to get a piece of rubber. In this case, you need to use other methods of sealing the camera.
No glue
If a puncture happened on the road, there is no glue, but there is a patch from the repair kit, you can act in this way. Release a little air from the wheel, apply a patch, then inflate the chamber so that the pressure presses the rubber with force. This will help you get to your home or the nearest workshop.
Instead of rubber, you can also use electrical tape, a piece of moistened cellophane. Wipe the surface as clean as possible, and then apply a “patch”. Another option for temporary repair of the camera is sticking the defect with a medical plaster. If we are talking about a car wheel, the patch is always available in the driver’s first-aid kit. The way to patch a defect with a patch is as follows:
- cut 3-4 patches of different sizes (ascending) - from 2 to 4-5 cm;
- stick the smallest patch;
- stick on patches in increasing order.

Vulcanization
Usually, the vulcanization method is used in the repair of car cameras, but on bicycle it can also be used. This method involves the availability of special equipment, but the camera after repair will serve as new. A patch is applied to the hole, after which the joint is warmed up until the rubber melts at the same time as strong pressing.
As a result, the camera with the patch tightly solder, forming a single structure. Vulcanization is much more reliable than conventional bonding, but for it you will have to purchase at least a mini vulcanizer and work with strict adherence to safety measures.
to contents ↑
Sealing the wheelchair
Often wheels on prams also have cameras that can be damaged while driving. Repair of such products is simple, it is carried out similarly to how it is done with a bicycle camera. You need to buy a bicycle repair kit, disassemble the wheel, degrease, clean the defect, then glue it with a patch. Upon completion of the time for complete polymerization of the glue, the product can be used again.
to contents ↑How to fix a scooter wheel
To quickly repair the wheels you need to get a self-tapping screw and glue for rubber. The scooter can be turned over to the steering wheel and seat, and then you do not have to remove the wheel. The damaged area should be cleaned of dirt, carefully lubricate the self-tapping screw with glue, screw it into the puncture, then allow the product to dry and pump up the wheel. This type of repair is a temporary measure, which will help to calmly deliver the scooter to the workshop.
to contents ↑Sealing tubeless tires
Tubeless tires can be repaired with a flagellum, fungal patch or sealant. The principle of action is similar to how gluing ordinary bicycle chambers is done. The difference is that it is necessary to achieve complete tightness, for which a fungus greased with glue is screwed into the hole, a flagellum or glue is poured. After 1-2 hours, the product can be used.

Tips for Avoiding Punctures
In order not to think about how best to seal the camera, you can use self-adhesive products.They have resin, which in the presence of a hole reliably seals it from the inside. The downside is that after a certain time, you still have to spend money on repairs, despite the fact that such a camera itself is an order of magnitude more expensive and weighs 2 times more.
To reduce the risk of camera punctures, you need to use these tips:
- monitor the pressure in the wheels - it should be optimal (for bicycles the indicator is 2.5-9 bar, depending on the type of equipment);
- on cold days, pump up the camera a little harder, but not higher than the maximum allowable (indicated in the instructions for the bike);
- change worn tires in time;
- Do not “storm” obstacles, do not allow hits on wheels.

Also for bicycles, you can purchase a special anti-puncture tape, which reliably protects the camera from holes. This strip of rubberized plastic or Kevlar is inserted between the camera and the tire. Over time, the tape can abrade the camera, so the use of such a device is recommended in dangerous situations, and not constantly. It is better to choose clean roads, ride in special areas for cyclists, so that you do not have to spend time on repairing a damaged camera.


