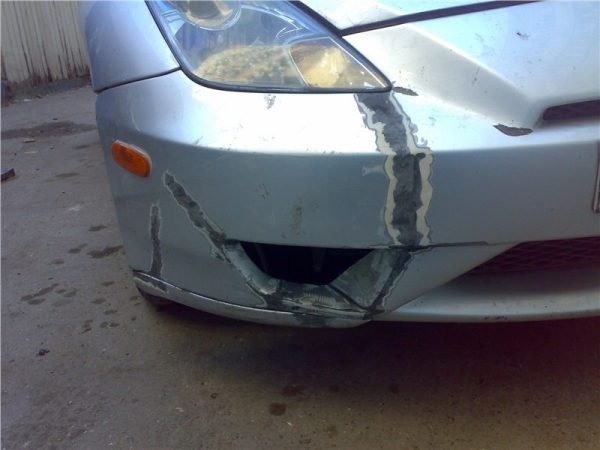
Car bumper is not only a decorative element, it performs an important practical function. This part is used to protect the body from damage in minor accidents. It is the bumper that first suffers from unsuccessful parking, hitting a high curb, with a number of accidents. If a crack occurs, you can specify how to glue the bumper, and do the repair yourself.
- What glue to choose for the bumper
- Tools and materials
- How to glue the bumper: instructions
- Preparatory work
- Bonding crack on the bumper
- Puttying and painting

What glue to choose for the bumper
In car dealerships, a large number of adhesives are sold, with which you can glue a cracked plastic bumper. You should not choose for this purpose the usual means used in everyday life. The specialized composition has a higher degree of adhesion and a host of other advantages: it does not leave spots, is not afraid of moisture and vibration.
To glue plastic on a car bumper, you can buy the following adhesives:
- Weicon Construction. Two-component structural adhesive based on methyl methacrylate, is sold complete with an activator. It is suitable for bonding metal, plastic, composites, heavy-duty, does not emit toxic fumes. The glue does not require drying in special ovens; it hardens at room temperature in just 4 minutes.
- Akfix-705. The tool is ideal for gluing small pieces, sealing defects on a plastic bumper, molding, wing, suitable for spot application. It does not require preliminary priming, provides reliable fixation and a long service life of the repaired item. For the polymerization, contact of the adhesive with moisture from the air is sufficient, because it, like superglue, is made on the basis of cyanoacrylate. The kit also has an aerosol activator, which is used with insufficient air humidity or to accelerate the polymerization of the seam.
- Good glue for all types of plastic, fiberglass. They can easily glue cracked plastic parts, eliminate small chips, dents. Due to the reliability and moisture resistance, the tool allows for other types of body repair, to eliminate radiator leaks.

Also, the adhesive for the car bumper can be made on the basis of epoxy resin. With it, even large pieces, chips are glued together, holes are sealed on the fiberglass parts of the machine. For this purpose, epoxy adhesive is used in conjunction with fiberglass.
to contents ↑After drying, a monolithic compound is formed, which does not differ in properties and strength from the bumper itself. Immediately after using the composition, it is important to paint the problem area. An example of high-quality epoxy-based adhesives is Moment, Mannol, SeaLine.
Tools and materials
To dismantle the bumper and carry out repairs at home, a number of tools are required. Some of them are quite expensive, although they can always be replaced with hand tools.Here is a sample list of what the wizard might need:
- keys, screwdrivers;
- sandpaper with different grit and whetstones;
- grinding machine with circles;
- electric drill (mini-drill);
- rubber spatula;
- clamps for fixation;
- building hair dryer;
- soldering iron;
- metal adhesive tape (rigid adhesive tape);
- sharp knife (for example, clerical).

to contents ↑As consumables, you need to purchase putty, primer and paint for the bumper, if necessary, a mesh for reinforcing the crack. You will also need a solvent for degreasing the part, high-quality glue, rags. In order to comply with safety precautions, gloves and safety glasses must be prepared.
How to glue the bumper: instructions
If the bumper is cracked, repair is best done without delay, so that the place of the defect is not clogged with dirt. First, the part must be removed, after removing the plugs, disconnecting the fasteners. Strongly broken skirts do not need to be removed immediately, they must first be fastened, then disconnected from the car. Before work, it is important to make sure once again what material the bumper is made of in order to choose a really suitable glue for it.
Novice masters are interested in whether it is possible not to remove the bumper before repair and painting? If the product is not properly dismantled, it may burst during handling. Only the removal of the part will eliminate unnecessary stress in the area of cracks and their further increase.
to contents ↑
Preparatory work
First, it is important to carefully prepare the base, which will be exposed to the application of glue. This will directly affect the service life of the performed adhesive joint. The first thing they do is wash the bumper, cleaning it from dirt, oil, and dry it well. Then do the following:
- remove the coating (varnish, paint) using a grinding machine or a bar with sandpaper;
- eliminate all rust, if any (on a plastic bumper its appearance is excluded);
- the edges of the crack are drilled with grooves in the form of a Latin V so that it does not continue to expand, as well as with the aim of more reliable adhesion of the glue;
- degrease the bumper with acetone, alcohol or another solvent;
- sand the product and primer it or coat it with a special adhesion improver;
- leave to dry completely.

Bonding crack on the bumper
Initially, primary bonding is carried out on the inside of the bumper using the selected adhesive with powerful bonding properties. Next, the composition is applied to the front of the part, acting carefully and accurately. If necessary, the areas around the crack can be covered with foil, which eliminates the contact of the adhesive with undamaged areas. From the “wrong side”, in the presence of large chips, a mixture of adhesive with soda can be applied, since these components, upon contact, turn into a durable acrylic-like plastic.
If the bumper is cracked so that it falls into two parts, separate pieces are combined with each other with an exact fit and fastened with metal tape. If necessary, after gluing, use clamps to clamp the debris. For reliability, reinforcing mesh of metal or synthetics is glued to large cracks from the inside, impregnating it with glue. Wait time until the product completely dries out according to the instructions. After the clips are removed, the glue line is ground to the surface level of the part.

Puttying and painting
The sealed bumper needs to be painted with high quality so that its appearance does not cause complaints. Sometimes, puttying is first carried out with a special tool for plastic, which will allow you to even out minimal defects. The putty layer must be very thin, otherwise it will not stick.

After the putty is dried, the surface is sanded with P1000 sandpaper and primed in 2 layers, the first drying time of at least 15 minutes. After painting the bumper with decorative auto enamel in body color.Apply paint in 3-4 layers withstanding intermediate drying cycles of 15-20 minutes. The last step is to varnish the bumper in order to give the repaired part a perfect look. Strict implementation of the entire sequence of actions will help save money on the work of professionals and learn how to fix minor problems with the car with your own hands.