The simplest and fastest way to seal the seams in the bathroom, which inevitably form between the plumbing and the wall, is gluing a special tape. This material is made of synthetic components, cost-effective and convenient in service.
- Choosing a border for sealing the gap
- Flexible self-adhesive tape border
- Plastic borders
- Ceramic borders
- Natural stone borders
- Glue for borders
- Surface preparation and preliminary work
- Sticking tape
- Installation of a plastic baseboard
- Ceramic adhesive
- Unpleasant smell from the baseboard
There are a number of other ways to seal the joints of the bath with the wall - fixing ceramic skirting boards or plastic products. How to glue the border on the bath, what are the ways? It is worth sorting out in more detail.

Choosing a border for sealing the gap
The absence of gaps near the sink, bathtub without sealing can be achieved only by perfect alignment of the walls, floor, the most accurate installation of plumbing and laying tiles. It’s not always realistic to do such high-quality work, and without great experience it is almost impossible. Even after the installation of tiles and bathtubs, the masters most often have a thin gap. The risk of water penetration, increased humidity and mold growth is greatly increased.
The choice of materials for sealing joints is not too large, there are several options for borders on sale. The most budgetary of them is self-adhesive tape, the more expensive are ceramic, natural or artificial stone products. It is necessary to choose the right border for the size. When selecting for length, they are guided by such recommendations:
- ceramic products - across the width of the tile;
- plastic skirting boards - along the length of the side;
- border tape - for the entire length of the seam.

to contents ↑The width of the elements or duct tape will depend on the size of the gap. If the latter is less than 3 mm, white silicone sealant can be used to seal the seam. Slots up to 5-6 mm are covered with a 3 cm wide border, larger ones up to 3-6 cm. If the gaps are significant, they are pre-sealed with a mounting foam or concrete solution, closed with the widest possible profile.
Flexible self-adhesive tape border
Tape border, or border tape - the original material that allows you to seal the joints between the bathroom and the wall. The tape can be mounted with your own hands, you do not need to have special skills for this. The disadvantage of such a curb can be called relative fragility (average service life - 3 years), but due to its low cost it will not be difficult to change it. In addition to protection from dirt and moisture, the border tape is used to give the finished look to the room - gluing the strip completes the repair. The skirting board is perfect for acrylic bathtubs - which one is better to choose, you can determine depending on its shape (oval, square).
The elastic skirting board for the bath is made of special plastic with various polymer additives. Liquid butyl glue coated with a tear-off film is applied to the back side. The material is sold in rolls of 3.5 meters, in shape it is angular and curly. The specified length is enough for pasting any standard bath. Some manufacturers sell kits with applicators and knives for cutting, as well as a pair of corners.Skirting boards are produced with antiseptics and fungicidal additives from fungus and bacteria in the composition.

Plastic borders
A plastic corner is a budget option to close an unsightly slit against a wall. The most high-quality borders from plastic imitate a ceramic surface. There are several types:
- internal, they can be put under the tile;
- external, mounted at the joints after completion of wall cladding;
- two-part profiles from a holder strip and a top decorative element.
The sizes of plastic borders are usually 3-5 cm in width, the length of individual elements is 1-3 meters. For a standard bath there are enough 2 elements of 1.8 m or one three-meter. Before installation, the skirting boards are cut according to the required dimensions. Additionally, you should buy plugs for the ends and sprockets for mounting in the corner. Plastic profiles can have different shades - beige, green, pink, blue. Unfortunately, over time, the material darkens with water and household chemicals, in a couple of years it will have to be changed.

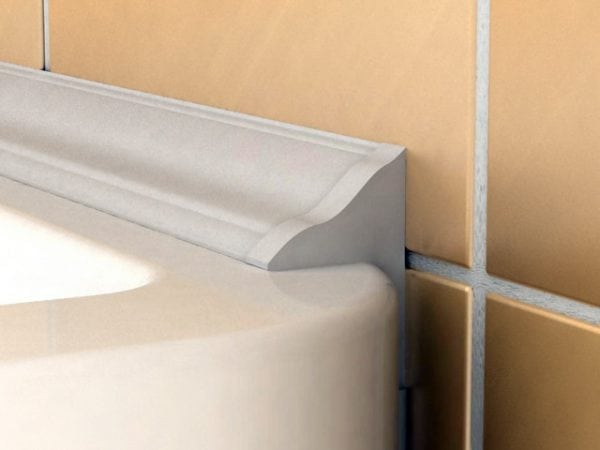
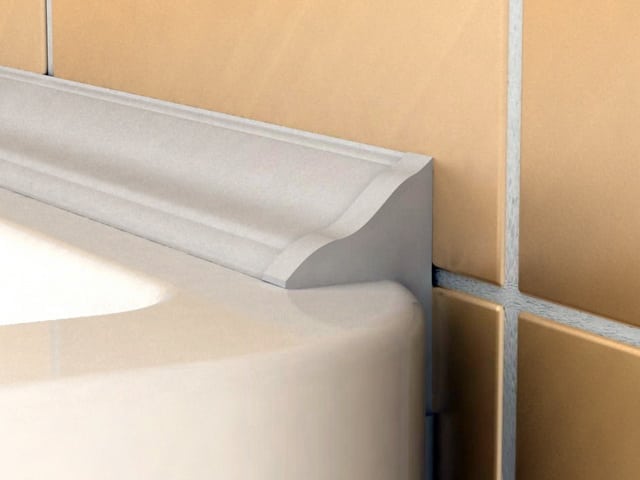
Ceramic borders
Ceramic skirting in the bathroom to the tile is better than others. It is not afraid of water, does not lose gloss for decades, has unique wear resistance. Other advantages of the material:
- ecological purity, harmlessness to humans;
- frost resistance (withstands large temperature differences);
- fire resistance - ceramics do not burn, do not emit harmful substances.
The material gives good protection against leakage, does not peel off when humidity is high in the bathroom, while the pattern on the curbs does not lose brightness. The skirting board will be perfect even if there is a large gap between the bathroom and the wall. In this case, close the gap with bricks, then cover with decorative elements. Ceramic borders do not turn yellow over time, and the soapy coating covering them is easily cleaned. The product range is very rich, many fit perfectly to the tile and are sold with it as a set. They are not only functional, but also aesthetic:
- underlined tile geometry;
- complement the thematic drawing;
- the perimeter of the bath will be highlighted.
Natural stone borders
By characteristics, such products are similar to ceramic tiles - they reliably serve and are durable. True, the design of the bathroom should be appropriate - solid, otherwise the stone borders will not look the best way. There are economy-class products (manufactured in Moscow, Ukraine) and more expensive. Marble and granite profiles have a beautiful appearance; travertine elements look luxurious. Such an interior can be designed only by a professional; independent installation of stone borders is not recommended.

Glue for borders
What is the best way to glue skirting boards if they are not self-adhesive? Usually, craftsmen advise laying them on a sealant with silicone, while periodically changing the gluing. Any sealant darkens from water (after 2-3 years), gradually lags behind the wall. You have to remove the installed baseboard, clean and disinfect the wall and edge of the bathtub, and fasten the material again. With low quality sealant, its service life can be reduced to 4-8 months, which depends on the intensity of operation of the bath and the type of ventilation in the room.
There is a solution, you need to follow these tips:
- Apply the “correct” sealant that is designed for aquariums. Thanks to antiseptic additives, a special composition, it does not darken, is not susceptible to mold.
- Choose a white or transparent product (the latter usually costs more).
- Buy only expensive brand-name sealant. If the composition contains MS-polymers, this gives high hydro-repellent properties (an example is “Crystal Moment”).
- The elasticity of the sealant should be at a high level, this will allow the tool to maintain integrity with small movements of the bath.

If there is no sealant, you can use other means. A reliable adhesive composition for borders with high moisture resistance and the addition of acrylic, silicone, polymers is suitable. Suitable "liquid nails", tile glue.
to contents ↑Surface preparation and preliminary work
The technology for laying the border around the bath may be different, but the preparation of the base is mandatory. You should clean the walls and edges of the bathtub with a good, high-quality detergent, then rinse with water and degrease. For the latter purpose, soda ash is used, if it is not - ordinary soda, alcohol. Before gluing the baseboard, you must make the surface dry. To do this, you can wipe the base with a lint-free cloth, blow dry with a hairdryer. When you have to glue the bezel again, you must carefully scrape off the remains of the old glue.
To stick a border, such tools and materials may be useful (depending on the type of profiles, some are not needed):
- glue or sealant;
- mounting gun;
- level, preferably laser;
- rubber spatula;
- sandpaper on the bar;
- pliers;
- Bulgarian;
- roulette;
- scotch tape;
- sharp knife;
- profiles of the required length.

Sticking tape
The easiest way to put a border tape at the junction. The curly one is slightly different from the angular one - it has an average longitudinal sector without an adhesive composition. It is necessary to do preliminary markup. The border is glued with paper tape at the desired height, since it is difficult to wash off a pencil or marker from the surface of the tile. At the end of the tape can be removed.
Before installation, a border is cut. An allowance of 2 cm should be made on each section of the bath. Then the profile is bent in the right place, warming with a hot hairdryer. After it becomes elastic, it will acquire the desired shape. This is also necessary so that the tape does not peel off ahead of time. Installation instructions are as follows:
- start work from the corner;
- gently separate the film from the tape in small sections - 15 cm each;
- simultaneously press the profile with the applicator, this should be done as strong as possible (then the tape will be glued stronger);
- to pay attention to the places of contact of the product and tile joints;
- put the curb in the corners with special care, the general appearance of the bath depends on this (the corner tape is left flat from above, cut from below at an angle of 45 degrees to about the middle);
- seal the joints of the tape with sealant;
- do not use the bathroom during the day, then, if there are lagging areas, glue them with “liquid nails”.

Installation of a plastic baseboard
It is necessary to install a plastic border in a different way, but the preparatory measures are similar. Next, you need to measure the length of the bathtub with a tape measure, make a mark on the curb, cut off the material. The easiest way to immediately carve out elements equal to the two sides of the bath. Corners file at an angle of 45 degrees. Then glue the paper tape 2 mm above and below the future corner so as not to stain it with glue.
The sequence of work is as follows:
- attach a piece of the border to the wall, press;
- bend the corner from above, leaving a space between the wall and the curb;
- insert the tip of the gun, squeeze the sealant or “liquid nails” into the slot;
- gently smooth the sealant with a spatula;
- do the same with the bottom of the curb;
- tighten the corner;
- After a few minutes, remove the tape.
If it is decided to put a plastic border under the tile, this is done at the stage of its installation, but it can only be replaced with the tile. Due to the fragility of the material, this technique is not recommended by specialists.

Ceramic adhesive
It’s more difficult to lay ceramic corners, but usually even beginners get the job done after a short training session. Under the tile, the material is mounted as follows:
- apply a layer of sealant between the bathroom and the wall, filling the gap evenly, align with a spatula or with a wet hand;
- knead tile adhesive according to the instructions;
- trim the borders for joints and corners at an angle of 45 degrees, using a grinder, a tiled knife (you can use the “nibble” with pliers, after grinding the surface with sandpaper);
- start work from the corner;
- put tile glue on the back of the curbs, glue to the joint, remove excess funds with a spatula;
- continue installation, leaving minimal gaps between the elements;
- the next day, pour water over the corners to seal the glue, apply sealant or grout for the joints a day later.
On a tile the border is mounted in another way.It is necessary to process the wall with “liquid nails”, press the ceramic corner to the wall, perform similar actions for other elements (do not forget to apply the level). After the glue has dried, fill the joints with sealant.
to contents ↑
Unpleasant smell from the baseboard
After installing the material, a painful smell may appear that comes from under the curb. This happens when the sticking technology is violated, when water seeps under the bathtub through microscopic cracks, which eventually rot. To avoid this, it is important to pre-seal the joints with a special tool, and then impose a border. So the ingress of water into the gap will be excluded and an unpleasant odor will not bother the owner.