The decorative roller is constantly used for finishing works using structural plaster. In addition, it can be improved or made with your own hands. Homemade roller - a budget option, which you can efficiently perform wall cladding on your own and to your taste.

Updated old do-it-yourself roller
It is not difficult to make a modernized decorative roller, especially if the house is covered with an old foam roller, the farm has a simple cord, a clothesline (50 cm long), a bag of polyethylene, scissors, a knife and tape. On a separate section of any wall, after covering it with decorative plaster, you can try these options and choose the appropriate one:
- To improve the appearance of the plaster, create a decorative pattern on it, a cord and a clothesline are wound on an old roller. The type of pattern will depend on their thickness. A distinct rhythm will appear on the wall. Its regularity can be controlled by the number of passes, the frequency of turns and direction. An unusual pattern appears from the hollows on the roller.
- An old foam rubber roll is also useful. With it, you can make a patterned pattern with bulges. First, cuts are made with a knife, after scissors cutouts of any diameter. A wide bulge will appear from the thickness of the cutout, which will build the pattern.
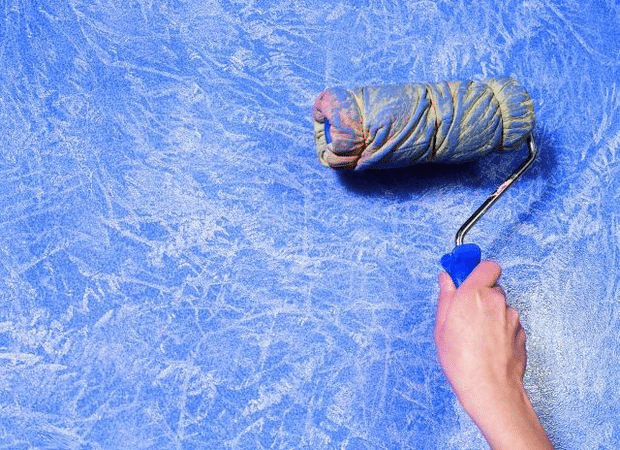
- Textured roller will be if you put on it a soft sleeve, rewound with thread.
Any of these rollers can add a beautiful shape, attractive depth to the walls at the finish layer of plaster, or completely change the interior of your house or apartment. If there is no old roller, a new one can be easily made with your own hands.
to contents ↑Improvised roller

For the future decorative roller, you must first make the basis - the cylinder. There are several options for obtaining an elongated cylindrical object, necessary for the base:
- Rolling pin for the test. Since it is wooden, it is easy to drill a hole in it along its entire length. A thick wire or a metal bar, curved in the form of a handle, is inserted into the hole. You can use the handle from the old roller.
- Plastic pipe (d = 5 cm, l = 10 cm). To close the side openings in the plastic pipe, plugs are cut out that fit onto the glue, holes for the handle are made in them.
- If there is a lathe, it is possible to carve a roller from metal, rubber, plastic, or wood on it, and then fix the handle in it.
If you have the foundation, you can begin to manufacture a decorative roller. From a randomly wound cord on a prepared layer of plaster, a unique relief pattern will be obtained.
From a plastic bag, an ordinary vegetable net wound on a foundation made by one's own hands and fixed with adhesive tape, a picture appears on the wall with winding folds, uneven wrinkles.
Cellophane can be replaced with any fabric material. Foam lying around in the house is also used. After fixing it with adhesive tape on a makeshift tool, drawings are cut out on it. The process of making such a roller is laborious, but as a result, the wall will be a real decoration of the room. If there is no foam, you can find a piece of rubber.Of course, it is more difficult to cut on rubber, but the quality of the pattern will be noticeably higher. To obtain a longitudinal structural drawing, a tool with bulges on the surface is made.

Proper plastering
The use of a roller, which can be done with your own hands, will be advisable if you follow all the rules for applying decorative plaster on the walls:
- The surface that you intend to update must be prepared - cleaned of the old finish (paint, wallpaper), degrease and coat with a primer.
- If the master is going to apply two layers of plaster, then a smooth layer with a smooth surface is first made and painted in the desired color.
- After that, a saturated structural second layer of plaster is applied to the wall. If the interior requires it and it is necessary to clearly distinguish the layers, a special adhesive tape is used. For arbitrary shapes, a self-adhesive sealant is used, which is used on windows.
- It should be borne in mind that the plaster has a quick-drying property, so that the texture should be applied quickly.
- It is undesirable to press the tool on the plastered surface, you can accidentally spoil the conceived texture. The movements should be light, sliding.
- After the decorative layer has been applied completely, (after about 20 minutes) a wet mesh is used to grind the protrusions on the finished embossed surface.
- After two days, (this is the best time for the walls and plaster to completely dry), the entire surface is completely cleaned of defects. After which it is covered with paint of the desired color.
Choosing a diverse textured coating for the roller, it is necessary to present the final result.
If a sleeve with a pile is put on the base of the roller, a structural relief “under the fur coat” can be made. It is most often used for concrete, brick exterior walls. In this case, the pile should be at least 18 cm long.
Work with a textured roller made by yourself is not only suitable for creative people. Everyone who wants to create an original interior in the house will be able to make it out of ordinary materials at hand.

