Before gluing wallpaper or finishing with other materials, all surfaces must be primed. This seriously increases the level of adhesion to the base and has a lot of other positive actions. To save on a primer, the consumption of which can be quite large, it is often prepared with your own hands. How to make a primer from PVA glue is a simple question, it is enough to follow the advice of experienced craftsmen.
- What is PVA and what is it used for?
- Why do the primer yourself
- Disadvantages of the method
- How to make a primer from PVA do it yourself
- What is required for work
- Solution preparation
- PVA primer
- What materials to use after PVA primer
- Properties and consumption of PVA putty
- How to enhance the properties of a homemade primer
- Tips for diluting and using PVA primers
- PVA oil and glue putty
What is PVA and what is it used for?
PVA glue is a mixture of polyvinyl acetate and water, presented in the form of an emulsion and containing various additives, modifiers and plasticizers. The glue is almost odorless, non-toxic, fireproof. It does not deteriorate after freezing and can be used as it unfreezes. Not too thick texture without lumps allows you to apply PVA in a thin layer, which after drying does not leave yellow spots and stains.

PVA glue is widely used in construction and repair. With it, you can glue completely different materials, because it is considered universal. PVA is suitable for bonding paper, cardboard, corrugation, wood, leather, as well as for gluing wallpapers. In industrial conditions, it is used for the manufacture of paints, primers, putties, concrete mixtures. At home, you can also make a primer for the walls, as well as a number of putties.
to contents ↑Why do the primer yourself
After drying, the adhesive forms a thin film on the surface of the processed material. A self-made primer will act in a similar way, only the film will turn thin, because the glue is diluted strongly with water. Soil based on PVA has a number of positive properties, so it is worth making it yourself:
- increased adhesion;
- giving the basis of additional protection against moisture;
- more even application of paint;
- reduction in the consumption of decorating or other material.

to contents ↑Homemade primer is very budget at a price. This will save on repairs, and also help to spend less paint and do the job better.
Disadvantages of the method
Despite the obvious pluses, there are also enough minuses on the ground. Compared with deep penetration, this composition penetrates weakly into the structure of wood, concrete, working mainly on the surface. If the base is low hygroscopic, there is no point in using PVA.
Home-made soil will not have antiseptic properties, in contrast to store-bought primers, which already contain antiseptics, fungicides in the composition. For wood this is of great importance, because mold, pests, microbes can settle in it over time. Many brands of PVA gradually turn yellow, and a light finish is not able to block these spots.Also, the finished coating will be afraid of direct and frequent contact with water, will not withstand the action of steam, it can not be used in damp rooms.

Experts note that it is better not to use PVA soil in large areas. It is recommended for use in small rooms and only at normal or low humidity. The quality of the soil will still be lower than that of expensive compounds, and in many cases, "savings" can be more expensive.
to contents ↑How to make a primer from PVA do it yourself
It is unacceptable to use PVA as a primer without dilution, since too thick a film forms on the wall surface, which quickly peels off. The glue consumption will also be high, and it is inconvenient to apply a thick composition on the surface. Therefore, dilution with water is required.
What is required for work
First you need to prepare all the necessary materials, tools:
- PVA glue. Building compounds are sold in packages of 0.5-10 liters. The consumption of the finished primer is small, a liter is enough for about 10-15 square meters of area. If you plan to apply the product in 2 layers, the consumption will increase by 2 times. For the preparation of the soil, it is advisable to choose adhesives that were made no later than 4 months ago.
- Water. A non-rigid, warm fluid that does not contain any impurities is required.
- Capacity. You can take any bucket, pan, as long as it is clean and has a convenient shape for mixing.
- Wooden stick or construction mixer. Professionals knead any construction compounds with a mixer, but in its absence the glue will completely dissolve from manual stirring.

to contents ↑To apply the primer, you need to prepare a roller or brush. It is better to have both tools in order to process even areas with a roller, and with a brush - hard to reach places. A ceiling extension or wooden stick is also required for the ceiling. To pour glue, you need a paint tray, which helps to evenly distribute the composition on the roller.
Solution preparation
It is very easy to make a primer. It is necessary to pour glue into the container, pour water from the calculation: 1 part of PVA, 2 parts of water. Stir the composition until it becomes homogeneous. Clots floating on the surface of the liquid must be removed immediately. It should be prepared as much solution as can be consumed at a time, such soil should not be stored for a long time.
Further it is recommended to make a trial application of the primer. They process a small section of the wall with it, evaluate the quality: the composition should be well absorbed, be completely white. After drying, you need to try to tear off the resulting film: if possible, you should introduce more water into the primer.
to contents ↑
PVA primer
Before starting work, the surface is carefully prepared. The walls should be smooth, not have large holes, chips, defects - the latter must be repaired with putty, and then sanded. The wood is polished, if necessary, cracks are covered with special putty on wood.
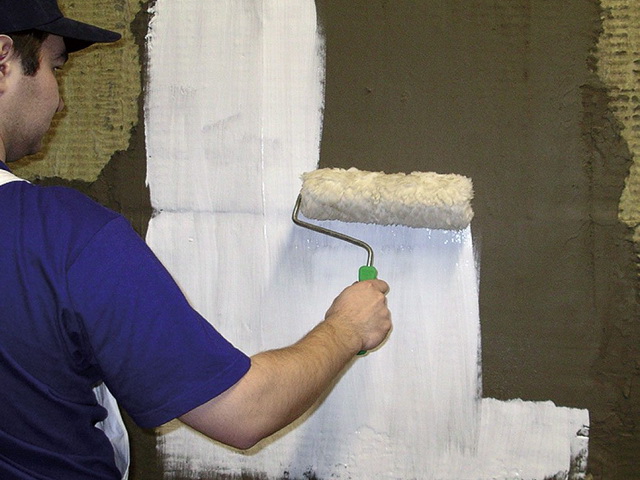
The composition is applied with rollers and brushes, choosing the right size of the tools. Be sure to walk well in corners, areas at the baseboards, behind pipes and radiators. The first layer is left to dry for 2 hours. If wood processing was carried out, the surface must be inspected for the presence of “fringe” (water raises part of the wood fibers). In case of violation of the smoothness of the base, it is ground with fine emery cloth and re-applied soil. The second layer is recommended to be applied to all surfaces regardless of the base material. Next, give the wall, other types of grounds to dry for a day.

What materials to use after PVA primer
After applying the soil made from PVA glue, you can produce different types of finishes. Thin protective film seriously reduces paint consumption, facilitates its application. This primer is ideal for acrylic and latex paints, as well as alkyd enamels.
After priming the walls, you can glue them with wallpaper: paper, vinyl, non-woven, using any wallpaper glue.To increase the strength of the connection, PVA is also often introduced into the glue. The primer composition is suitable for ceilings that are planned to be finished with polystyrene foam tiles: the degree of adhesion will increase.

Properties and consumption of PVA putty
In addition to the primer, special putty is often prepared on the basis of PVA. It has a lot of advantages:
- high level of adhesion;
- suitability for any paint and wallpaper glue;
- creating a smooth base without potholes;
- lack of an unpleasant smell, environmental friendliness;
- elasticity, ease of application;
- resistance to moderate mechanical stress;
- no risk of cracking.
Often PVA putty is used as a finish after cement materials. If the glue is of high quality, the coating will be perfectly white. To create a putty, you need to purchase PVA (1 part), chalk or gypsum (2.5 parts) and mix the components thoroughly. The mixture in density should resemble sour cream. Apply it with a spatula, like conventional puttying compounds.
The thickness of the putty layer should not exceed 0.5 cm. After hardening (in a day), the wall is treated with a polyurethane grater and sandpaper with fine grain to achieve perfect smoothness. Before staining or gluing the wallpaper, you will need to perform 1-2 layers of primer based on PVA. Putty consumption is 0.4-0.5 kg per square meter of area.

How to enhance the properties of a homemade primer
Seriously improves the strength of the connection and adds leveling properties to the primer by adding construction chalk. The resulting composition is not used for walls for painting, since small irregularities are created on the surface. But such a roughness improves the grip force of wallpaper glue, tiles, decorative stone and other finishing materials with the base.
After the introduction of chalk, the primer will be as close as possible to professional analogues in terms of properties, so the quality of repair will improve. The amount of chalk should not exceed 10% of the volume of finished soil. It is introduced in small portions and thoroughly stirred with a construction mixer.
Instead of chalk, you can use building gypsum, however, you need to work with it faster, because the mixture will set in a short time. For processing floors, it is recommended to introduce into the primer up to 10% cement, which gives powerful reinforcing properties. To prepare the walls for painting, it is recommended to pour up to 5-10% of water-based paint into the finished soil, which will make the surface uniform in color.
Soil from PVA does not have antiseptic properties, which is its serious disadvantage. To give the composition such qualities is quite possible, for which it introduces "White", "Chloramine" in the amount of 50 g per liter. It is necessary to work with such compounds more carefully, because the chlorine vapor is harmful. The room after priming will need to be well ventilated.

To improve the penetration of the composition into the deeper layers of wood, concrete, plastered walls, use the following technique. Per 1 liter of soil pour 30 g of water glass - an aqueous alkaline solution of potassium or sodium silicates. Liquid glass also has strong antiseptic properties, so there is no need to add chlorine.
to contents ↑Tips for diluting and using PVA primers
After applying the first layer, there is no need to rush to perform the second. To begin with, it is important to make sure that the coating is completely dry and does not peel, otherwise the result of the work will not please. It is better to apply PVA soil to monolithic concrete, and on cement it gives less pronounced reinforcing properties and can be cracked.
to contents ↑When cultivating the soil, do not be afraid to add more water. Some adhesives are sold in a thickened form, and after the first layer is completed, the polyvinyl acetate film begins to separate. Therefore, a 2: 1 ratio with water is not always true, and sometimes it is necessary to introduce water in a larger volume.
PVA oil and glue putty
The composition of this building material includes acrylates, drying oil, plasticizers. Putty has a high plasticity, ideal for plaster, wood, metal, after hardening it is easy to sand.The material can be applied in several layers: it is not susceptible to cracking, shrinkage. The only disadvantage is the instability of the putty in a humid environment, so it is used only in dry rooms.

To improve the technical properties of the finished putty, PVA is introduced in an amount of 10% of its total mass. It is also possible to make the composition yourself, difficulties will arise only with the search for the necessary plasticizers. When buying, you need to make sure that the expiration date is normal, otherwise the material may peel off after drying. The quality of PVA also needs to be given due attention: it is better to take specialized building compounds from a trusted manufacturer.


