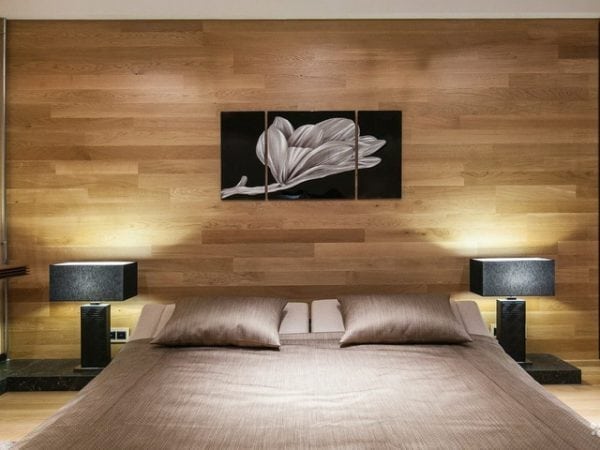
Laminate can not only be used to create flooring. Decorating the walls with this material is also possible - this will create a beautiful, even “wood look” surface. How to glue the laminate on the wall, what other installation methods are used, it is worth considering in more detail.
- Advantages and disadvantages of the laminate on the wall
- Laminate for walls - what is suitable
- Fixing laminate on glue
- Tools and materials
- Glue selection
- Wall alignment
- Styling process
- Wireframe mounting method
- When the laminate is not suitable for laying on the wall

Advantages and disadvantages of the laminate on the wall
Laminate board is a fairly strong, durable material - panels on the floor, walls have high wear resistance, do not wear. This is achieved by applying a special coating to the surface of the board. Depending on the need, you can purchase a laminated panel of the desired class, manufacturers give a guarantee of at least 20 years.

Other advantages of laying laminate on the walls are:
- concealment of wall defects - the material will hide chips, spots, bumps (when using the crate);
- lack of pollution - dust does not sit on the laminated material;
- lack of fungus, mold - due to biological inertness, fungi do not multiply on the laminate, some brands of the laminate are even treated with silver, other antiseptics;
- profitability - when buying a laminate of 21–23 class with a small thickness, the cost of repair will cost inexpensively;
- good soundproofness (a number of manufacturers even make a special membrane substrate for the panels);
- a variety of colors, textures - the range of laminate in stores is great;
- the ability to wash with various detergents.
Unfortunately, the disadvantages lie in the cheapness of the laminate board. Thin material reacts to temperature changes, it can not be glued on the balcony, next to the batteries. Such a laminate does not tolerate high humidity, even the rays of the sun will be unfavorable for its appearance, operational properties. You will have to pay more for high-quality products, which will increase the cost of repairs.
The disadvantage is the need for perfect alignment of a horizontal or vertical base. If the base is a curve, it should be aligned as much as possible. Only in this way the glued laminate will last a long time, it will lie beautifully. This will significantly increase the cost and time to create coverage. If a frame (crate) is made for laying, this will reduce the area of the room. Using panels in the bathroom or in the kitchen is undesirable - the material will deteriorate from constant moisture.

Laminate for walls - what is suitable
Since the wall will not be subjected to daily stresses, a thin laminate can be bought for its lining. The lower the strength class, the thinner and cheaper the coating. Usually on the walls acquire a laminate no higher than 21-30 classes. If you plan to finish the balcony, it is better to choose a class closer to the upper limit, the thinnest material is suitable for creating coverage in the apartment.
Depending on the system of locks, the laminated material can be:
- Glue. The panels do not have locks at all, fastening is done by gluing. Due to the small area of contact with the surface, the adhesive laminate is not used on the crate.
- Groovy. The material must be secured with a tongue and groove lock.Even if you do not glue the lock, it will hold firmly, firmly. This type of laminate is well suited for walls.
- Clicky. Locks are a more advanced tongue-and-groove system, so the panels are perfectly and quickly connected to each other. Such material is considered the most suitable for the adhesive method of fixing the laminate, it can even be glued to the crate.
- Kleimerny. It is fastened using special devices - kleimers, it is advisable to attach it to a wooden frame.

Fixing laminate on glue
There are two main ways of attaching boards to the walls vertically - glue and frame. Joining the material with glue to the wall is considered the simplest method, you can create such a coating with your own hands. It is important that the wall is flat, discrepancies and defects greater than 3 mm should be eliminated.
Tools and materials
To mount the laminate, you need to prepare in advance the necessary devices, materials. To fasten the battens to concrete, brick walls, you will need a hammer or drill with a quality drill. Also in the process, you may need a screwdriver and jigsaw. To cut the board, you can use the usual manual hacksaw for metal instead of a jigsaw. Other repair tools:
- hammer;
- pliers;
- roulette;
- marker (pencil);
- level;
- container for kneading glue;
- glue stick or construction mixer;
- trowel (rule);
- plumb line;
- spatulas - small and large;
- rag for glue.
To knock the panels you need a block, a boss is also useful - they knock the panels through it with a hammer. If you have to level the surface, you should buy a putty (dry or ready), a primer. It is also important to buy glue that will securely fasten laminated panels.

Glue selection
Which glue to choose? There are ready-made adhesives or mixtures that need to be diluted. Glue for the laminate should meet all the necessary characteristics. With temperature differences, the laminate has the ability to change the geometry, so a not too movable joint may not hold the vertical coating. It is recommended to buy non-toxic compounds that are resistant to deformation and easily removable from the surface of the board.
It is best to use adhesives such as "liquid nails", but their price is quite high. The composition of the product must necessarily contain polymers or polyurethane. The following laminate adhesives have proven themselves best:
- Tomzit;
- Kisel;
- Cleo Laminate.

From "liquid nails" you can stick a laminate on a Henkel brand product with a green bottom of the spray can. All listed adhesives have excellent water-repellent properties, good viscosity with minimal fluidity, long service life, and are environmentally friendly. Consumption of materials - 20-30 g / sq. m
to contents ↑Wall alignment
If small irregularities in the floor are perfectly compensated by the substrate, then there is no such possibility on the wall. Due to the high cost of glue, it is necessary to apply a thin layer, and it will not hide the wall defects. Remaining defects and irregularities will reduce the adhesion area and make the coating unreliable. To align the walls, you need to apply the starting putty. Good quality compositions are obtained having high adhesion to the surface.
After puttying, wait a sufficient time (1-2 days) for complete drying. Then the surface of the wall is primed 1-2 times, which will improve adhesion to the glue. It is impossible to neglect the primer - the laminate is quite heavy, without a primer it will be worse to stay on a vertical basis. After the soil has dried, you can proceed to gluing the laminate. The glue should be diluted according to the instructions if the finished composition is not used. Before laying, it is necessary to draw a wall so that the laying of the laminate is perfectly even.

Styling process
Begin bonding material from the lower left corner. Take the first panel, cut in half, grease with glue, then apply it to the wall, press. Hold the bar for a few seconds, after it is torn off so that the glue is slightly weathered. Then the board is pressed again for the final setting. Then continue the row up, leaving a gap between the board and the floor of 2 cm. To do this, lay a gasket made of scraps of laminate. After this gap is closed by the baseboard. To create a flat surface, use a level, gently tap on the top of the boards with a hammer. The last board in the row is also trimmed to the desired length.
to contents ↑The second row begins with the whole panel, so that the styling is done in a checkerboard pattern. This will make the coating more beautiful. When the weathering of the glue is not performed, after 2-3 rows take a technological break. This is necessary for the glue to grip well, otherwise the panels may “float”.
Wireframe mounting method
Wood is used to create the frame, as the metal profile is not suitable for the laminate. Self-tapping screws for the metal will gradually become loose, the lining will sooner or later deteriorate. The vertical or horizontal frame is mounted before starting work. To create a horizontal frame, the crate is typed vertically, for a vertical one, horizontally.

Features of the frame are as follows:
- the pitch of the supporting bars is calculated as ½ of the length of the board;
- it is better to buy bars 30 * 30 mm three meters long;
- at first they put the extreme bars, fixing them strictly according to the level;
- between the bars pull the threads, fasten the middle bars along the threads;
- for insulation it is possible to place a heater (for example, mineral wool) between the cells;
- after creating the frame, the panels are attached to it using kleimers (brackets), using a construction stapler, by gluing - in any way.
When the laminate is not suitable for laying on the wall
A laminated board is a rather heavy material, so it is not recommended to mount it on drywall walls. This may cause structural failure. Also, it is impossible to make laminate cladding for light partitions, too cold rooms, those where humidity is high. Cellars are not finished with material, cellars are due to dampness and cold temperatures.
In the kitchen, the material, if located next to the stove, will quickly become worthless. Laminate is also not suitable for children's rooms - if a child paints it, it will be almost impossible to wash the spots. It is also not recommended to use laminated panels for the walls of apartments where there are animals - scratched and “marked” boards will have to be replaced regularly.