Some people confuse liquid wallpaper with decorative plaster, which is associated with a similar application technique and appearance. But the difference between these two materials is significant - their composition is completely different, because in the plaster there is sand and cement, and in the wallpaper there are silk, cellulose, cotton fibers and glue as a binder. Several methods have been developed on how to glue liquid wallpaper; any of them is suitable for use at home.
- Advantages and disadvantages of liquid wallpaper
- How to glue liquid wallpaper: technology
- Necessary tools and materials
- Surface preparation
- Work with old or plastered walls
- GKL surfaces
- Mixture preparation
- Application of liquid wallpaper
- Manual way
- Application by gun
- Roller application
- Patterns and original ideas
- How to store the remnants of liquid wallpaper
- Surface restoration

Advantages and disadvantages of liquid wallpaper
Liquid wallpaper is a great decoration. The result will be unusual and very attractive in appearance. They are a dry composition, which is sold in bags and diluted with water according to the instructions. The resulting semi-liquid mixture is applied using a spatula, as a result, a decorative coating is created without seams, joints.

On the wall, liquid wallpaper does not look the same, because they are different in composition:
- silk - have a pleasant "matte" shine, reminiscent of the soft glow of silk;
- cellulose - a non-gloss coating based on cellulose;
- cotton - non-shiny, made of cotton.
The silk coating due to the presence of artificial silk fibers is considered the most durable and durable. Liquid wallpaper can be white or grayish, designed for the introduction of coloring additives with your own hands. Also, this material is already sold in colored form, and the range of shades is quite large. Wallpaper with the addition of sparkles, gold and silver threads and other decor looks more expensive.

The advantages of this type of coating are many:
- Correction of surface defects and ease of use. To make a sticking of such material, it is not necessary to close up small holes, irregularities and chips. The plastic mass penetrates inside and eliminates them like putty. Applying wallpaper is easy, even a novice will do it. A master can work alone, no assistant is required. When the mass gets on the floor, the furniture is quickly washed with water.
- Universality. Application of liquid wallpaper is possible not only on the wall, but also on the ceiling. Such a coating is ideal for a bedroom, a corridor, a living room, an office, a nursery, and fits into most interior styles. With the help of liquid wallpaper, you can even make an original drawing or a complex picture.
- Reliability and excellent performance. Wallpaper is not subject to shrinkage, cracks do not appear on them, they are pleasant, warm to the touch. This material gives excellent sound insulation, fireproof, repels dust due to antistatic qualities.
- The ability to find an inexpensive solution. Depending on the manufacturer, the cost per square meter of coverage can vary and range from 50 to 500 rubles. For example, the price of Silk Plaster “economy” category material is 270 rubles per package (54 rubles per square meter), packs of Prestige category liquid wallpaper are 1,400.
- Variation in layer thickness. If necessary, the material can be applied in a layer of 5-6 mm to hide surface defects. If the base is smooth, a layer of 2 mm is enough, which seriously reduces repair costs.
- Security. The composition of liquid wallpaper does not have a single harmful component, they are bred with ordinary water, do not pose a risk to human health, animals, do not harm the environment, can be used in hospitals and child care facilities. The material is odorless.

Work with liquid wallpaper is not dirty, not dusty. At any stage of installation, you can open the window, this will not damage the coating, unlike ordinary wallpaper paintings. If any area is uneven, you can sprinkle it with water from the spray gun, remove the soaked material and apply the same portion again. It happens that after decoration a few divorced wallpapers remain. They can be saved, because the shelf life of the material is almost unlimited.
Disadvantages of liquid wallpaper are also available. They are not suitable for wet rooms: bathroom, kitchen. However, when a room is flooded with water, the coating will remain unchanged. The main thing is not to touch it until it dries completely. Other disadvantages of liquid wallpaper:
- burnout in the sun, the risk of yellow spots due to ultraviolet radiation;
- inability to wash - only dry cleaning with a brush, vacuum cleaner is allowed;
- poor adhesion to smooth surfaces (fiberboard, wood with varnish, paint, glass), the ability to apply only on rough materials (stone, drywall, plaster, unprocessed wood surface, OSB plate);
- high installation time.

How to glue liquid wallpaper: technology
The process of working with liquid wallpaper can be divided into three stages: preparation of the base, preparation of the mass and the actual application. To correctly perform each of them, you must follow the instructions below.
Necessary tools and materials
Before starting work, you need to prepare a certain set of materials, tools that will be required for applying liquid wallpaper:
- the decorative coating itself in the required amount;
- putty (if the walls have significant irregularities);
- primer (it is advisable to buy products with deep penetration on an acrylic base);
- white water-based paint (needed if the walls are dark and the layer of wallpaper is thin);
- narrow and wide spatulas;
- roller;
- paint brush and primer;
- container for mixing wallpapers;
- spray gun (spray gun);
- special plastic grater-ironer.

to contents ↑As for the grater, it is better to prepare a transparent one: through it you will see whether the surface is well leveled. A similar tool has a narrowed canvas, which is very convenient when applying liquid wallpaper.
Surface preparation
The method of preparation of the base is selected depending on the type of old coating. It is a mistake to consider that the material will hide absolutely all defects; preparatory measures are required in any case.
Work with old or plastered walls
Usually, liquid wallpaper has to be glued to walls that have already been repeatedly finished. Therefore, step by step surface preparation will look like this:
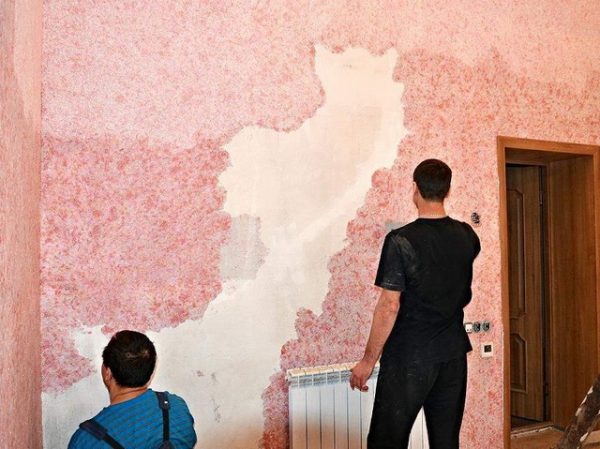
- If there is wallpaper or another coating on the wall, it must be removed completely, without a trace. The canvases are sprayed with water and cleaned, the whitewash is scrubbed off with a spatula, the paint is removed in a similar way, which is especially important, because the liquid mass falls poorly on smooth substrates and literally slides off them.
- Inspect the wall for plaster quality. When there are cracks, defects, places of shedding, it is impossible to apply a layer of wallpaper. You need to go through unreliable areas with a hammer and a chisel so that they crack, and remove them. With unsatisfactory quality of the walls or serious level differences, it is necessary to complete the finish. In the presence of small defects, they can be left intact.
- Wait a day after puttying, then finally level the wall by grinding with a block of sandpaper or a granular mesh.Small scratches, roughness do not touch, it is only important to bring out the main plane. After they clean the walls of dust with a vacuum cleaner.
- Apply a deep penetration primer. They impregnate the wall with an even layer, excluding leaks, while most carefully treat corners and other difficult areas. After drying, perform a second coat of primer. A too porous substrate may require a third layer.
- Dark walls are painted with white paint. Otherwise, the rough finish will be visible from under the liquid wallpaper, and their aesthetics can greatly suffer.

GKL surfaces
Drywall is often used to level walls, and its surface can be completely finished with liquid "canvases". The joints are considered the most difficult areas here, because the wallpaper layer can become cracks in the area of the drywall seam. To avoid this, you need to process all the seams with reinforced tape, and stick out the sticking out caps of nails and self-tapping screws with putty.
When working with drywall, one more trouble is possible. From above it is covered with ordinary cardboard, and paper strongly absorbs water. As a result, in some places on the wallpaper surface, compression or swelling may appear. If tenants in the future decide to change the finish, it will be removed along with the upper layer of GKL, which will damage the entire stove. Therefore, the base must be covered with a thin layer of putty and then primed once. The same actions are recommended for OSB-plate, other wooden coatings.

Mixture preparation
Since most types of liquid wallpaper require infusion for a long time, the preparation of the mixture must begin in advance. The process will depend on the composition of the wallpaper and their configuration. Many brands produce sets consisting of dry glue, warp (silk, cotton, cellulose) and decorative additives. Other firms produce fully mixed formulations in which only water should be added. In the first case, you must first connect the contents of the three packages to each other, mix well in a large container.
The order of preparation of the "paste" for the installation of wallpaper is as follows:
- Pour the dry mixture into any container. It is good to fluff up the powder so that there are no lumps. Additional additives that go outside the kit should not be added to the dry mass, but to water. Otherwise, there is a risk of their uneven distribution.
- Measure the amount of water indicated on the packaging of the wallpaper. Pour liquid at room temperature into a second container, then pour the mixture into it (only one bag). It is strictly forbidden to mix 2 packages of wallpaper or take half the package: the result may turn out to be of poor quality due to the violation of proportions.
- Stir the mass well with your hands, wearing gloves in advance (you can without them, since liquid wallpapers do not include hazardous substances). Drill or mixer should not be used, as long fibers will begin to break.
- Leave the mass under the lid for 6-12 hours or for the period indicated by the manufacturer. During this period, the fibers will soften, and the glue will bind them together. Before applying, make sure again that there are no lumps in the wallpaper by mixing them well.

If you want to do several servings of material at the same time, each of them is prepared separately, and only after infusion is mixed into a single mass. The remains of the mixture from one wall can be introduced into the general solution. Usually a standard pack is enough for 5-6 square meters of the wall, although often the expense is higher due to small surface irregularities.
to contents ↑Application of liquid wallpaper
The application technology is simple, it practically does not differ from puttying with building mixtures.
Manual way
Novice masters most often use just this method of installing a liquid coating. For this purpose, 1 or 2 spatulas will be required. A portion of the solution is collected by hand or with the first spatula, placed on the second tool and applied to the wall. After grinding the mass with a layer of 2-4 mm. Continue to work in small sections, connecting them together. If the solution is thick and poorly applied, you can add a little water to it.
As one square meter is filled, the walls take a grater, moisten it with water and level the entire area again. This is required to exclude the appearance of lumps, pits, and furrows. Then continue working further until the entire wall or room is closed. In the corners, align the wallpaper in the direction from the corner.
to contents ↑
Application by gun
Typically, this method is used to treat significant areas of walls or ceilings. Unfortunately, not all types of liquid wallpaper are suitable for this type of application, some in any case have to be applied manually. On the possibility of mechanized wall covering, you need to find the mark on the package. If a special Hopper gun is used, it is necessary to set the working pressure equal to 3-4 atmospheres. Do not use pistols whose productivity is less than 210-250 l / m.
The consistency of the mixture for this application method should resemble thick sour cream, so it can be slightly diluted with water. During operation, you must not:
- stay in one place;
- dock wet and dry coatings;
- skip sections;
- move jerkily.

to contents ↑Before starting the installation of wallpaper, it is important to install a bright spotlight, the beam of which will be aimed directly at the wall. This will help to eliminate the appearance of irregularities, sections of greater or lesser thickness, unfilled zones.
Roller application
Covering the walls with liquid wallpaper using a spatula usually takes a very long time. To speed up the process, you can try to work with a roller. It should have hard, short hairs gathered in groups. The width of the tool is about 15 cm. In an extreme case, a fur roller with a short pile or hard foam rubber is suitable.
Wallpaper is bred to the consistency of sour cream of medium density. After applying a little mass to the wall with your hand or a spatula, distribute it with a roller, gently ironing each area. You can’t pour too much water, the composition will slide off the wall. If the base is even, work is fast and the layer is the same over the entire area. The finished wall will be a little rough. If this effect does not suit you, you can slightly sprinkle the coating from the spray gun, and then carefully go through it with a trowel to smooth it.

Patterns and original ideas
Some prefer not just applying liquid wallpaper, but applying a creative approach. There are a number of interesting design techniques that can be used to decorate walls with such material:
- emphasis on individual zones in the room: ledges, niches, one wall, columns, arches, panels;
- creating a “panel” and framing it in a frame of moldings;
- laying out a color picture on a specific part of the wall or on its entire surface.
The most unusual method of decorating a wall with liquid wallpaper is to draw small objects or whole pictures. The execution of the figure is possible in the following techniques:
- Acrylic paints, felt-tip pens on a dry white surface. The method requires artistic skills, is quite laborious, does not make it possible to draw clear lines, the picture will be blurred.
- Filling stencils. You can apply ready-made patterns to the wall, performing a repeating ornament, or make one large drawing. For uniform staining of the entire thickness of the material will have to be patient.
- Smearing wallpaper of different colors on fragments of the wall. First, the drawing is done with a pencil directly on the base, then with the help of a small spatula the contours are filled with liquid wallpaper.
- Application of wallpaper with a special roller. On sale there are figured rollers with an already embossed pattern, with which you can quickly make a unique ornament on the wall. As a result, you get a monophonic coating with a repeating textured pattern.

Most often, pictures with plant themes are used: branches with leaves, large flowers, landscapes. Also popular is drawing butterflies, Egyptian patterns, geometric shapes, curls, waves, children's images. Light stylized paintings will not overload the interior, while becoming an interesting accent of the room. Beginners are not recommended to plan the execution of complex drawings, it is better to try small ones with 1-2 colors, no more.
to contents ↑How to store the remnants of liquid wallpaper
Usually, after finishing work, a part of the finished raw material remains. You can store it for several years, so it’s definitely not worth throwing it out: the mass is useful for possible adjustment, replacing the contaminated area. Raw materials must be completely dried, leaving the container open. Transfer the dry powder into a bag, close it tightly, put in storage in a dry place until the right time.
Surface restoration
It happens that during operation on the wall covering spots of grease and dirt appear. Since you can’t wash the wallpaper, you will have to perform a surface adjustment:
- take the rest of the dry mixture;
- dilute with warm water to a pasty consistency;
- let it soften for 12 hours under the lid;
- moisten the problem area with water (brush, spray);
- to separate a piece of wallpaper from the wall with a spatula;
- to process a "hole" with a primer;
- moisten the edges;
- carefully apply the mass by making a “patch” and adjusting the material to the joints;
- align the area well with the level of the main coating.

To facilitate the care of liquid wallpaper, you can apply varnishing with furniture varnish by applying it directly to the wall in 2-3 layers. After good drying, such a finish can be washed, wiped with a damp cloth - this will not harm her. Varnish reduces the vapor permeability of the walls, but gives the room an original, beautiful appearance and significantly extends the life of liquid wallpaper.