An airbrush is a small hand-held spray gun that sprays paint on almost any surface. Due to its small size, spraying occurs in a thin strip, so it is convenient for them to make drawings with small details. It is usually freely sold and is not very expensive, but you can not spend money, but make an airbrush with your own hands.
- Components and principle of operation
- How to assemble the device without a spray
- Spray gun manufacture
- Additional detail

Components and principle of operation
This device works on the principle of pneumatic spraying: the air flow passes through a narrow hole under high pressure, forms a stream and spray paint. It consists of the following parts:
- containers for paint;
- receiver - a tank designed for the accumulation of air necessary for spraying;
- compressor - an element that enhances the pressure of the air entering the receiver;
- control valve and lever, responsible for the movement of paint and air;
- nozzles - paint spray volume regulator;
- needles - regulator of its supply;
- air valve, which is responsible for the movement of air into the nozzle;
- pens.

An optional but important addition is the stand.
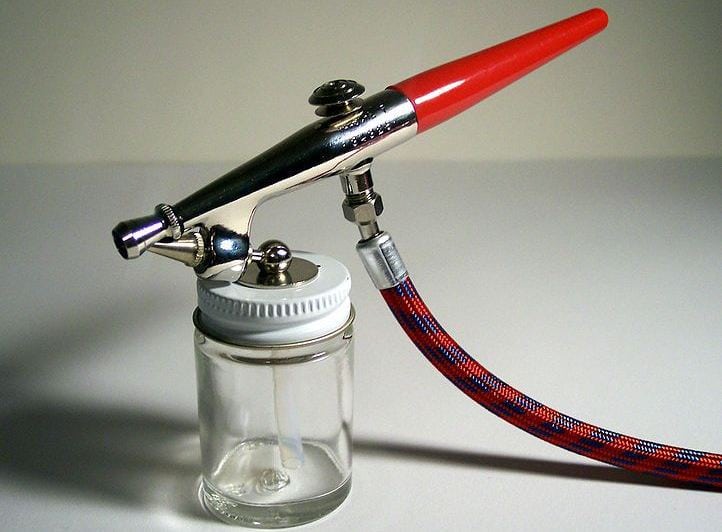
The handheld airbrush is similar in appearance to a fountain pen attached to a can. The mechanism is simple, it is quite possible to make it at home.
A homemade airbrush can be with and without a spray gun (in this case, you need to blow into the nozzle for spraying).
Thinking about the question of how to make an airbrush with your own hands, it is important to remember that the option without a sprayer is easier to manufacture, but it is easier to work with a sprayer.
to contents ↑
How to assemble the device without a spray
It will be required:
- a disposable syringe from which you need to remove the needle and piston and attach its top to the bottle;
- gel pen shaft;
- bottle (with a capacity of 0.5 l);
- thread as strong as possible;
- clip;
- Scotch.
It is necessary to make according to the following scheme:
- straighten the paper clip, and then bend it at an angle of 90 °;
- tie one side of the paper clip with the needle;
- tape the second side to the body near the needle hole;
- install it with the tip in the center of the nozzle (prerequisite).
To use such an airbrush, you need paint, lower the needle into the container with it and blow it (preferably with great force).
There is another version of such an apparatus (with and without a stand). To make it, you need to additionally take a piece of the ballpoint pen rod cut off with a cone and glue. The steps for making this model are:
- cut off the end of the needle, and dip the rest into glue and stick into the shaft, only with the condition that the tip must stick out;
- make holes in the lid so that air enters there.

A homemade airbrush can be made with one pen, a cork from a wine bottle, a small can or bottle and glue:
- clean the ink core;
- make two cuts in the cork in opposite directions;
- drill a hole for the rod, which will be located there in the center, and another perpendicular;
- make a nozzle: insert the rod into one hole, the body into the second, make a hole in the lid of the jar along the diameter of the rod and push the part into it;
- fix with glue or sealant.
In order for it to be automatic, it is recommended to attach tubes from the dropper to the compressor. For more convenient work, you can get a stand.
to contents ↑Spray gun manufacture
Many fans of homemade devices are wondering how to make an airbrush with a spray gun, as it is more convenient. This is somewhat more complicated, but also quite possible. For him you will need:
- 3 ballpoint pens and 2 gel pens;
- pencil;
- deodorant spray can;
- wire;
- nipple;
- 2 bolts with a diameter of 3 mm;
- as many needles;
- glue.

Making this type of airbrush involves several steps.
Pick up the cartridge and needle retainer:
- Remove the piston from the shaft of the automatic handle and lower the spring.
- Drill a hole in the handle shaft (gel) and insert a small bolt at an angle of 90 °.
- Make 2 holes in the ballpoint pen.
- Bend the wire all the way to the trigger and insert it into the housing.
- Heat a needle of the same diameter and insert it there.
- Fasten the structure with four pieces of wire (6 cm each) bent at 90 °.
- Insert the body with the needle into the spray gun (the length of the rod used for this should be such that it abuts against the bent wire and the spring is compressed).
- Glue parts.
The next stage is the manufacture of an air valve: using an empty syringe (from which the piston has been removed), needles, springs from a handle, a piece of tube from a cylinder from under an air freshener, nipple. Glue everything.
For the sprayer, the same parts are taken, but instead of the spring, tube and nipple, the front part of the rod (with the tip) and the hose through which air will be supplied are used. All of this should also be firmly combined.
Another option is to do it using a vinyl tube and compressor:
- Cut the tube and put it on the syringe close to its base, leave room for pressing the cylinder valve.
- Draw up paint and attach the cut off tube to the cylinder, which will be used as a spray gun.
To avoid getting dirty, wear gloves.
to contents ↑For the successful design of the apparatus, you need to focus on the drawing.
Additional detail
A useful addition to an airbrush is always a stand. It can also be done at home.
As a stand, it is good to use a regular stationery clip. There is always the opportunity to modify it or make a new one yourself.

There are various options for refinement. For example, attach aluminum wire, springs and plugs from medical bottles to the clamp. The wire must be thick and strong, since the axis of the device is made from it, which is fixed with a nut, a special rocker arm for airbrush is attached to it from above, in the places of contact with it, tubes from the dropper are attached. This is a fairly durable device that reliably holds even a large device.
One of the most affordable options for making a stand from scratch:
- take the brackets from the old meat grinder;
- drill holes in them (2);
- bend knitting needles or from bicycle wheels (it is important that there is thread at the ends);
- tighten the nuts to the end of each thread and solder;
- insert the knitting needles into the drilled holes and screw them with nuts, screw the stand to the table.

It is possible to use lining as the main material:
- saw off a piece (length about 17 cm);
- saw along;
- make holes for bolts and nuts;
- pull the wire, clamp with pieces of rail;
- so that it does not scratch the airbrush, prime and pull the hose from the dropper.
Independently made or purchased stand must meet certain requirements:
- firmly attached to the table;
- It is easy and fast to install, do not take time from the staining process itself;
- be low so that you can add paint at any time;
- an airbrush should be easy to install and remove, so that these actions eventually become automatic.
Homemade airbrush in practice is no worse than bought in a store. In addition, there is almost no need to spend money on materials, and almost complete cost savings are obtained.


