Starting to paint the ceiling, it must be properly primed. This will maximize the adhesion quality of the materials used, which, in turn, will significantly increase the strength and reliability of the coating. In any case, the primer of the ceiling before painting is an indispensable procedure, which must be performed in strict sequence.
- Surface preparation
- Featured Materials
- Additional tools
- Why do I need to be primed
- Main stages
- Drying time

Surface preparation
Before you begin the process of priming the ceiling, it must be prepared properly. For this purpose, a number of works should be performed:
- at the initial stage, completely remove all layers of the previous coating;
- then carefully clean the base of the ceiling;
- then proceed to repair existing defects in the base, whether it be bulging cavities, cracks or bulges;
- perform a preliminary primer;
- after that, apply the initial layer of test plaster;
- then apply a layer of high-quality finishing putty on the ceiling surface;
- The next important step before the final primer is a thorough treatment of the ceiling with a special sandpaper and troweling.
to contents ↑Keep in mind that before proceeding with the final priming of the ceiling and walls before painting, it is imperative to get rid of all the remains of construction waste. This is necessary to avoid excessive dust, which can spoil the result obtained after your work.
Featured Materials
Consider how to prime the ceiling in accordance with all the rules, and what materials can be used for these purposes.
Currently, a wide selection of primers for walls and ceilings is presented in construction shopping centers and supermarkets - they are available in the form of ready-made primers or concentrates, which must be properly diluted with water in the proportions specified in the instructions. If it is necessary to ground impressive areas of ceilings and walls, it is advisable to purchase special concentrates in large volumes - so you will experience real savings.

Everyone who plans to prime the ceiling before coating with a water-based emulsion or other types of paint is interested in how many hours the primer dries, and also in what proportions to properly dilute it. The total drying time of the primer depends on the type of surface coating. The type of surface coating also affects the calculation of proportions when diluting a primer mixture, but in most cases it is recommended to adhere to a ratio of 1: 5 or 1: 2.
to contents ↑Additional tools
It is important not only to purchase a high-quality primer for the ceiling and walls, but also to correctly select all the necessary tools and auxiliary materials.
For priming under a special tile or under a coating with water-based paint, you need to use a convenient roller or brush.It is important that these products are of high quality, because this affects the durability of the coating and the reliability of the work performed. In most cases, it is preferable to use a roller for the primer, since it allows you to cope with this work much better, easier and faster.
Brushes that have excessively stiff bristles should not be used for priming the ceiling and walls, as they can leave unattractive stripes and marks on surfaces.
But if wallpapering is planned in the future, a hard brush is exactly what you need. It will allow you to create characteristic roughness on the surface, thanks to which the quality of adhesion of the putty with the adhesive composition and with the wallpaper itself will significantly improve.
to contents ↑Why do I need to be primed
Getting started painting special ceiling tiles, the ceiling must be primed without fail. There are several important reasons for this procedure.
- The primer of the ceiling and walls can significantly reduce paint consumption, and also prevents the appearance of unsightly stains.

The consequences of not primed ceiling - The primer provides the best adhesion to the ceiling surface with its finish.
- The ceiling finish - with paint or tile - due to the use of the primer, it will be much more durable, reliable and durable.
- Preliminary priming of the ceiling and walls ensures that the paintwork used becomes less susceptible to the negative destructive effect of moisture.

Based on all of the above, we can safely say that priming the ceiling with your own hands under the tile, painting or wallpaper Necessarily necessary - this is by no means a luxury, but an important necessity.
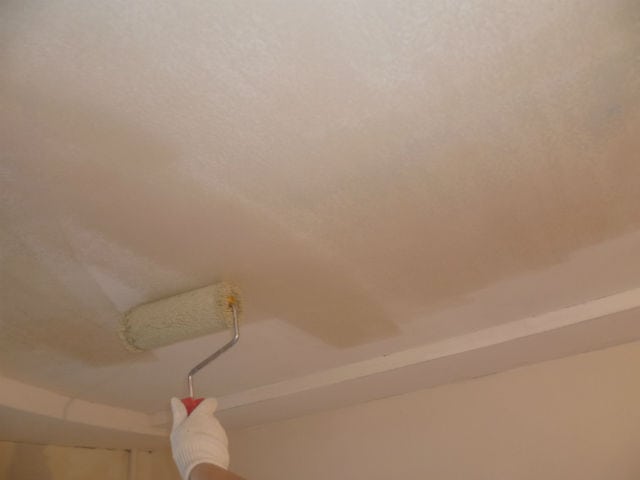
to contents ↑Main stages
The priming process is practically no difficulty, since it has much in common with the process of painting walls or ceilings. However, other materials are used in this case.
- diluted in the right proportions, the primer mixture is placed in a convenient bath;
- a special roller or brush (depending on your preference) must be carefully dipped in the bath;
- excess primer must be carefully brushed off;
- after that, smoothly roll the roller to roll the primer evenly over the entire surface of the ceiling in one layer.

When covering walls and ceilings for future paint or tile coating, several important points should be considered. This solution must be distributed evenly over the ceiling surface, without losing sight of any area.
If the ceiling structure is multi-level and contains various cornices and ledges, you need to pay special attention to them. Also keep in mind that only after the primer layer is thoroughly dried, it will be possible to further process the walls and ceiling - applying a water-based paint or tile.
to contents ↑Drying time
In order to do everything correctly, it is important to know how much the primer putty layer dries. As a rule, this depends on the type of surface, as well as on the consistency and composition of the solution used.
A deep penetration primer for a ceiling can dry on average between six and twelve hours. In order to accelerate drying, special heat guns are sometimes used.
People who plan to repair the ceiling and walls with their own hands are interested in how many hours the primer mix dries on various surfaces. A high-quality primer, applied with a roller to ordinary cement-sand plaster or putty, dries on average about two to three hours. However, for this it is necessary that the air temperature is from 25 to 30 degrees Celsius.
Knowing how much time the primer for the ceiling needs to dry, you can correctly plan all subsequent work. If, after applying the primer mixture with a roller, it is planned to treat the surface with starting putty, there is no need to wait for complete drying.
Also, many are wondering how long the primer mix applied on the surfaces coated with putty or plaster based on cement and lime dries. In this case, the process of complete drying can last from four to six hours, depending on the number of layers. After the surface is completely dry, you can start laying tiles or staining.
Now, having a full idea of how much the primer for the ceiling dies, applied by a roller on various types of surfaces, you can correctly do the repair yourself. Do not hesitate - the result will be attractive and durable!

